90 - 97
Instruction Manual
AC 02/2019-rev.1.1
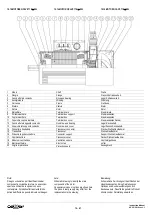
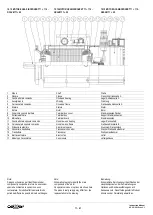
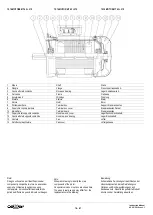
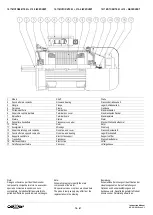
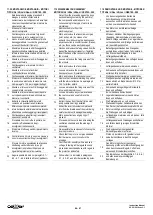
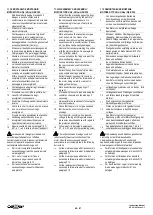
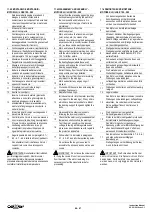
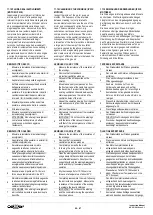
11.8 SMONTAGGIO E MONTAGGIO motori
QCA 71
112 - QCAVM 71
90
11.8 DISASSEMBLY AND ASSEMBLY motors
QCA 71
112 - QCAVM 71
90
11.8 DEMONTAGE UND MONTAGE Motore
QCA 71
112 - QCAVM 71
90
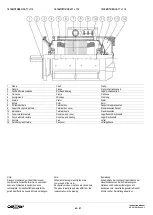
1
Selezionare dalle pagine precedenti il
disegno in sezione contenente la
nomenclatura dei componenti ed accertarsi
che sia corrispondente al tipo di motore da
manutenzionare.
1
Select from the preceding pages the cross
section drawing containing the part list of
the components and make sure it is
corresponding to the type of motor to be
maintained.
1
Von den vorangehenden Seiten die
Schnittzeichnung mit der Stückliste
aussuchen und sicherstellen, dass es sich
um den zu wartenden Motor handelt.
2
Rimuovere il motore dalla
macchina/impianto.
2
Remove the motor from the
machine/system.
2
Den Motor von der Maschine/Anlage
demontieren.
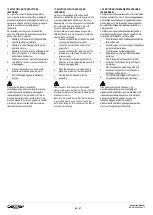
3
Contrassegnare e rimuovere l'organo di
trasmissione (giunto, puleggia etc.) per
mezzo di un estrattore evitando colpi che
danneggerebbero i cuscinetti e gli eventuali
accessori (trasduttori, freni etc.).
3
Mark and remove the transmission organ
(joint, pulley, etc.) by means of an
extractor. Avoid knocking the bearings and
any accessories (encoder, resolver, brakes,
etc.) as these can be easily damaged.
3
Mit einem Abzieher Übertragungsorgane
(Kupplung, Riemenscheibe etc.) abziehen.
Dabei Schläge vermeiden, die Lager oder ev.
vorhandenes Zubehör (Drehgeber, Bremsen
etc.) beschädigen könnten.
4
Allentare e rimuovere le viti di fissaggio
della calotta copriventola (modulo
ventilatore)*.
4
Loose and remove the fixing screws of the
fan guard (electric-fan module)*.
4
Befestigungsschrauben des Lüftergehäuses
(Elektrolüfter) lösen und entfernen.
5
Contrassegnare e rimuovere la calotta
copriventola (modulo ventilatore)*.
5
Mark and remove the fan guard (electric-
fan module)*.
5
Lüftergehäuses (Elektrolüfter) markieren und
entfernen.
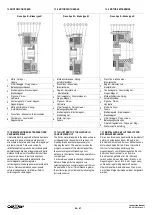
6
Allentare e rimuovere le viti del copri
trasduttore se installato.
6
Loose and remove the screws of the
transducer cover, if installed.
6
Befestigungsschrauben des Drehgeber-
deckels lösen und entfernen, falls installiert.
7
Contrassegnare e rimuovere il copritrasduttore.
7
Mark and remove the transducer cover.
7
Drehgeberdeckel markieren und abziehen.
8
Rimuovere il trasduttore contrassegnando
la posizione e prestando la massima cura.
Vedi paragrafo 12.0 per maggiori dettagli.
8
Remove the transducer marking its position
with the utmost attention. See paragraph
12.0 for further details.
8
Drehgeberposition sorgfältig markieren und
diesen abziehen. Siehe Abschnitt 12.0 für
weitere Details.
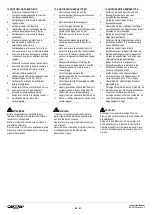
9
Estrarre la chiavetta dall’albero lato
comando ed eventuali anelli di tenuta.
9
Extract the key from the shaft (drive side)
and possible seal rings installed.
9
Die Passfeder und ev. vorhandene
Wellendichtringe der Antriebseite abziehen.
10
Allentare e rimuovere i tiranti di fissaggio
carcasse.
10
Loosen and remove the tie rods holding the
frame.
10
Die Zugstangen des Gehäuses lösen uns
entfernen.
11
Contrassegnare le carcasse e posizionare
un’estrattore sulla semi
-carcassa anteriore
(lato comando). In questa fase è necessario
che i bracci dell’estrattore siano fissati alla
semi-carcassa mentre il perno centrale
deve fare pressione sull’albero
del motore
in modo da spingere sul rotore e di
conseguenza aprire il motore.
11
Mark the frame and position an extractor on
the front-ent shield (drive-end side). During
this phase the arms of the extractor must
be fixed to the end-shield while the central
pin must press on the shaft so as to push
on the rotor and consequently open the
motor.
11
Das Gehäuse markieren und einen
Abzieher am Lagerschild A-Seite
positionieren. In dieser Phase müssen die
Arme des Abziehers am Gehäuse
befestigt sein, während der Dorn Druck
auf die Welle ausübt, um den Rotor
auszurdrücken und so den Motor zu
öffnen.
12
Scaldare la semi-carcassa anteriore
utilizzando una fiamma ossidrica sino al
raggiungimento della temperatura di 100-
120°C. Durante questa fase è necessario
prestare la massima attenzione ed adottare
tutte le misure di sicurezza necessaria.
12
Heat the front of the main motor body to a
temperature of 100-120°C using an
oxyhydrogen flame. Take great care and
adopt all the necessary safety measures
during this phase.
12
Die Vorderseite des Gehäuses mit einer
Brennerflamme auf eine Temperatur von
100-120°C erhitzen. Alle notwendigen
Sicherheitsmassnhamen in dabei
beachten.
13
Aprire immediatamente il motore agendo
sull’estrattore.
13
Open the motor immediately by using the
extractor.
13
Mit Hilfe des Abziehers das Gehäuse sofort
öffnen.
14
Contrassegnare e sfilare il rotore dalla
semi-carcassa con cura evitando di toccare
e danneggiare gli avvolgimenti.
14
Mark and remouve the rotor of the end-
shield while taking care not to touch or
damage the windings.
14
Den Rotor markieren und vom Lagerschild
entfernen, ohne die Windungen zu
beschädigen.
15
Contrassegnare ed estrarre gli eventuali
spessori di rasamento.
15
Mark and extract any airgap rings if
present.
15
Luftspaltringe markieren und abziehen, falls
vorhanden.
16
Procedere con i controlli e la pulitura dei
canali di raffreddamento e degli
avvolgimenti se necessario.
16
Proceed with the checks and cleaning the
ventilation channels and the windings, if
necessary.
16
Lüftungskanäle und Windungen kontrollieren
und falls notwendig reinigen (QLa/HQLa
Motore).
17
Rimontare il tutto seguendo il procedimento
inverso e scaldando la semi-carcassa
anteriore alla temperatura di 100-120°C.
17
Re-assemble the components following the
inverse procedure and heating the front
motor body to a temperature of 100-120°C.
17
Die Komponenten in umgekehrter Reihenfolge
wieder montieren, die Vorderseite des Gehäuses
auf eine Temperatur von 100-120°C erhitzen.
18
Controllare che il motore non sia a massa e
non vi siano cortocircuiti negli avvolgimenti.
18
Check that the motor is not grounded and that
there are no short-circuits in the windings.
18
Prüfen ob der Motor nicht geerdet ist und keine
Kurzschlüsse in den Windungen vorliegen.
19
Provare il motore possibilmente a tensione
ridotta seguendo tutte le norme e gli
accorgimenti sopra descritti per quanto
riguarda le protezioni e la sicurezza.
19
Test the motor, possibly with a reduced
voltage, following all the regulations and
procedures described above with regard to
the protection and safety.
19
Den Motor möglichst mit geringerer
Spannung prüfen, unter Berücksichtigung der
oben beschriebenen Regeln, Verfahrens-
weisen und Sicherheitsvorschriften.
20
Seguire quanto indicato nei paragrafi 5.7
–
6.0
–
6.1
–
ed in tutte le altre noti pertinenti.
20
Follow what it is indicated in paragraphs
5.7 - 6.0 -6.1 and all other pertaining notes.
20
Den Indikationen der Abschnitte 5.7 - 6.0 -6.1
und allen anderen einschlägigen Bemerkungen.
*
Valido per motori servoventilati
*
Valid for servo-ventilated motors
*
Gültig für Motoren mit Servolüftung

