16
2.
Remove O-Ring (25) from the Housing (1G) and discard it.
3.
Remove Hexagonal Bolts (1J) from Spindle (1A).
4.
Remove Bearing Carrier (1P) from the Spindle (1A).
CAUTION:
The Shim edges are sharp; wear gloves when handling or installing Shims to
prevent injury.
5.
Remove Steel Shims (1I) from the Internal Coupling (1H).
6.
Remove Internal Coupling (1H) from the Hub (1G).
7.
Remove Bearing Cone (1F) from spline end of the Internal Coupling (1H).
8.
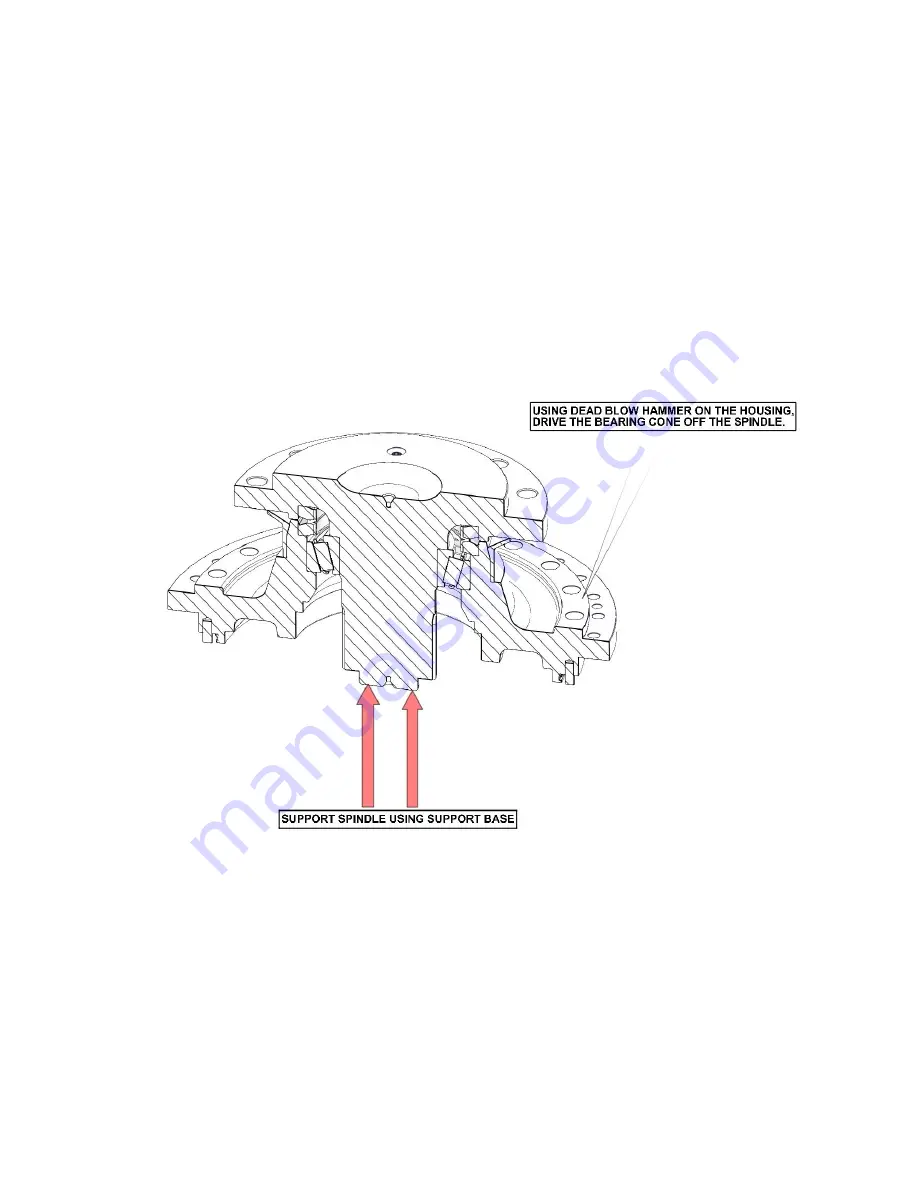
Turn over the unit and carefully place the unit on a support base until the Spindle (1A) rests
on it. Ensure there is enough gap to lower the Housing (1G) down.
9.
Using a dead blow hammer on the Housing (1G) flange to drive the Hosing (1G) off of the
Spindle (1A).
10.
Lift the Spindle (1A) out of the Housing (1G).
11.
Remove the Boot Seal (1U) from the Housing (1G).
Continued on Next Page
Summary of Contents for Fairfield Torque-Hub S40B Series
Page 1: ...1 Torque Hub Planetary Final Drive S40B Series Service Manual Rev 09 03 13 ...
Page 10: ...10 DISASSEMBLY ...
Page 11: ...11 THIS PAGE INTENTIONALLY LEFT BLANK ...
Page 20: ...20 ASSEMBLY ...
Page 29: ...29 THIS PAGE INTENTIONALLY LEFT BLANK ...
Page 32: ...32 Planetary Final Drive Service Manual Assembly Drawing ...
Page 36: ...36 T125034 BEARING CUP ASSEMBLY ADAPTOR ...
Page 37: ...37 T164786 ALIGNMENT PIN FOR ASSEMBLY ...
Page 38: ...38 T136699 750 DRIVE LOCKNUT WRENCH ...
Page 39: ...39 T163327 SPLINED LOCATOR RING ...
Page 40: ...40 T159309 LOADING PLUG AND BASE FOR ASSEMBLY ...
Page 41: ...41 T160835 ASSEMBLY PRESSING TOOL ...
Page 42: ...42 T158152 LOADING PLUG AND BASE FOR ASSEMBLY ...
Page 43: ...43 T158338 ASSEMBLY PRESSING TOOL ...
Page 44: ...44 T147871 N 12 LOCK NUT WRENCH ...
Page 45: ...45 T173814 LEAK TEST ADAPTOR ...
Page 46: ...46 T212150 ROLL TEST TOOL ...


