
2
1
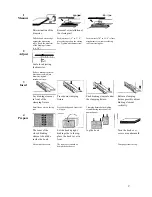
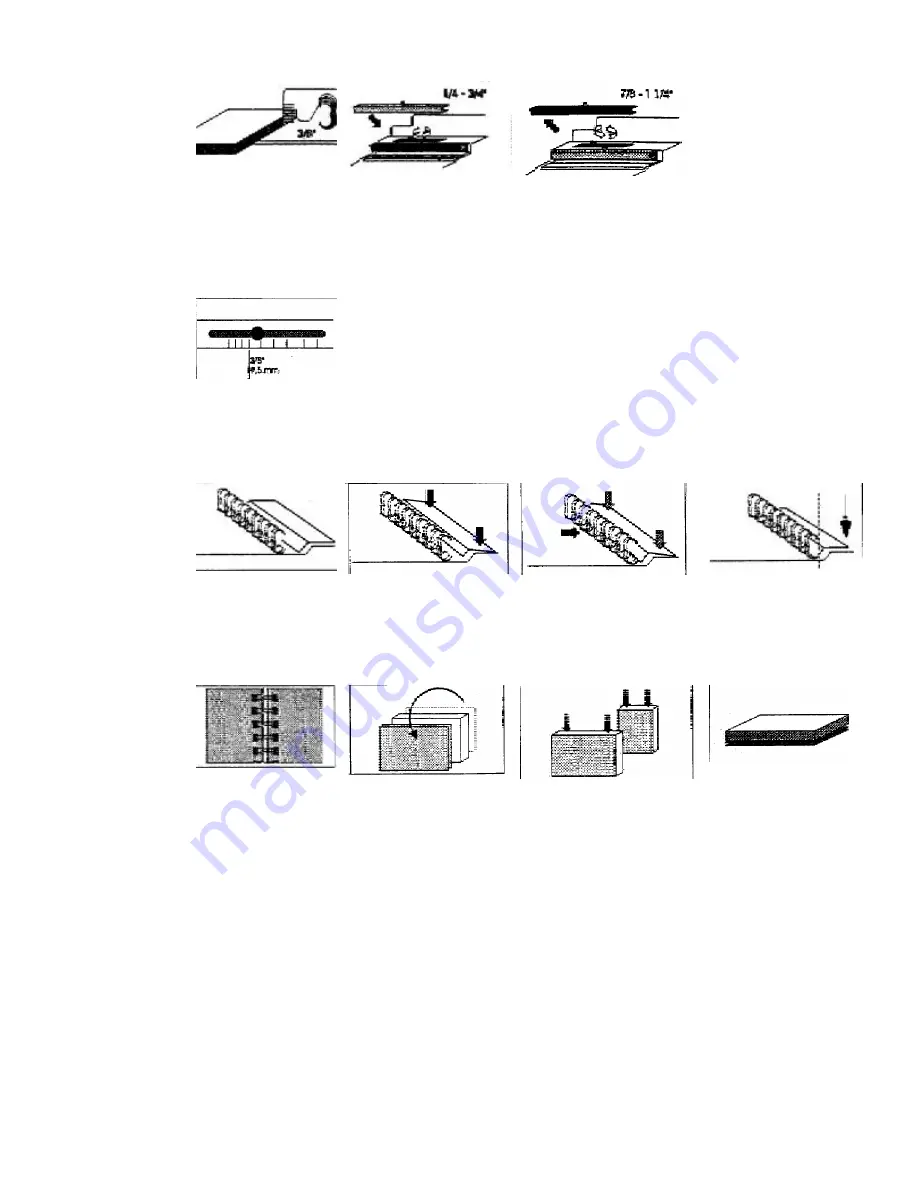
Measure
Determination of the
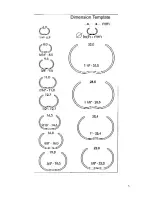
diameter
Pull the book on the edge
against the measuring
scale. Read the diameter
of the binding element
(e.g. 3/8”)
Removal or installation of
the closing rail
For diameters 1 / 4” to 3 / 4”
place closing rail on the closing
bar. Tighten attachment screw.
For diameters 7/8” to 1-1/4” release
attachment screw remove closing
rail from closing bar.
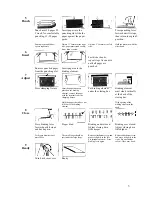
2
Adjust
Scale for adjusting
the diameter.
Release attachment screw
determine scale; adjust
diameter, tighten
attachment screw.
3
Insert
Lay binding element
in front of the
clamping fixture
Small loops on top, facing
rear.
Press down clamping
fixture
Press back edge and front side
will open.
Push binding element under
the clamping fixture.
Clamping fixture holds binding
element during insertion of the
punched paper.
Release clamping
fixture possibly adjust
binding element
vertically.
4
Prepare
The seam of the
closed binding
element should be
inside the book
Not outside the covers.
Set the book upright,
binding side to the top,
place the back cover in
front.
The front cover should be
behind the back cover
Jog the book
Turn the book over,
covers are underneath
Take pages from the top.


