OFITE, 11302 Steeplecrest Dr., Houston, TX 77065 USA / Tel: 832-320-7300 / Fax: 713-880-9886 / www.ofite.com
6
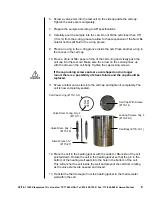
6. Screw a valve stem into the test cell on the side opposite the cell cap.
Tighten the valve stem completely.
7.
Prepare the sample according to API specifications.
8.
Carefully pour the sample into the cell. Do not fill the cell closer than 0.5"
(13 mm) from the o-ring groove to allow for heat expansion of the fluid. Be
careful not to spill fluid in the o-ring groove.
9. Place an o-ring in the o-ring groove inside the cell. Place another o-ring in
the recess in the cell cap.
10.
Place a circle of filter paper on top of the cell o-ring and slowly push the
cell cap into the test cell. Make sure the arrow on the cell cap lines up
with the arrow on the cell body. Tighten the cap locking screws.
If the cap locking screw seats are oval shaped and no longer
round, there is a possibility of stress failure and the cap should be
replaced.
11. Screw another valve stem into the cell cap and tighten it completely. The
cell is now completely sealed.
12.
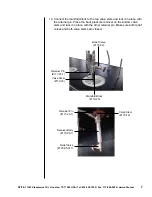
Place the cell in the heating jacket with the outlet or filter side of the cell
pointed down. Rotate the cell in the heating jacket so that the pin in the
bottom of the heating well seats into the hole in the bottom of the cell.
This will anchor the cell inside the well and prevent the cell from rotating
as the valve stems are opened and closed.
13. Transfer the thermocouple from the heating jacket to the thermometer
well within the cell.
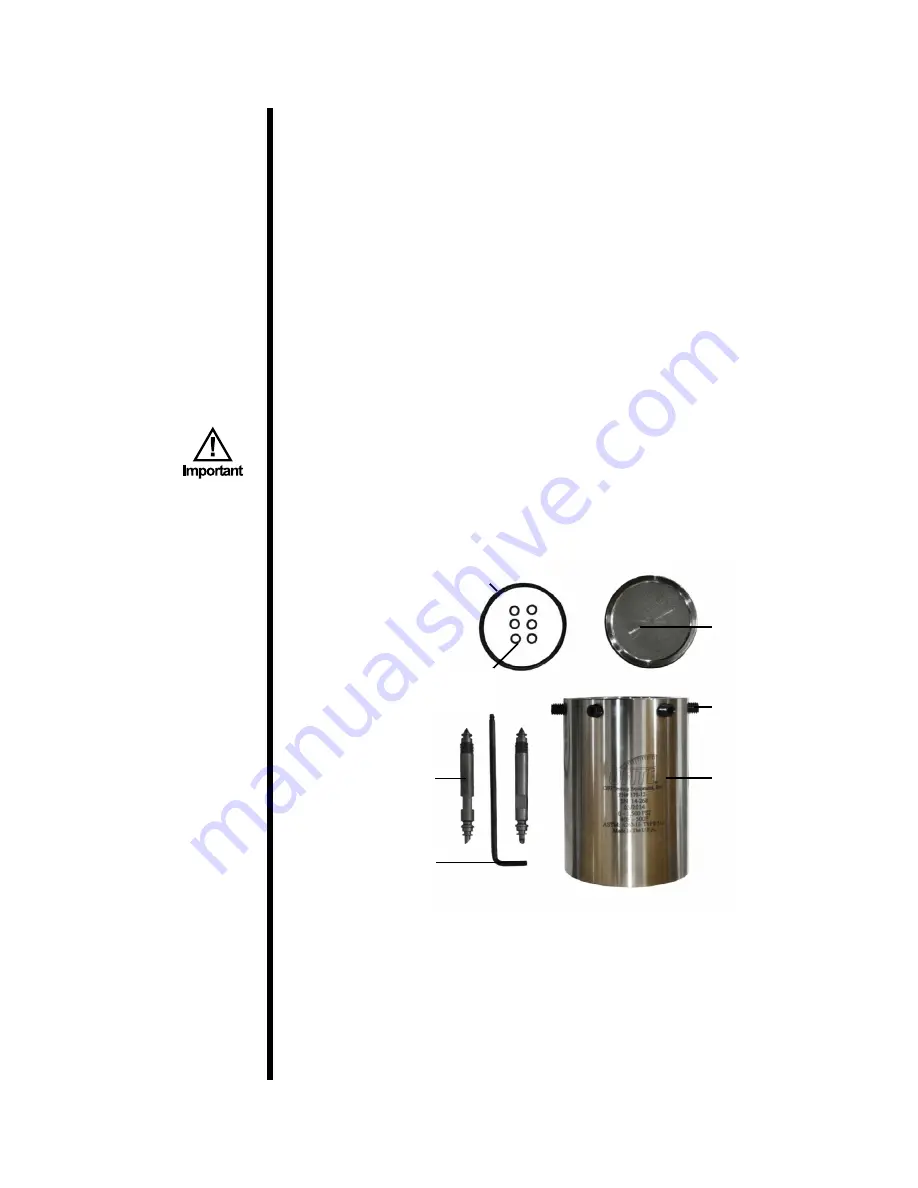
Locking Screws, Qty. 6
(#170-26-1)
Valve Stem, Qty. 2
(#170-16)
Cell Cap With Screen
(#170-14)
Allen Wrench
5/32
"
(#170-27)
Valve Stem O-ring, Qty. 4
(#170-17)
Cell Cap O-ring (#170-13-3)
Cell Body (#170-12-1)


