background image

46

47

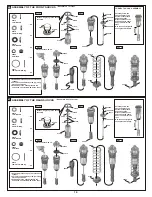
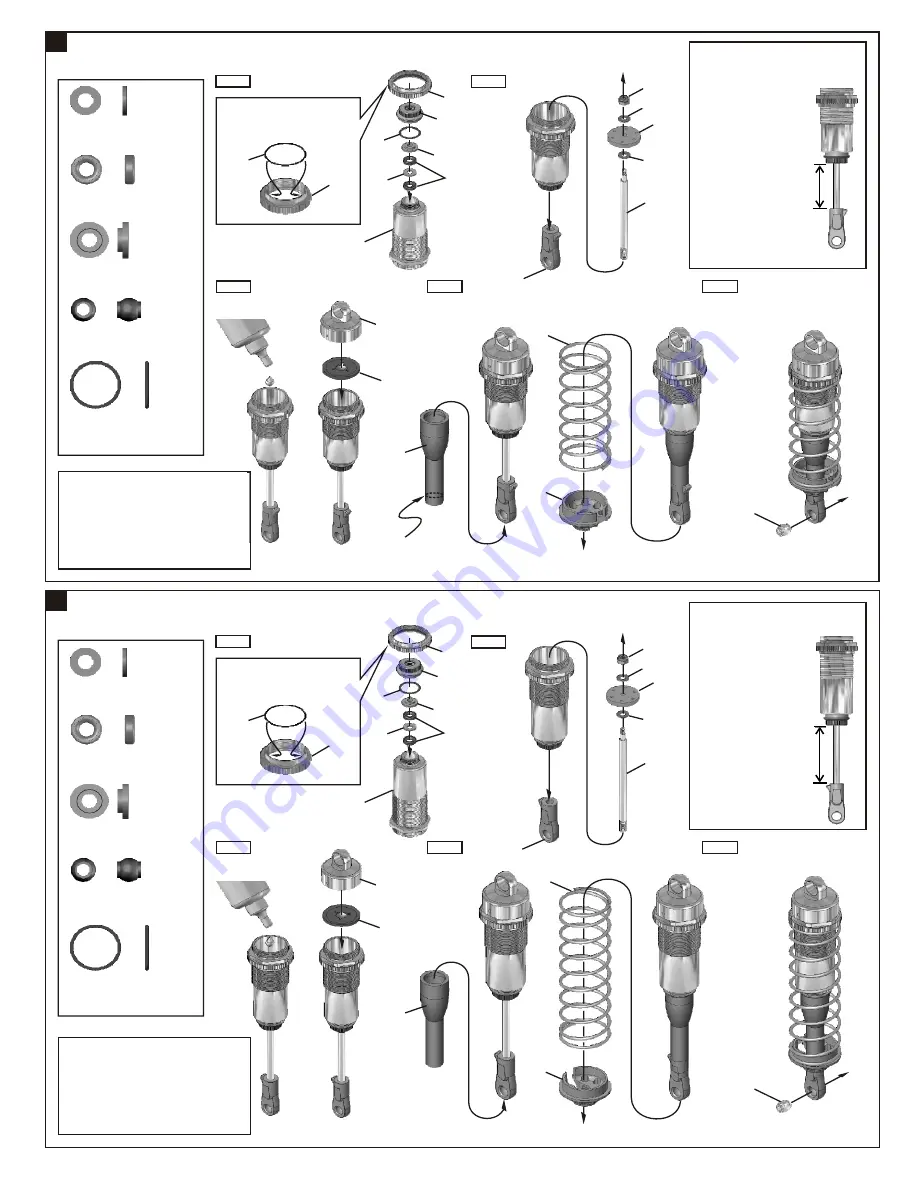
ASSEMBLY OF THE FRONT SHOCKS

ASSEMBLY OF THE REAR SHOCKS

Step 1

Step 2

Step 3

Step 4

Fit the o-ring into groove before 
assembly

Fill the shocks with oil.

2

8

m

m

CORRECT SHOCK  ASSEMBLY

Carefully screw the 
shock shaft into the 
bottom of the plastic 
ball and until the 
distance between the 
ballend and the shock 
body is 28mm for the
front.

N.B. Do not over tighten 
as the plastic will strip. 

Step 5

*Assemble 2  for front

*Assemble 2 sets for rear

41007

41006

40643

40054

2.6x5mm

41005

41013

40058

41008

30403

41015

1.Pull down piston and pour oil into shock
   cylinder.
2.To remove air bubbles by slowly moving
   piston up and down. 
3.Pull down piston, attachpressure top 
   and shock oil overflow with tissue paper.

41012
2mm Washer 

.....x2

.....x2

30403
6mm Ball 

41012
1mm Washer 

.....x2

41008

41012

40113

41012

41012

41003

2.6x5mm

41011

*Cut 7mm for front.

41012
3.5mm O-Ring 

.....x4

Step 1

Step 2

Step 3

Step 4

Fit the o-ring into groove before 
assembly

Fill the shocks with oil.

3

7

.5

m

m

Carefully screw the 
shock shaft into the 
bottom of the plastic 
ball and until the 
distance between the 
ballend and the shock 
body is 37.5mm for the
rear.

N.B. Do not over tighten 
as the plastic will strip. 

Step 5

41007

41006

40643

40055

2.6x5mm

41005

41013

40058

30403

41015

1.Pull down piston and pour oil into shock
   cylinder.
2.To remove air bubbles by slowly moving
   piston up and down. 
3.Pull down piston, attachpressure top 
   and shock oil overflow with tissue paper.

41012
2mm Washer 

.....x2

.....x2

30403
6mm Ball 

41012
1mm Washer 

.....x2

41008

41012

40113

41012

41012

41004

41011

41012
3.5mm O-Ring 

.....x4

40113
10mmx1mm O-Ring

.....x2

40113
10mmx1mm O-Ring

.....x2

41006

41006

16

2.6x5mm

41008

40060

40060

Summary of Contents for PICCO OFF ROAD

Page 1: ...Instruction manual OFNA 7 VANDERBILT IRVINE CA 92618 PH 949 586 2910 HI PerFORMANCE 1 8 OFF ROAD NITRO BUGGY ...

Page 2: ...increased voltage and longer life Recommended Option You may want to upgrade the car battery pack to a Ni Cad or Ni Mh 5 cell type 600AE This will give more run time OFNA 10202 1700Ni Mh Hump Pack and Ni Mh Battery Charger 10214 You will need to buy a few items to start the engine and run the car Use 20 nitro CAR fuel Do not use airplane or heli fuels they will over heat engine Buy LONG glow plugs...

Page 3: ...ethanol and Nitro Methane both are flammable and poisonous Glow Fuel Glow fuel is poisonous Store fuel in cool ventilated location Refer the glow fuel Glow fuel is flammable Do not leave in fuel bottle with lid off at any time label for additional precautions Do not use any fuel other than glow fuel in this engine Car Fuel tank Never store fuel in car tank it will ruin the First Time Starting the ...

Page 4: ...tter Retract the antenna Transmitter 11 11 12 13 THINGS REQUIRED FOR OPERATION Bottle s with spout 10160 large 500cc 10161 large 500 ccAuto Stop 10162 small 250cc 10164 CNC spout 500CC 10167 CNC spout 800CC SUITABLE SERVO SIZE 29mm 42mm 15mm 21mm 6m 1m 3 m 4 m 3 5 cc 21 Class ENGINE REAR EXHAUST Off Road Starter Box 12V motor 10250 1 8 scale Starter Box 10253 1 8 scale Starter Box w Panel 92571 Po...

Page 5: ...PLASTIC PARTS FOR USE 40047 RECEIVER BOX 36901 FRONT KNUCKLEARM ARM 36081 UPRIGHT REAR 40003 DIFF CASE 40020 REAR LOWER ARM 40202 LOWER ARM FRONT 40017 GEAR BOX 40046 STONE GUARD ...

Page 6: ...ighten Rotate Direction Rotate Direction Contact Adhesive Contact Adhesive S re c w Ceme t n BAG 1 1 Parts Bag Used Degrease With Motor Spray Do Not Over Tighten Clockwise Rotation Anti clockwise Rotation True To Scale Apply Oil Apply Screw Cement 1 1 ì o Ï 40027 WING STAY 40094 FRONT UPPER ARM 40031 SERVO SAVER 40018 40029 CHASSIS BRACE 16015 WING PLASTIC PARTS FOR USE ...

Page 7: ...ials for front and rear Put the Diff Oil 3000 for front and the 1000 for rear Fill the Diff case to approx 80 with the Diff Oil Oil 4x4mm 40005 40009 Oil 1 Tight the diff screws in this order 1 4 3 2 40513 40003 49032 40006 36053 40513 40010 40001 Tighten 40003 40513 40009 36053 40005 40513 30773 30776 40009 40010 40513 36053 40006 40010 40010 Oil 36053 8x16mm Ball Bearing x4 94034 4x4mm Set Screw...

Page 8: ...20 3x12mm Flat Head Hex Screw 94036 5x4mm Set Screw x1 Tighten 40513 30773 30776 36053 36053 40017 49012 30080 49048 40024 40024 5x4mm 4x16mm 4x45mm 94014 4x45mm Hex Screw x2 94011 4x16mm Hex Screw x2 94027 4x16mm Flat Head Screw X4 x2 40024 13x16x0 2mm Shim 4x16mm 40015 40015 2 41009 41010 41010 4x16mm 3x12mm 4mm Nylon Nut 4mm Nylon Nut 6 ASSEMBLY OF THE FRONT SHOCK STAY Step 1 Step 2 94004 3x12m...

Page 9: ...ment x4 2 5mm 36170 2 5mm 34053 L 36901 36904 36905 36903 36904 36905 36903 30656 36055 36053 4x4mm x2 94034 4x4mm Set Screw 36055 2 5x16 8mm Pin x2 36053 8x16mm Ball Bearing x4 36903 14mm Steering Ball x4 90020 2 5mm E Ring 90021 3mm E Ring x4 Assembly for both right and left side Assembly for both right and left side 40094 40202 4x10mm 36870 4x10mm Set Screw x2 3mm 3mm 40524 40094 40094 L for le...

Page 10: ... STABILIZER 4 3x16mm 3x10mm 3x3mm 40018 3x3mm Ensure Free Movement Screw Cement Screw m n Ce e t 3x3mm 3x3mm Makes two rods for left and right hand side 30341 30403 3x8mm 40029 40029 94033 3x3mm Set Screw x4 94019 3x10mm Flat Head Hex Screw x2 x2 30403 6mm Ball 94005 3x16mm Hex Screw x2 94035 3x8mm Set Screw x2 40019 8mm Insert the drive shaft before assembling the knuckle arm ...

Page 11: ...38 4x10mm 3x10mm 4x10mm 40031 Plastic Flange Bushing x2 94022 3x20mm Flat Head Hex Screw x2 cr w S e me t Ce n Screw e e C m nt 3mm 3mm 3x20mm 3x20mm 3mm 3x18mm 40037 40031 40031 40033 40035 40031 40034 40036 40027 40039 Approx 26mm 1 1 36700 40038 36700 94009 4x10mm Hex Screw x2 94041 3mm Nylon Nut x2 94003 3x10mm Hex Screw x2 94009 4x10mm Hex Screw x2 94022 3x18mm Flat Head Hex Screw x2 40039 40...

Page 12: ...10 4x12mm Hex Screw x4 36053 8x16mm Ball Bearing x2 94036 5x4mm Set Screw x1 94011 4x16mm Hex Screw x2 x2 40024 13x16x0 2mm Shim 4x45mm 40027 40017 40015 4x16mm 4x12mm 4x12mm 49049 4x45mm 3x10mm 36053 30080 5x4mm Screw Cem ent 40024 36053 49012 40017 94030 4x45mm Flat Head Screw X2 17 ASSEMBLY OF THE REAR SHOCK STAY 18 ASSEMBLY OF THE WING STAY 94003 3x10mm Hex Screw x1 90018 3x25mm Cap Screw x2 9...

Page 13: ... Screw x4 5x4mm x2 Ensure Free Movement 90021 3mm E Ring x2 x4 36870 4x10mm Set Screw x4 2 5mm 36053 30656 36053 36081 36055 2 5mm 40020 3x25mm 36082 4x20mm 4x16mm 4x16mm 40018 94008 3x25mm Hex Screw x1 94041 3mm Nylon Nut 94036 5x4mm Set Screw 90020 2 5mm E Ring 36055 2 5x16 8mm Pin x2 4x10mm 3mm x1 36170 Step 1 Step 2 40020 40020 Assembly for both right and left side 94042 4mm Nylon Nut x2 3mm 4...

Page 14: ...x4 x2 30403 6mm Ball 94005 3x16mm Hex Screw x2 94035 3x8mm Set Screw x2 94033 3x3mm Set Screw x4 94019 3x10mm Flat Head Screw x2 Ensure Free Movement 3x3mm 3x3mm S w cre e t C men Screw Ce nt me 3x16mm Approx 13mm 1 1 36850 40065 36111 x4 36850 7mm Ball 3x10mm Makes two rods for left and right hand side 30341 30403 3x8mm 40029 40029 Assembly for both right and left side 94008 3x25mm Hex Screw x2 A...

Page 15: ...x12mm Hex Screw x4 30171 3x3mm 40040 40040 3x12mm 40042 40042 26 ASSEMBLY OF THE BRAKE DISK INTO CENTER DIFF MOUNT Place the brake disc between the brake disc pads Brake disc Step 1 Step 3 Step 2 49053 40031 40040 Plastic Flange Bushing x2 Step 3 40040 40512 40040 40512 36660 36661 A B C 40044 40045 40040 36661 Remove the double side tape before assembly double side tape A B C Step 2 ...

Page 16: ...R DIFF ONTO CHASSIS 40028 4x10mm 4x10mm Insert the drive shaft into the cap joint before assembly the center diff onto chassis 94046 2 6x10mm Tapping Screw x4 2 6x10mm 2 6x10mm 94039 4x10mm Flat Head Screw x4 31 ASSEMBL OF THE STONE GUARD Y 40064 40046 3x10mm 3x10mm 3x10mm Assembly for both right and left side 94003 3x10mm Hex Screw x6 40013 94039 4x10mm Flat Head Hex Screw x2 ...

Page 17: ...x12mm Hex Screw x2 31 32 Step 1 94003 3x10mm Hex Screw x6 x8 94004 3x12mm Hex Screw x8 3x10mm 40047 40047 3x12mm 40031 3x8mm ASSEMBLY OF THE RADIO TRAY 3x8mm 3x8mm 3x8mm Step 2 3x10mm 3x10mm 40031 94040 3x8mm Washer 49054 3x12mm 3x12mm ASSEMBLY OF THE REAR GEAR CASE ONTO CHASSIS 40028 94026 4x12mm Flat Head Hex Screw x2 Insert the drive shaft into the cap joint before assembly rear gear box onto c...

Page 18: ... THE RADIO TRAY ONTO CHASSIS 3x10mm 94019 3x10mm Flat Head Hex Screw x8 3x10mm 94004 3x12mm Hex Screw x1 3x12mm 3mm 3mm Nut x1 34 ASSEMBLY OF THE STEERING SERVO AND STEERING ROD Approx 18 5mm 1 1 30342 30401 30403 30401 30661 3x10mm 30403 Use the screw provided with your servo 94003 3x10mm Hex Screw x1 x2 30403 6mm Ball 37410 37410 Battery Case ...

Page 19: ...8 10040 10010 Fit the flywheel using a pair of the plIer and cross wrench Place the clutch shoes with the clutch springs over the 3 pins of the flywheel Using a phillips screw driver or needle nose pliers and bend the small end in the clutch spring behind the pilot shaft 10101 than press down Screw Cem t en 38313 10101 ASSEMBLY OF THE FUEL TANK ONTO CHASSIS Do Not Over Tighten Step 1 Step 2 40066 ...

Page 20: ...ep 2 4x10mm 5x4mm 4x4mm 10120 40056 40050 10185 10069 94039 4x10mm Flat Head Hex Screw x1 94036 5x4mm Set Screw x2 ZIP TIES 31990 10060 30661 10300 30531 30802 10300 3x3mm 3x3mm Step 3 Step 2 Step 4 2x8mm 2mm 30172 30802 30802 30802 30172 30802 ASSEMBLY OF THE ENGINE ONTO CHASSIS 10114 10114 5mm Engine Mount Screw x4 Use note book paper to set gear backlash between spur gear and clutch bell gear a...

Page 21: ...et the Engine Control Servo Trim to the neutral position Adjust the idling adjusting screw on the Carburetor to be open approx 1mm gap Adjust both of the 10300 Engine Control and Brake linkage accordingly Adjust the Engine while it is not running Adjust the Servo Horn mounting position for the Carburetor to be full open Change the pivot mounting position on the servo horn in case the Carburetor is...

Page 22: ...sher x2 x2 30403 6mm Ball 41012 1mm Washer x2 41008 41012 40113 41012 41012 41003 2 6x5mm 41011 Cut 7mm for front 41012 3 5mm O Ring x4 Step 1 Step 2 Step 3 Step 4 Fit the o ring into groove before assembly Fill the shocks with oil 37 5mm Carefully screw the shock shaft into the bottom of the plastic ball and until the distance between the ballend and the shock body is 37 5mm for the rear N B Do n...

Page 23: ... and left side 3x20mm 94007 3x20mm Hex Screw x2 x2 94040 3x8mm Washer 94041 3mm Nylon Nut x2 3x20mm 3mm 3x8mm 3mm 94007 3x20mm Hex Screw x2 x2 94040 3x8mm Washer 94041 3mm Nylon Nut x2 50 ASSEMBLY OF THE FUEL TUBE Connect to carbulater Connect to fuel t ank nipple Connect to pressure nipple 10177 10177 Connect to fuel nipple 40643 3x8mm 40643 ...

Page 24: ... of the wheel 86082 86056 81095 x2 x2 94004 3x12mm Hex Screw 94041 3mm Nylon Nut 3x12mm 40027 3mm 3mm 53 ASSEMBLY OF THE TIRE ONTO FRONT KNUCKLE AND REAR HUB Assembly for both right and left side Tire and Wheel assembly 40550 x4 40550 Wheel Nut 40550 40550 40550 16015 Drill two 7mm holes for mounting Body Reamer Not included 40027 ...

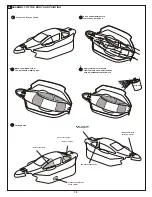
Page 25: ...ws from the inside with masking tape Apply internal color decals from the inside and paint the body with polycarbonate spray paints Spray Paint Cutting holes Hole for fuel tank Hole for engine Cut out for engine For the exhaust outlet of the muffler Hole for antenna pipe Make a 8mm hole for body mount Make a 8mm hole for body mount ...

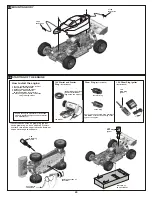
Page 26: ...or car Insert starter rubber ring on the 12V starter 12V Starter 12V Starter and Starter Ring Not Included 1 2V Glow Plug Igniter 1 2V Glow Plug Igniter 1 2V Glow Plug Igniter 1 2V Glow Plug Igniter Not Included Glow Plug Not Included There is 2 types of glow plug available NORMAL or Turbo depending of the type of the engine Normal Plug Turbo Plug To start the car attach a glow plug igniter to the...

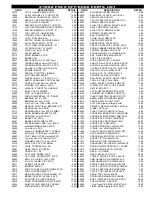
Page 27: ... RTR 7 95 34110 BEARING 5x10 2 PCS 6 95 40202 ARMS LOWER FRNT RR 95 MBX 16 95 36053 BEARING 8x16mm PAIR 12 95 40512 CENTER DIFF MOUNT POST 13 95 36055 PIN 2 5x17mm HEX HUBS 4PCS 3 95 40513 DIFF GEAR small large ALUM 16 95 36081 REAR UP RIGHT 8mm BEARING PR 12 95 40524 FRONT or REAR ARM SHAFT 4x73mm 6 95 36082 REAR AXLES 8mm PAIR 10 95 40550 WHEEL NUT 5mm 4 95 36111 REAR BONES 91mm 2PCS 95MBX 15 95...

Page 28: ......

Page 29: ......

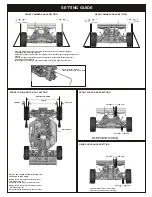
Page 30: ...E OUT SETTING TOE IN TOE OUT NEUTRAL POSITION Making the tie rod shorter will make the front tires become toe out Response will be quicker and will under steer REAR SHOCK ANGLE SETTING Firm rear suspension over steering Soft rear suspension under steering FRONT SHOCK ANGLE SETTING Firm front suspension less steering Soft front suspension more steering Negative Negative Positive Positive Adjust the...

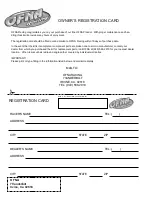
Page 31: ...it is incomplete or component parts are broken due to error in manufacturer contact your dealer from which you purchased the kit for replacement part or call OFNA at 949 586 2910 for your nearest dealer location Other items such as radio and engine other covered by individual warranties IMPORTANT Please print or type filling in the information listed below and mail immediately MAIL TO OFNARACING 7...

Reviews: