background image


Assembly Instructions 
DO NOT plug in the fan before assembly. Carefully remove all packaging  
materials, make sure there is no residual foam left in any of the components.  
Carefully check all components, make sure there is neither shortage nor  
damage during transportation. 
 
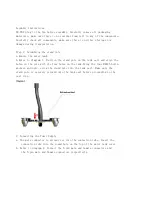
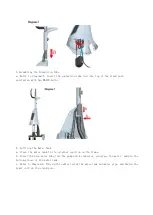
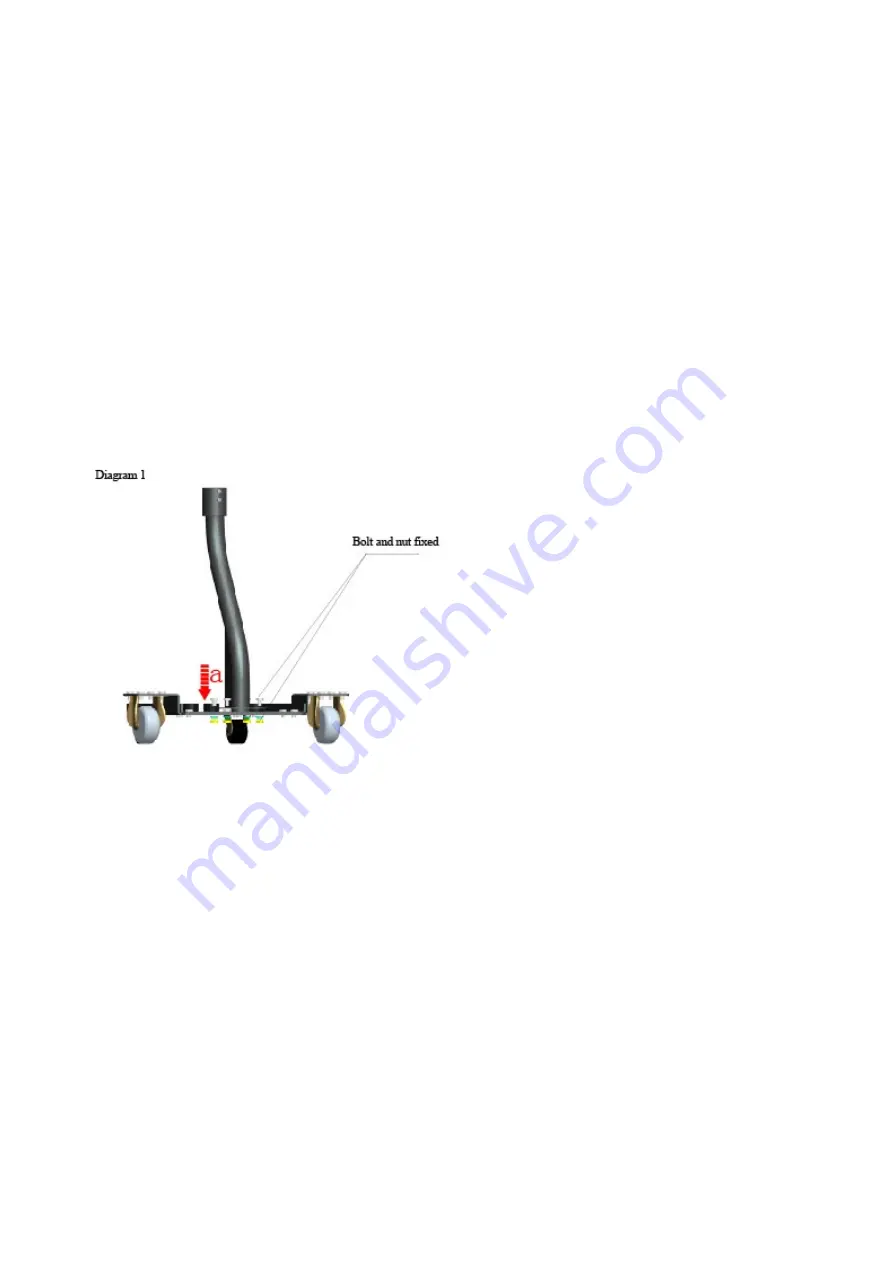
Step 1: Assembling the stand pole 
a.Remove the water tank. 
b.Refer to diagram 1. Position the stand pole on the tank cart and align the  
holes on the pole with the four holes on the tank.Using the four M8X25 bolts,  
washers and nuts, screw the stand pole into the tank cart. Make sure the  
stand pole is securely screwed onto the tank cart before proceeding to the  
next step. 


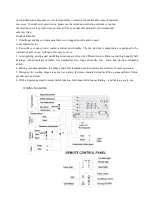
2. Connecting the Power Supply 
a. The male connector is already set into the connection tube. Insert the  
    connection tube into the round hole on the top of the water tank cover. 
b. Refer to diagram 2. Connect the 3-pin male and famale connectors and  

the 5-pin male and famale connectors respectively. 

Summary of Contents for 171

Page 1: ...www ofresh fr Owner s Manual Misting Fan ref 171...

Page 2: ...as this may cause electric shock or bodily injury Do not block or tamper with the misting fan while it is in operation 10 Do not place the fan near curtains drapes or any other materials that can get...

Page 3: ...lectrical components are designed to be waterproof safe to use with tank cart easy to move 3 Air supplying misting and oscillating functions are driven by different motors Motors adopt high quality ba...

Page 4: ...Press the SWING key to start oscillation function press again to turn off oscillation function the light indicates at the same time f Press MIST key to start misting function press it again to turn o...

Page 5: ...d pole on the tank cart and align the holes on the pole with the four holes on the tank Using the four M8X25 bolts washers and nuts screw the stand pole into the tank cart Make sure the stand pole is...

Page 6: ...bolts 4 Settling the Water Tank a Place the water tank in its original position on the frame b Insert the blue water tube into the pump quick connector and place the water pump in the bottom groove o...

Page 7: ...e extension pipe with connectors and water pipes inside into the round hole on the bottom lid of water collection plate decoration cover Connect the water pipes and connectors d Refer to diagram 5 Tid...

Page 8: ...nction check if the misting motor misting plate and water pumps is working normally d Turn the ball valve knob from OFF to ON observe if the misting changes f Press SWING button to start oscillation f...

Page 9: ...n Cover 9 Front Grill 10 Net Ring 11 Rear Grill 12 Blade 13 Front Lid of Motor Cover 14 Fan Motor 15 Motor Back Cover 16 Supporter 17 Upper Joint 18 M6 Injection Screw 19 Extension Pipe 20 Connector B...

Reviews: