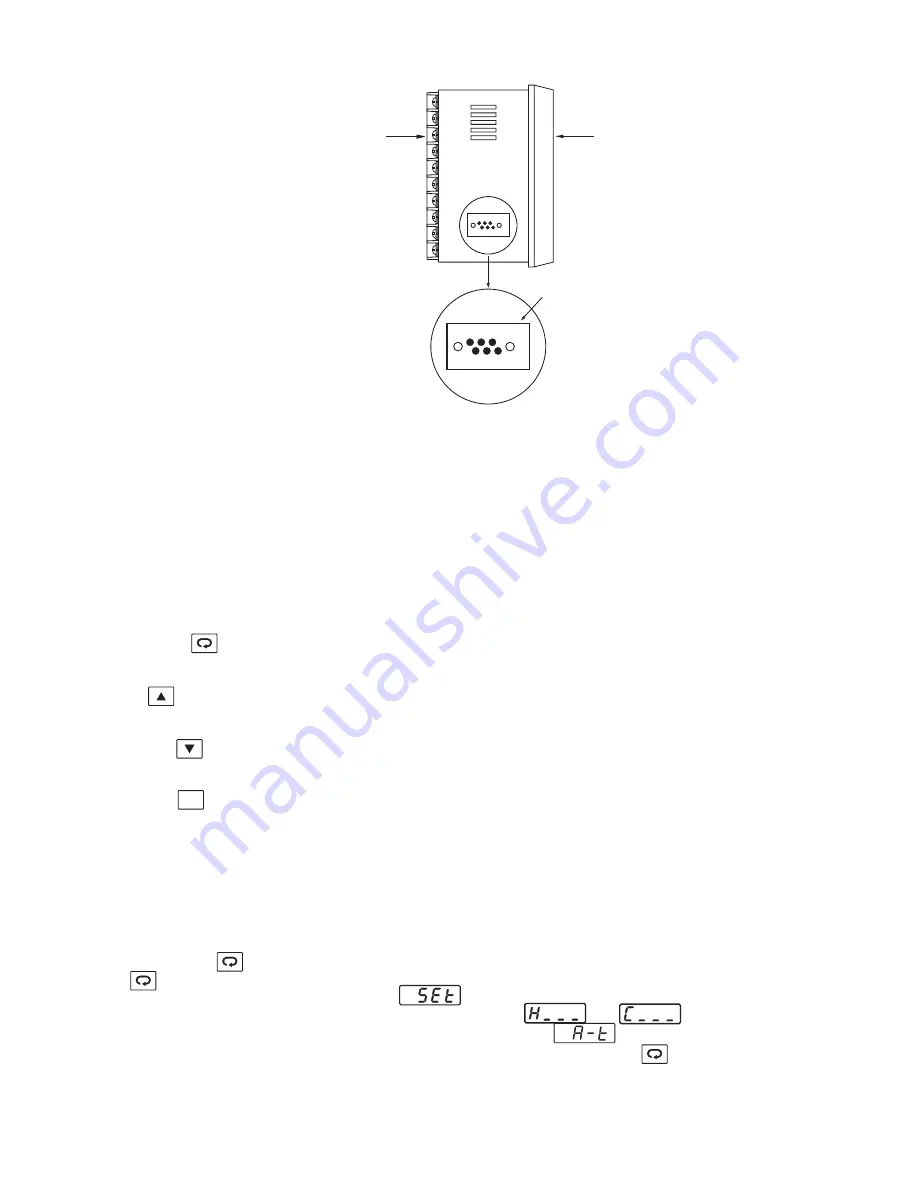
1-3 Programming Port
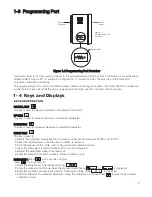
Figure 1.2 Programming Port Overview
A special connector can be used to connect to the programming port which is then connected to a smart network
adaptor SNA12A and a PC for automatic configuration. It can also can be connected to an ATE system for
automatic calibration and testing.
The programming port is used for off-line automatic setup and testing procedures only. Don't attempt to make any
connection to these pins while the unit is powered up and being used for normal control purposes.
1- 4 Keys and Displays
K E Y PA D O P E R AT I O N
SCROLL KEY:
UP KEY:
DOWN KEY:
RESET KEY:
ENTER KEY :
This key is used to select a parameter to be viewed or adjusted.
This key is used to increase the value of a selected parameter.
This key is used to decrease the value of a selected parameter.
This key is used to:
1. Revert the controllers display back to the process value (or set point value if DISP is set to SP1).
2. Reset the latching alarm, once the alarm condition is removed.
3. Stop the manual control mode, auto-tuning mode and calibration mode.
4. Clear the message of a communications error or auto-tuning error.
5. Restart the dwell timer when it has timed out.
6. Enter the manual control menu when a failure condition occurs.
Press for 3 seconds or longer.
Press for 3 seconds to:
1. Enter the setup menu. The display will show .
2. Enter the manual control mode when the manual control menu, or is displayed.
3. Enter the controller into auto-tuning mode. During auto-tuning mode is displayed.
4. Perform calibration to a selected parameter during the calibration procedure. Press for 5 seconds to select
calibration mode.
SCROLL KEY:
UP KEY:
DOWN KEY:
RESET KEY:
ENTER KEY :
7
Front
Panel
Rear
Terminal
Access Hole
1
1
3
3
4
4
6
6
Figure 1.2
Programming Port
Overview
2
2
5
5
R

