ADVENTURER BALANCES
EN-11
4.1.2
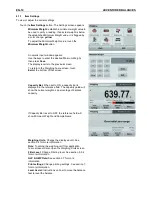
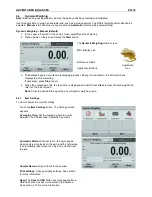
Sample Name
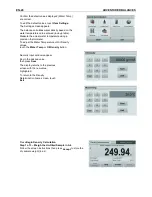
Press this button to add a sample name. An alphanumeric input window appears. Press
to alternate
between Lower and Upper case characters.
Lower Case:
Upper Case:
Key in the desired sample name and press Save to save the name and return to weighing home screen.
4.1.3
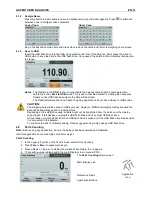
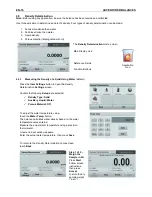
Save to USB
Insert the USB flash drive into the USB slot located on the front of the balance. Next, press the Save to
USB button to save the data to the USB flash drive. Once saved, the button will momentarily change color
to orange.
Notes
: The first time a USB flash drive is connected to the balance there might be some delay time
before the button
Save to USB
works. This is due to that the balance is creating the necessary
folders on the USB flash drive where the data will be stored.
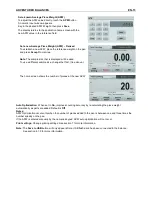
The Density Determination and Check Weighing applications do not have a Save to USB button.
CAUTION:
The weighing data will be saved to USB every day. However, if different weighing modes are used the
data will be separately saved to individual files.
Depending on the USB drive used, all data might not be transferred from the balance or the display
might freeze. If this happens, unplug the USB flash drive and try another USB flash drive.
Ohaus takes no responsibility if data on USB flash drive is erased or if the USB flash drive breaks while
it is connected to the balance.
To minimize the risk of problems arising, Ohaus suggests using a high quality USB flash drive.
4.2
Parts Counting
Note:
Before using any application, be sure the balance has been leveled and calibrated.
Use this application to count samples of uniform weight.
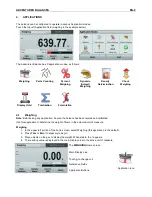
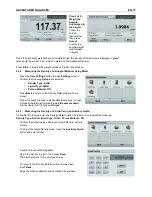
Parts Counting
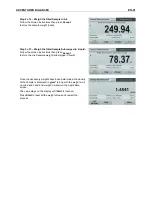
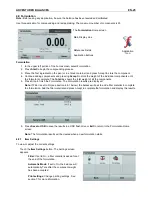
1. In the upper left portion of the home screen, select Parts Counting
2. Press
Tare
or
Zero
if necessary to begin.
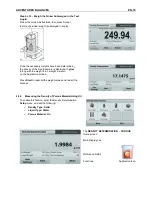
3. Place objects on the pan to display the weight. When stable, the
*
appears.
4. The resulting value is displayed in the main Display Line in pieces (PCS).
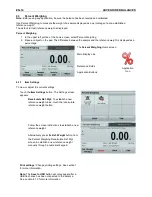
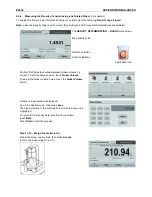
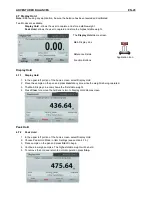
The
Parts Counting
Home screen
Main Display Line
Reference Fields
Application Buttons
Application
Icon


