background image


                                             EN-1 

1. SAFETY INFORMATION


Definition of Signal Warnings and Symbols


WARNING 

For a hazardous situation with medium risk, possibly resulting in injuries or death if not avoided.


CAUTION 

For a hazardous situation with low risk, resulting in damage to the device or the property or in loss 


of data, or injuries if not avoided. 

Attention 

For important information about the product.


Note 

For useful information about the product. 

Warning Symbols


General hazard


Electrical shock


Safety Precautions


CAUTION:

 Read all safety warnings before installing, making connections, or servicing this equipment. 

Failure to comply with these warnings could result in personal injury and/or property damage. Retain all 
instructions for future reference. 


Verify that the local AC power supply voltage is within the input voltage range printed on the equipment

’s or AC adapter’s 

ratings label. 


Only connect the AC power cord or AC adapter to a compatible grounded socket. 


Position the instrument such that the AC power cord or AC adapter can be easily disconnected from the socket. 


Position the power cord so that it does not pose a potential obstacle or tripping hazard. 


Operate the equipment only under ambient conditions specified in the user instructions. 


Do not operate the equipment in hazardous or explosive environments. 


Disconnect the equipment from mains power before cleaning or servicing. 


Service should only be performed by authorized personnel. 

Intended Use 

Use the instrument exclusively for weighing as described in the operating instructions. Any other type of use and operation 
beyond the limits of technical specifications without written consent from OHAUS, is considered as not intended. 
This instrument complies with current industry standards and the recognized safety regulations; however, it can constitute a 
hazard in use.  
If the instrument is not used according to these operating instructions, the intended protection of the instrument may be 
compromised and OHAUS assumes no liability. 


2. INSTALLATION


2.1 External Connections 

RS232 Interface Cable to T31P 

Connect the optional RS232 cable to the RS232 connector.


Pin 

Connection 


N/C 

TXD 

RXD 

N/C 

GND 

N/C 

N/C 

N/C 

N/C 


AC Power Cord/Adapter  Installation 

Connect the AC mains/adapter power cord to the instrument's power input connector, and then connect the AC plug to a 
suitable electrical outlet.  


Attention:

 Only use an AC adapter specified by OHAUS 


Summary of Contents for Ranger 3000 Series

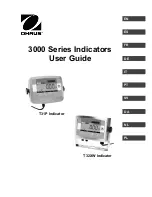
Page 1: ...3000 Series Indicators User Guide EN ES FR DE IT PT SV DA NL PL T31P Indicator T32XW Indicator...

Page 2: ...EN 2 2000 SERIES INDICATORS...

Page 3: ...potential obstacle or tripping hazard Operate the equipment only under ambient conditions specified in the user instructions Do not operate the equipment in hazardous or explosive environments Discon...

Page 4: ...2XW Remove the four hex head screws from the rear housing Open the housing by carefully pulling the top of the front housing forward Once all connections are made reattach the front housing The screws...

Page 5: ...ng the application mode Press and hold allows scrolling through modes Menu Enter the menu View the Audit Trail event counters extended press Menu Function Short Press Yes Accept the current menu or se...

Page 6: ...ed with water and a mild detergent 4 2 Troubleshooting For technical issues contact an Authorized Ohaus Service Agent Please visit our website www ohaus com to locate the Ohaus office nearest you 5 TE...

Page 7: ...onic equipment For disposal instructions in Europe refer to www ohaus com weee Verified weighing instruments When the instrument is used in trade or a legally controlled application it must be set up...

Page 8: ...imentaci n de manera que no represente un obst culo con peligro de tropezar Utilice el equipo nicamente bajo las condiciones ambientales especificadas en las instrucciones de uso No utilizar el equipo...

Page 9: ...e superior de la caja frontal hacia adelante Una vez que est n hechas todas las conexiones vuelva a colocar la parte frontal de la caja Los tornillos deben apretarse completamente para mantener un sel...

Page 10: ...ermite desplazarse por los diferentes modos Menu Abre el men Permite visualizar los contadores de eventos de revisi n de auditor a presi n prolongada Funci n de men presi n corta Yes Acepta el men o a...

Page 11: ...un detergente suave 4 2 Soluci n de problemas Para cuestiones t cnicas p ngase en contacto con un agente de servicio autorizado de Ohaus Por favor visite nuestra p gina web www ohaus com para localiz...

Page 12: ...disposiciones locales mediante el sistema de recogida selectiva de aparatos el ctricos y electr nicos Para obtener instrucciones de eliminaci n en Europa consulte www ohaus com weee Instrumentos de p...

Page 13: ...FR 2 LES INDICATEURS 2000...

Page 14: ...on en s assurant qu il ne cr e pas un obstacle ou un risque de chute N utiliser l appareil que dans les conditions ambiantes sp cifi es dans ce manuel d utilisation Ne pas utiliser l appareil dans les...

Page 15: ...re Ouvrir le bo tier en tirant doucement vers l avant la partie sup rieure du bo tier avant Une fois tous les raccordements faits remettre en place le bo tier avant Les vis devraient tre fermement ser...

Page 16: ...dans le menu R trospective des compteurs d v nements pression prolong e Fonction Menu Pression br ve Yes Accepte le menu actuel ou le param trage actuel No Passe au menu suivant ou au param tre suiva...

Page 17: ...x 4 2 D pannage Pour les questions techniques contacter un r parateur agr Ohaus Visiter notre site Web www ohaus com pour trouver le bureau Ohaus le plus proche de vous 5 DONNEES TECHNIQUES Les donn e...

Page 18: ...e collecte de mat riel lectrique et lectronique Pour les instructions de rejet et recyclage en Europe merci de consulter le site www ohaus com weee Appareils de pesage v rifi s Lorsque l appareil est...

Page 19: ...DE 2 INDIKATOREN DER 2000 SERIE...

Page 20: ...Hindernis darstellen Bedienen Sie das Ger t nur unter den in der Bedienungsanleitung angegebenen Umgebungsbedingungen Bedienen Sie das Ger t nicht in einer gef hrlichen oder explosiven Umgebung Trenn...

Page 21: ...en Sie das Geh use indem Sie das vordere Geh use vorsichtig nach vorne ziehen Nachdem alle Verbindungen fertig sind schlie en Sie das Geh use Ziehen Sie die Schrauben auf um einen wasserdichten Abschl...

Page 22: ...cht das Wechseln der Anwendungsmodi Dr cken und halten erm glicht Skrollen ber die Modi Menu Men ffnet das Men Zeigt Testprobe Ereignisz hler langes Dr cken Men funktionen Kurzes Dr cken Yes Ja Akzept...

Page 23: ...ktes Tuch gereinigt werden 4 2 Fehlerbehebung Bei technischen Fragen wenden Sie sich an den autorisierten Ohaus Service Agenten Besuchen Sie unsere Webseite unter www ohaus com um eine Ohaus Niederlas...

Page 24: ...elektrische und elektronische Ger te Hinweise zur Entsorgung in Europa finden Sie unter www ohaus com weee Verifizierte W geger te Wenn die Waage im Handel oder in gesetzlich kontrollierten Anwendunge...

Page 25: ...IT 2 INDICATORI SERIE 2000...

Page 26: ...il cavo di alimentazione in modo che non costituisca un potenziale ostacolo o pericolo di inciampo Utilizzare l apparecchiatura solo nelle condizioni ambientali specificate nelle istruzioni per l uti...

Page 27: ...a esagonale dall alloggiamento posteriore Aprire l alloggiamento estraendo delicatamente in avanti la parte superiore dell alloggiamento anteriore Dopo aver effettuato tutte le connessioni rimontare l...

Page 28: ...rolungata consente di scorrere le modalit Menu Accede al menu Visualizza i contatori di eventi dell iter di verifica pressione prolungata Funzionamento a menu pressione breve S Accetta il menu o l imp...

Page 29: ...n un detergente delicato 4 2 Risoluzione dei problemi Per problemi tecnici contattare un agente di manutenzione Ohaus autorizzato Si prega di visitare il nostro sito web www ohaus com per individuare...

Page 30: ...lettriche ed elettroniche Per le norme di smaltimento vigenti in Europa fare riferimento a www ohaus com weee Strumenti di pesatura verificati Quando lo strumento viene usato nel commercio o per un ap...

Page 31: ...o equipamento apenas sob condi es ambientais espec ficas nas instru es do utilizador N o opere o equipamento em ambientes perigosos ou explosivos Desligue o equipamento da fonte de alimenta o antes d...

Page 32: ...iro Os pernos devem ser apertados completamente de modo a manter um vedante estanque Ligar base da balan a Passe o cabo da c lula de carga atrav s do redutor de tens o e instale o no bloco de terminai...

Page 33: ...permite percorrer os modos Menu Entra no menu Visualiza os contadores de eventos da pista de auditoria manter premido Fun o de menu Premir breve Yes Sim Aceita o menu ou a defini o atual No N o Avan...

Page 34: ...rgente neutro 4 2 Resolu o de problemas Para problemas t cnicos entre em contacto com um agente de servi o autorizado da Ohaus Visite o nosso site Web www ohaus com para localizar o estabelecimento Oh...

Page 35: ...letr nico Para instru es de elimina o na Europa consulte www ohaus com weee Instrumentos de pesagem verificados Quando o instrumento utilizado no com rcio ou numa aplica o legalmente controlada deve s...

Page 36: ...aget Placera n tsladden s att den inte utg r ett potentiellt hinder eller snubbelrisk Anv nd utrustningen endast under de omgivningsf rh llanden som anges i anv ndningsanvisningen Anv nd inte utrustni...

Page 37: ...exkantskruvarna fr n det bakre huset ppna huset genom att f rsiktigt dra det fr mre huset fram t N r alla anslutningar r gjorda s tt tillbaka fr mre huset Dra t skruvarna ordentligt f r att s kerst ll...

Page 38: ...eten Mode ndra programl ge Menu G in i menyn Visa verifieringskedjan h ndelser knare f rl ngt tryck Meny Funktion Kort Tryck Yes Acceptera aktuell meny eller inst llning No G vidare till n sta meny el...

Page 39: ...ng ringsmedel 4 2 Fels kning F r tekniska problem kontakta en godk nd OHAUS service agent F r tekniska fr gor kontakta ett auktoriserat OHAUS serviceombud Bes k g rna v r hemsida www OHAUS com f r att...

Page 40: ...uppsamlingspunkten angiven f r elektrisk och elektronisk utrustning F r kasserings instruktioner i Europa referera till www OHAUS com weee Kontrollerade instrument N r instrumentet anv nds i yrkesm ss...

Page 41: ...fjernes fra stikkontakten Placer ledningen s den ikke udg r en potentiel forhindring eller snublerisiko Betjen kun udstyret under de omgivende betingelser der angivet i brugervejledningen Betjen ikke...

Page 42: ...bagside bn kabinettet ved forsigtigt at tr kke kabinettets top fremad N r alle tilslutninger er foretaget montereres kabinettets forside igen Skruerne skal strammes helt for at opretholde en vandt t f...

Page 43: ...amtilstanden Tryk og hold kan rulle gennem tilstandene Menu G ind i menuen Se gennemgangen spore begivenhedst llere udvidet tryk Menufunktion Kort tryk Yes Accepter den aktuelle menu eller indstilling...

Page 44: ...t mildt reng ringsmiddel 4 2 Fejlfinding Kontakt en autoriseret Ohaus servicetekniker mht tekniske sp rgsm l Bes g vores hjemmeside www ohaus com for at finde det Ohaus kontor som er t ttest p dig 5 T...

Page 45: ...odukt i henhold til lokale regler p indsamlingssteder beregnet til elektrisk og elektronisk udstyr Mht bortskaffelsesinstruktioner i Europa henvises til www ohaus com weee Verificerede v gte N r instr...

Page 46: ...het toestel in een omgeving zoals gespecifieerd in de gebruikershandleiding Gebruik het toestel niet in gevaarlijke of explosieve omgeving Ontkoppel het toestel van het elektriciteitsnet vooraleer u...

Page 47: ...bevestigt u opnieuw de voorste behuizing De schroeven moeten volledig worden aangedraaid om een waterdichte afdichting te behouden De basis van de weegschaal monteren Voer de kabel van de laadcel door...

Page 48: ...applicatiemodus Door deze ingedrukt te houden kunt u bladeren door de modi Menu Hiermee opent u het menu Hiermee geeft u de gebeurtenisteller van de audittrail langer ingedrukt houden Menufunctie Kort...

Page 49: ...gent 4 2 Troubleshooting For technical issues contact an Authorized Ohaus Service Agent Please visit our website www ohaus com to locate the Ohaus office nearest you 5 TECHNICAL DATA De technische spe...

Page 50: ...verwijdering in Europa vindt u op onze website www ohaus com weee Geijkte weegschalen Indien het toestel gebruikt wordt voor commerci le transacties of wanneer de lokale wetgeving dergelijke verplich...

Page 51: ...udnienia dla poruszania si i nie powodowa niebezpiecze stwa potkni cia U ywaj sprz tu jedynie w odpowiednich warunkach opisanych w instrukcji Nie u ywaj sprz tu w niebezpiecznym i wybuchowym rodowisku...

Page 52: ...tylnej panelu Ostro nie otworzy obudow poci gaj c przedni cz do przodu Po wykonaniu po cze wewn trz panelu zamkn obudow Dokr ci ruby celem zapewnienia szczelno ci po czenia Pod czanie platformy Przep...

Page 53: ...trzymanie umo liwia przegl d tryb w aplikacji Menu Wej cie do menu Wy wietlanie licznik w zdarze cie ki audytu przed u one naci ni cie Funkcja menu kr tkie naci ni cie Yes Akceptacja aktualnie wy wiet...

Page 54: ...rodkiem czyszcz cym 4 2 Rozwi zywanie problem w W celu rozwi zania problem w technicznych skontaktuj si z autoryzowanym dealerem OHAUS Odwied nasz stron internetow www ohaus com w celu znalezienia bi...

Page 55: ...mi przepisami do punkt w zbieraj cych zu yty sprz t elektryczny i elektroniczny Informacje dotycz ce utylizacji zu ytego sprz tu elektrycznego i elektronicznego w Europie znajduj si na stronie interne...

Page 56: ...NDICATORS Ohaus Corporation 7 Campus Drive Suite 310 Parsippany NJ 07054 USA Tel 1 973 377 9000 Fax 1 973 944 7177 With offices worldwide www ohaus com 30283460 P N 30283460 A 2015 Ohaus Corporation a...

Reviews: