background image

EN-26                                                                    

Ranger™ 3000


Series


5. LEGAL FOR TRADE 

When the scale is used in trade or a legally controlled application it must be set up, verified and 
sealed in accordance with local weights and measures regulations. It is the responsibility of the 
purchaser to ensure that all pertinent legal requirements are met. 
The  Menu  Lock  switch  limits  changes  to  the  Cal,  Setup,  Readout,  Unit  and  Print  menus.  The 
switch  in  type  approved  models  may  set  some  scale  settings  as  required  by  the  approval 
agency. The switch may be secured using paper seals, wire seals or plastic ties.  
 

Note:

  When  LEGAL  FOR  TRADE  is  set  to  ON  (LFT  Switch  in  locked  position),  the  menu 

settings are affected as follows: 
 

Calibration (

C.A.L

) menu is not accessible 


Zero Range setting is locked at 2%. 


Stable Range setting is locked at 1d 


Auto-Zero Tracking setting is locked at 0.5d 


Units are locked at their current settings 


Stable Only is locked On 


Auto Print/ Continuous is disabled 


lb:oz is locked Off. 


5.1 Settings


Before verification and sealing, perform the following steps: 

1. Verify that the menu settings meet the local weights and measures regulations. 

2. Perform a calibration, see section 4.2. 

3. Set the switch to Locked. See figure 5-1. 
 

5.2 Verification 

The local weights and measures official or authorized service agent must perform the 
verification procedure. 


5.3 Sealing


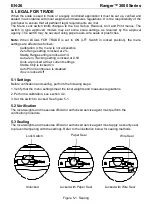
The local weights and measures official or authorized service agent must apply a security seal 
to prevent tampering with the settings. Refer to the illustration below for sealing methods. 


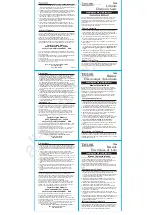
Figure 5-1. Sealing  


Paper Seal 

Wire Seal 

    Unlocked                         Locked with Paper Seal               Locked with Wire Seal 

Lock Switch 

Summary of Contents for Ranger R31P(E)1502

Page 1: ...Ranger 3000 Series Instruction Manual Manual_R31_V1...

Page 2: ......

Page 3: ...he scale only under ambient conditions specified in these instructions Disconnect the scale from the power supply when cleaning Do not operate the scale in hazardous or unstable environments Do not im...

Page 4: ...in a small round window on the front of the scale To level the scale adjust the feet so the bubble is centered in the circle Be sure the equipment is level each time its location is changed Figure 2...

Page 5: ...will automatically turn off when the batteries are fully charged TABLE 2 1 Symbol Charge level 0 to 10 Remaining 11 to 40 Remaining 41 to 70 Remaining 71 to 100 Remaining LED models During battery op...

Page 6: ...a tare value Clears the accumulation when the accumulation information is displayed Secondary Function Long Press Off Turns the scale Off Units Changes the weighing unit Mode Allows changing the appli...

Page 7: ...tonne symbol not used 7 Accumulation symbol 15 Scale symbol not used 8 Calibration Menu Mode symbol TABLE 3 3 LED Symbols Item Description Item Description 1 NET symbol 8 Calibration Menu Mode symbol...

Page 8: ...ow Loads Lower limit Figure 3 4 Below view of Ranger 3000 3 2 Turning Scale On Off To turn the scale on press and hold the On Zero Off button for 1 second The scale performs a display test momentarily...

Page 9: ...e sample material The display shows the percentage of the sample compared to reference weight 7 To clear the stored reference press and hold Mode until Percnt is displayed Press Yes when Clr ref is di...

Page 10: ...ht If the sample is within the target weight range the green LED will light If the sample is over the target weight range the red LED will light Note Press Function to view the low and high check limi...

Page 11: ...The stored value then displays with the first digit highlighted 000000 Pcs Repeatedly press No until the desired number appears Press Yes to accept and highlight the next digit Repeat until all the di...

Page 12: ...ght larger than 5d will be displayed and held Semi automatic operation DYNAMIC is set to SEMI in the Mode menu 1 Press and hold Mode until dYNAmM Dynamic is displayed rEAdY Ready will then be displaye...

Page 13: ...key to display the statistical information To clear the accumulation data press the Tare key while the statistical information is displayed The display shows Clr aCC Press the Yes key to clear the sto...

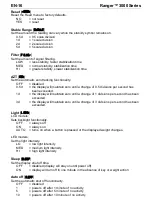
Page 14: ...vailable in all models 1 This menu item is only used in models with LED display When LEGAL FOR TRADE is set to ON Lock Switch in locked position the menu settings are affected as follows Calibration C...
Page 15: ...weighing results Before performing the calibration be sure to have the appropriate calibration weights as listed in table 4 1 Ensure that the LFT switch calibration lock is set to unlocked position S...

Page 16: ...the top of the current menu 4 3 Setup Menu Enter this menu to set scale parameters Reset reset Reset the Setup menu to factory defaults NO not reset YES reset Power on unit pwWr UN Set the unit of me...

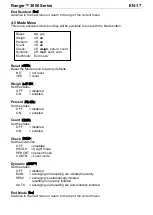
Page 17: ...g OVER UNDER the beeper will sound when the weight is above the Over setting OVER the beeper will sound when the weight is below the Under setting or above the Over setting Beeper Key BP key Set wheth...

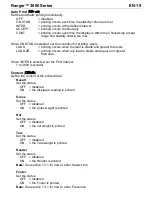
Page 18: ...ded 1d the display will maintain zero until a change of 1 divisions per second has been exceeded 3d the display will maintain zero until a change of 3 divisions per second has been exceeded Light LIGH...

Page 19: ...d Count COUNt Set the status OFF disabled ON enabled Check CHECk Set the sub mode OFF disabled WEIGH weight mode PERCNT percent mode COUTN count mode Dynamic DYNAmM Set the status OFF disabled MAN ave...

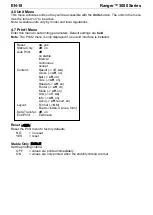
Page 20: ...econd interface is installed Reset reset Reset the Print menu to factory defaults NO no reset YES reset Stable Only Stable Set the printing criteria OFF values are printed immediately ON values are on...

Page 21: ...LOAD ZR printing occurs when any load is stable and equal to or greater than zero When INTER is selected set the Print Interval 1 to 3600 seconds Content CONtNt Define the content of the printed data...

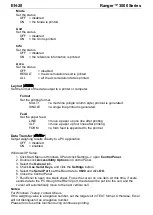
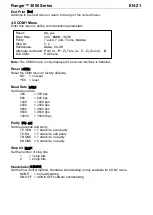
Page 22: ...rintout Data Transfer data tr Output weighing results directly to a PC application OFF disabled ON enabled Windows XP Setup 1 Click Start Menu in Windows XP and click Settings open Control Panel 2 Dou...

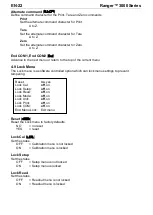
Page 23: ...0 4800 bps 9600 9600 bps 19200 19200 bps Parity paritY Set the data bits and parity 7 EVEN 7 data bits even parity 7 ODD 7 data bits odd parity 7 NONE 7 data bits no parity 8 NONE 8 data bits no parit...

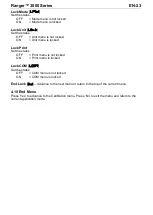
Page 24: ...nu The Lock menu is a software controlled option which can lock menu settings to prevent tampering Reset reset Reset the Lock menu to factory defaults NO no reset YES reset Lock Cal l CAL Set the stat...

Page 25: ...nu is locked Lock Print Set the status OFF Print menu is not locked ON Print menu is locked Lock COM l COmM Set the status OFF COM menu is not locked ON COM menu is locked End Lock End Advance to the...

Page 26: ...ver for the weigh below opening Install the hook into the access hole at the bottom of the scale as shown Do not over tighten tighten finger tight Mount the scale onto an appropriate assembly that all...

Page 27: ...1 42 19 43 26 17 16 16 15 15 14 14 13 13 12 12 43 26 44 32 17 17 16 16 15 15 14 14 13 13 12 44 32 45 38 18 17 17 16 16 15 15 14 14 13 13 45 38 46 45 18 18 17 17 16 16 15 15 14 14 13 46 45 47 51 19 18...

Page 28: ...le Zero Range setting is locked at 2 Stable Range setting is locked at 1d Auto Zero Tracking setting is locked at 0 5d Units are locked at their current settings Stable Only is locked On Auto Print Co...

Page 29: ...n event counter CFG will index by 1 when exiting the menu if one or more of the following menu settings are changed Zero Range Stable Range Auto Zero Tracking AZT Units kg g oz lb or lb oz or Stable O...

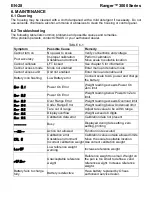
Page 30: ...charge the battery Err 8 1 Power On Error Weight reading exceeds Power On Zero limit Err 8 2 Power On Error Weight reading below Power On Zero limit Err 8 3 Over Range Error Weight reading exceeds Ov...

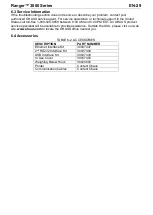
Page 31: ...tween 8 00 AM and 5 00 PM EST An OHAUS product service specialist will be available to provide assistance Outside the USA please visit our web site www ohaus com to locate the OHAUS office nearest you...

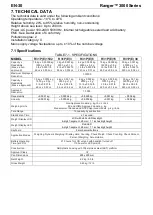
Page 32: ...3 lb x 0 001 lb 48 oz x 0 02 oz 3 kg x 0 001 kg 3000 g x 1 g 6 lb x 0 002 lb 96 oz x 0 04 oz 6 kg x 0 002 kg 6000 g x 2 g 15 lb x 0 005 lb 240 oz x 0 1 oz 15 kg x 0 005 kg 15000 g x 5 g 30 lb x 0 01...

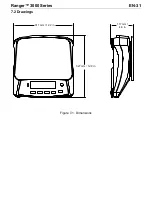
Page 33: ...Ranger 3000 Series EN 31 7 2 Drawings Figure 7 1 Dimensions 311 mm 12 2 in 327 mm 12 9 in 117 mm 4 6 in...

Page 34: ...uto print OFF Z Same as pressing Zero Key T Same as pressing Tare Key xT Download Tare value in grams positive values only Sending 0T clears tare if allowed PU Print current unit g kg lb oz lb oz t c...

Page 35: ...s entered 1 23 kg T Tare value line If Printx Content Tare is ON and a tare value is entered REF WGT 0 012 kg Information line If Printx Content Info is ON MODE PERCENT Mode line If Printx Content App...

Page 36: ...logy sticker on the descriptive data plate They may be put into service immediately Weighing Instruments to be verified in two stages have no green M metrology on the descriptive data plate and bear o...

Page 37: ...line at europe ohaus com europe en home support weee aspx Thank you for your contribution to environmental protection FCC Note This equipment has been tested and found to comply with the limits for a...

Page 38: ...been damaged by accident or misuse exposed to radioactive or corrosive materials has foreign material penetrating to the inside of the product or as a result of service or modification by other than...

Page 39: ......

Page 40: ...Avec des bureaux dans le monde entier Weltweite Gesh ftsstellen Con uffici in tutto il mondo www ohaus com 30037453 P N 30037453 2012 OHAUS Corporation all rights reserved todos los derechos reservado...

Reviews: