background image

Scout

TM


SJX Balances


Quick Start Guide


Scout

TM


SJX Balances


ii

           Corporation  www

.

ohaus.com


Step-2 

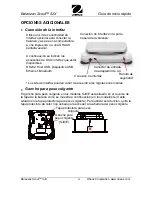
Install the Pan  

For SJX/E: 

Rectangular pan: 

Place


diagonally on 

sub-platform and rotate counter-
clockwise until it locks. 

Round pan

: Set straight down on 

subplatform. 

For SJX

: Install the stainless steel pan 

directly on the subplatform. 


Step-3 

Connect Power 

Connect the AC Adapter to the balance 
input jack. 

Battery Installation 

Install the Four “AA” (LR6) batteries 
(not included) with polarity as shown in 
the battery compartment.


Step-4 

Level the balance 

Level the balance before using by 
adjusting the feet until the air bubble is 
centered


SAFETY PRECAUTIONS


CAUTION:

 Read all safety warnings before installing, making connections, or 

servicing this equipment. Failure to comply with these warnings could result in 
personal injury and/or property damage. Retain all instructions for future reference. 


Verify that the local AC power supply voltage is within the input voltage 
range printed on the AC adapt

er’s ratings label. 


Only connect the AC adapter to a compatible grounded socket. 


Position the instrument such that the AC adapter can be easily 
disconnected from the socket. 


Position the power cord so that it does not pose a potential obstacle or 
tripping hazard. 


Operate the equipment only under ambient conditions specified in the user 
instructions. 


Do not operate the equipment in hazardous or explosive environments. 


Disconnect the equipment from mains power before cleaning or servicing. 


Service should only be performed by authorized personnel.


AC Adapter Jack 

Battery 

Compartment 

For SJX/E 

Summary of Contents for Scout SJX

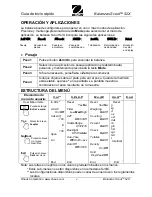
Page 1: ...Plug SELECTING THE LOCATION Place on a firm steady surface with sufficient space Avoid excessive air currents vibrations heat sources or rapid temperature changes PREPARATION FOR USE Step 1 Release th...

Page 2: ...nstalling making connections or servicing this equipment Failure to comply with these warnings could result in personal injury and or property damage Retain all instructions for future reference Verif...

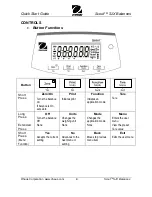
Page 3: ...nitiates print Function Initiates an application mode Tare Tare Long Press Extended Press Off Turns the balance Off None Units Changes the weighing unit None Mode Changes the application mode None Men...

Page 4: ...No to select an alternate weight C will blink while the reading is stored The display will show done if the calibration was successful The balance returns to the previous application mode and is ready...

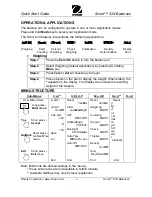
Page 5: ...objects on the pan to display the weight When stable the appears on the display The display then shows the resulting weight of the sample MENU STRUCTURE Sub Menus C a l S E t U P M o d E U n i t E n d...

Page 6: ...t USB Device Ethernet Bluetooth Interface connection on the rear of the balance Interface kits may vary according to local regulations Weigh Below Hook The weigh below hook on SJX E models is located...

Page 7: ...4 30 EU EMC 2014 35 EU LVD and 2014 31 EU NAWI The EU Declaration of Conformity is available online at www ohaus com ce This product complies with the EU Directive 2002 96 EC WEEE Please dispose of th...

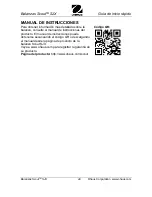
Page 8: ...re detailed information about the balance please refer to the product instruction manual The instruction manual can be obtained either by scanning the QR code or by going to the Scout SJX product page...

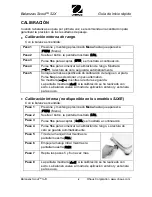
Page 9: ...TALACI N Coloque la balanza sobre una superficie firme y con suficiente espacio Evite el exceso de corrientes de aire vibraciones fuentes de calor o cambios bruscos de temperatura PREPARACI N PARA EL...

Page 10: ...onexiones o efectuar reparaciones en este equipo El incumplimiento de estas advertencias puede causar lesiones personales y o da os a la propiedad Conserve todas las instrucciones para referencia futu...

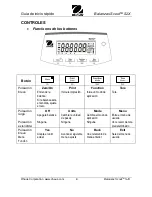
Page 11: ...nicia la impresi n Function Inicia un modo de aplicaci n Tare Tara Pulsaci n larga Pulsaci n extendida Off Apaga la balanza Ninguna Units Cambia la unidad de pesaje Ninguna Mode Cambia el modo de apli...

Page 12: ...un peso alternativo Se mostrar C mientras la lectura se guarda La pantalla mostrar done si la calibraci n se ha realizado con xito La balanza vuelve al modo de aplicaci n anterior y est lista para su...

Page 13: ...sobre el plato para ver el peso Cuando la medici n est estable aparece en la pantalla La pantalla muestra a continuaci n el peso resultante de la muestra ESTRUCTURA DEL MEN Elementos de men de usuario...

Page 14: ...Conexi n de interfaz en la parte trasera de la balanza Los kits de interfaz pueden variar de acuerdo a las regulaciones locales Gancho para peso colgante El gancho para peso colgante en los modelos S...

Page 15: ...30 EU EMC 2014 35 EU LVD y 2014 31 UE NAWI La Declaraci n de Conformidad de la UE est disponible en l nea en www ohaus com ce Este producto cumple la directiva de la UE 2002 96 EC WEEE Deseche este p...

Page 16: ...ci n m s detallada sobre la balanza consulte el manual de instrucciones del producto El manual de instrucciones puede obtenerse escaneando el c digo QR o descargando el manual desde la p gina de produ...

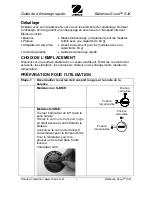
Page 17: ...DE L EMPLACEMENT Disposer sur une surface stable avec un espace suffisant viter les courants d air excessifs les vibrations les sources de chaleur ou des changements rapides de temp rature PR PARATION...

Page 18: ...jusqu centrer la bulle d air MESURES DE S CURIT ATTENTION Lire tous les avertissements de s curit avant d installer de raccorder ou d entretenir cet quipement Ne pas se conformer ces avertissements p...

Page 19: ...Bouton Pression br ve Zero On Mise en service de la balance SI la balance est sur On remise z ro Print D clenche l impression Function D clenche un type d application Tare Tare Pression longue Appui p...

Page 20: ...si l talonnage est r ussi La balance revient au type d application pr c dente et est pr tre tre utilis e talonnage de l intervalle interne pas disponible pour les mod les SJX E Balance en marche tape...

Page 21: ...ndique ensuite le poids de l chantillon ORGANISATION DU MENU Sous menus C a l S E t U P M o d E U n i t E n d User Menu Items In CAL A CAL On Off CAL Adj 100 0 100 Span Lin Reset Yes No Filter Low Med...

Page 22: ...onnexion larri re de la balance L interface de connexion peut varier selon les r glementations locales Pes e sous crochet La pes e sous crochet pour les mod les SJX E se situe sur la face oppos e du c...

Page 23: ...E LVD et 2014 31 UE NAWI La d claration de conformit UE est disponible en ligne sur le site www ohaus com ce Le pr sent produit est conforme la Directive 2002 96 CE WEEE liminer ce produit conform men...

Page 24: ...s informations sur la balance se reporter au manuel d instructions On peut obtenir le manuel d instructions soit par balayage du code QR code ou en se rendant sur la page produit Scout SJX pour le t l...

Reviews: