4-8
CHAPTER 4 MAINTENANCE PROCEDURES
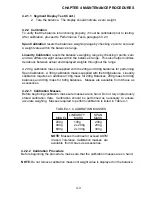
4.2.3.3 Centered Load Test (Cont.)
Test
1. Place a mass equal to the maximum capacity of the balance on the center of
the Pan (6) and note the reading.
2. If the displayed weight is greater than 1 count higher or lower than the value
of the applied mass, proceed to paragraph 4.2.2.2 and calibrate the balance.
The balance should now be calibrated in grams.
3. After completing the above adjustments, check the linearity at intermediate
positions in the range between zero and maximum capacity. The displayed
weight readings should be equal to the applied mass. Tolerance is + 1 count
for each of the respective weight readings. If the displayed weight values are
in excess of tolerance count, proceed to paragraph 4.2.2.2 and perform a
Linearity Calibration.
4.2.4
4.2.4
4.2.4
4.2.4
4.2.4 Down Stop Adjustment
Down Stop Adjustment
Down Stop Adjustment
Down Stop Adjustment
Down Stop Adjustment
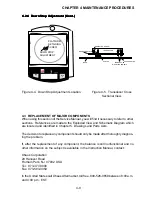
Use the following procedure to adjust the Downstop Screw (21) on the Transducer (8)
so that the Pan (6) will “bottom out” when the weight on the Pan (6) is 150% of the
balance’s capacity. Refer to Figures 4-4 and 4-5.
1. Place a mass on the Pan (6) equal to 100% of the balance capacity.
2. Gently press down on the Pan (6) and verify that there is downward
movement.
3. Place a mass on the Pan (6) equal to 150% balance capacity .
4. Gently press down on the Pan (6) and check for downward movement. If the
Pan (6) does not move downward, the Down Stop (21) adjustment is correct.
Proceed to step 7.
5. If the Pan (6) moves down when pressed, remove the Pan (6) , rotate the
Downstop Screw (21) 1/8 turn clockwise using a small flat blade screwdriver.
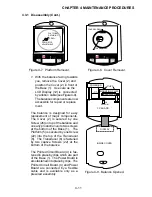
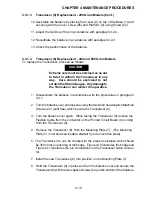
See Figure 4-4 for Down Stop location and Figure 4-5 which is cross sectional
view of the Transducer (8).
6. Repeat steps 4 and 5 as necessary until there is no downward movement.
7. Repeat the entire procedure to verify that with 100% capacity on the Pan (6),
it moves down when pressed, and with 150% capacity on the Pan (6), it does
not move when pressed.
Summary of Contents for SCOUT
Page 1: ...OhausCorporation 29HanoverRoad FlorhamPark NJ 07932 0900 ELECTRONIC BALANCES SERVICE MANUAL TM...
Page 6: ...i v...
Page 10: ...1 4 CHAPTER 1 INTRODUCTION...
Page 38: ...5 2 CHAPTER 5 DRAWINGS AND PARTS LISTS...
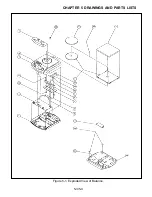
Page 39: ...5 3 CHAPTER 5 DRAWINGS AND PARTS LISTS Figure 5 1 Exploded View of Balance 5 3 5 4...
Page 43: ...SCOUT ELECTRONIC BALANCES P N 300040 010 R1198...
Page 45: ...e e e...
Page 47: ......


