EN-5
Valor 5000 Series
Pan
Leveling feet x 4
Level Indicator
Load pads x 4
Foot Switch Connector
2 INSTALLATION
2.1 Unpacking
Unpack and verify that the following components have been included:
• Scale
• Instruction Manual
• Weighing Pan
• Warranty Card
• AC Adapter
• Weights and Measures Sealing Kit
Save the packaging material. Repack the scale in the original packaging to ensure safe storage or
transport of the product.
2.2 Installing Components
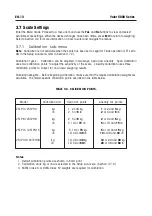
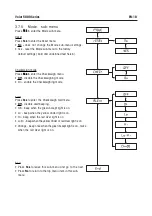
Place the weighing pan securely over the four load pads on the top of the scale. If using the optional
foot switch, plug the foot switch connection into the appropriate receptacle on the underside of the
scale (refer to Figure 2-3).
2.3 Selecting the Location
Operate the scale on a firm, level surface. Avoid
locations with rapid temperature changes or
excessive dust, air currents, vibrations,
electromagnetic fields or heat.
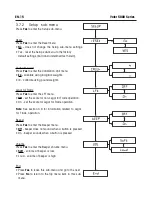
Adjust the leveling feet so that the bubble is
centered in the circle of the level indicator.
2.4 Connecting Power
2.4.1
AC Power
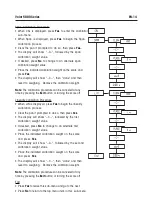
Check to ensure that the voltage printed on the scale’s data label matches your local line voltage.
If this is not the case, DO NOT connect the scale to the power supply. Contact an OHAUS dealer for
assistance.
Connect the AC adapter to the wall outlet. Connect the plug into the power receptacle on the underside
of the scale.
Figure 2-3. Bottom of Scale.
Power Receptacle
Figure 2-1. Installing Scale Components.
Figure 2-2. Leveling Indicator.
NOTE
: The scale should be leveled each time its location is changed.
Summary of Contents for VALOR 5000 H Series
Page 2: ......
Page 91: ...EN 1 FD Series...


