CHAPTER 2 DIAGNOSTIC GUIDE
Valor
™
7000 Series Service Manual
2-5
Ohaus Corporation www.ohaus.com
General Load Test
This test checks the Main PC Board circuitry by simulating accurate Load Cell voltages at zero
load, 50% and 100% load capacities.
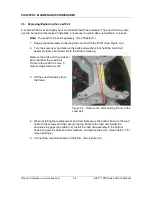
Disconnect power from the scale, and remove the Top housing. (See Section 3.3.1.) Leave the
Mechanical Switch connected to the scale. Disconnect the battery.
1. Disconnect the Load Cell cable from the main PC Board.
2. With the Simulator set to zero, solder its cable leads to their counterparts on the
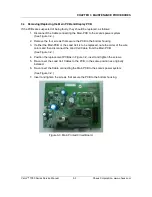
PCB, using the Load Cell Cable solder points on the PCB. (See Figure 2-1.).
3. Connect a known good AC Adapter to the scale and connect to a power source.
4. Turn on the scale. An under load error may appear. This is normal.
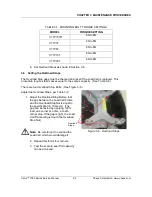
5. Set the scale to indicate weight in kilograms (kg) and set the calibration value to
maximum span value.
6.
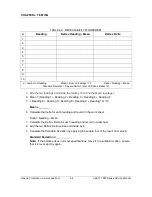
Adjust the Simulator to simulate 0% load, 50% load and 100% load for the capacity
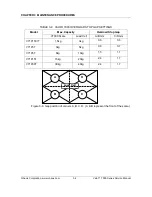
that the scale is rated for. (See Table 2.3 for values to use.) If the resulting readings
are unstable, the Main PC Board is defective.
7.
Use the Simulator to calibrate the scale in the next procedure to verify if the Main PC
Board is good or bad.
Calibration Test
This test calibrates the scale using the simulator and can verify that the Main PC Board is
functioning properly or improperly.
1. With the scale on, enter the scale menu and perform a span calibration.
(See Appendix A.)
2. Follow the scale prompts. When the scale indicates a given weight to be placed
on the scale, set the simulator to an equivalent value based on Table 2-3.
3. Upon completion of calibration, the PCB can be further checked using the Simulator
to simulate various weight values. If simulator settings and weight readings on the
scale agree, the PCB is functional. If the scale readings vary, or do not agree with
readings in Table 2-3, the Main PC Board is defective and should be replaced.
(See Chapter 3.)


