3
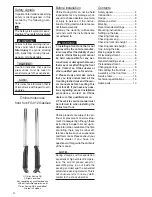
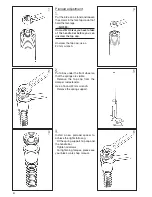
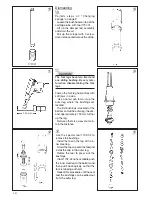
cated at the bottom of the fork leg,
fig 1, the rebound adjuster at the top,
fig 2.
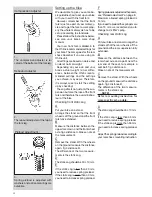
Spring preload is adjusted with
washers, fig 3, and optional springs
are available to suit different tracks
and riders.
In the legs there are also “air-
springs“ (the air trapped above the
oil) that work together with the “real“
spring. You adjust the air-spring by
raising or lowering the oil level in the
legs.
By using different combinations of
springs and air-springs you can al-
ter the characteristic of the fork. For
example, a soft spring in combina-
tion with a small air-spring (high oil
level) makes the fork progressive,
see “Fine-tuning the bike“.
Marking
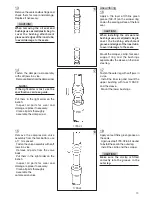
All Öhlins front forks are marked. You
will find the part number on the in-
side of the fork bottom.
Your Öhlins front fork has the fol-
lowing marking:
FG 012 GasGas
Recommended settings
The front fork in your kit is adjusted
to the Öhlins recommended setting
for your bike, see “Making adjust-
ments“. We advise you to use this
as your start setting.
Introduction
Öhlins Racing congratulates you on
your choice of front fork for your mo-
tocross bike.
All Öhlins products are designed
with just one aim; to win races. To
design a winner you need a concept
starting with a unique know-how.
You add engineering skill, precision
and the best material available. The
result is quality, endurance and win-
ning performance.
Your new Öhlins front fork is devel-
oped from experience gained during
years of successful cooperation with
the World Championship winning
works motocross teams.
Spring rates and damping forces
are developed just for your bike. The
design and the settings are conse-
quently the results of extensive test-
ing and no guesswork!
Öhlins shock absorbers and front
forks have dominated the motorcy-
cle scene for several years and have
captured more World Championship
titles than any other brand, over 80
titles!
A well equipped network of author-
ised Öhlins service centres around
the world, with specially trained me-
chanics, can help you with person-
ally tuned settings, service, repairs
and spare parts.
Design
Öhlins new up-side-down (USD)
front fork is designed to combine the
advantages of comfortable, safe
conventional forks and rigid, light
USD forks. The result is a unique
combination of being rigid, precise
in corners and during hard braking
yet comfortable, forgiving when
“over-landing“ and in big bumps.
Your new Öhlins USD front fork has
aluminium outer legs and 46 mm
steel inner legs, with a polished sur-
face for lowest possible friction.
The legs also feature a completely
new bushing design with fixed and
one sliding bushing.
The new USD fork features the
Öhlins championship winning car-
tridge damping system.
The fork is fully adjustable with
external adjuster for compression-
and rebound damping.
The compression adjuster is lo-
Mounting instructions
WARNING
1. It is advisable to have an Öhlins
dealer or a qualified mechanic to
fit your front fork kit.
2. To install the kit you need your
motorcycle’s work shop manual.
3. When working on your motorcy-
cle, support it securely so it does
not fall over.
The Öhlins front fork is designed to
fit your bike’s standard triple clamps
and to use the standard brake com-
ponents and wheel.
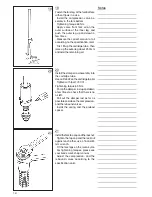
A
Put your bike on a stand and remove
the front wheel, the front brake com-
ponents and the fork legs from the
bike according to the work shop
manual.
CAUTION!
1. The outer legs, both left and right,
should be adjusted evenly in the
fork crown.
2. The Öhlins fork legs feature
grooves on top of the outer fork legs
to make adjustment of the fork
height easier. The distance between
the grooves is 4 mm.
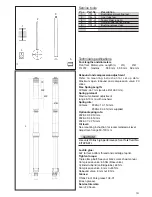
B
Fit the Öhlins front fork legs. For rec-
ommended front fork mounting
height see mounting instruction.
C
Fit the brake components and the
front wheel according to the work
shop manual.
D
Tighten all screws. For maximum
torque, please see your bike’s work
shop manual.

