background image

Made in P.R.C

Manuel d’utilisation

Gebrauchsanleitung

Libretto istruzioni d’uso

Instruction manual

FR

DE

IT

EN

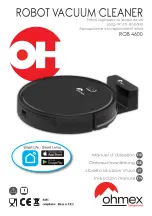
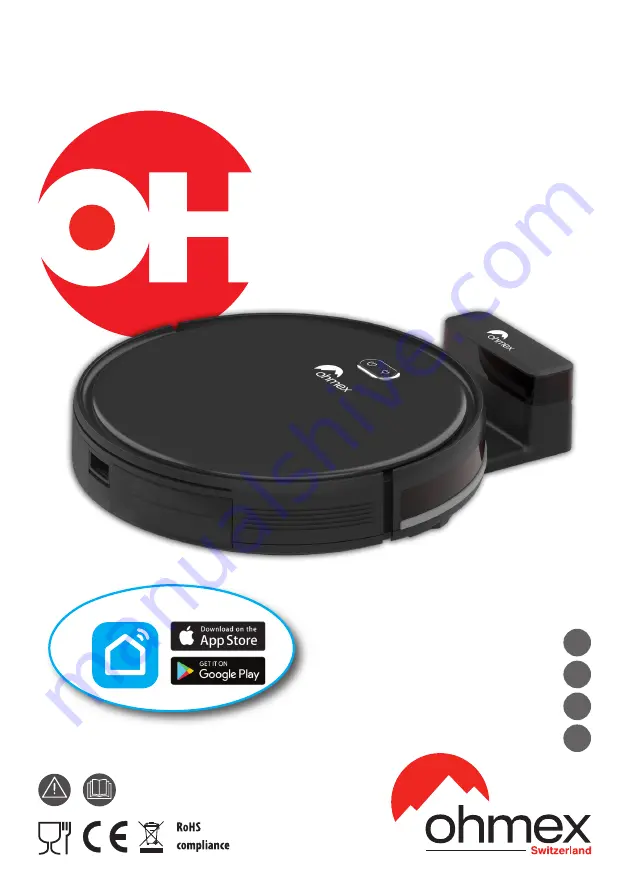
ROB 4600

ROBOT VACUUM CLEANER

Robot aspirateur et laveur de sol

Saug-Wisch-Roboter

Aspirapolvere e lavapavimenti robot

Smart Life - Smart Living

Summary of Contents for ROB 4600

Page 1: ...isation Gebrauchsanleitung Libretto istruzioni d uso Instruction manual FR DE IT EN ROB 4600 ROBOT VACUUM CLEANER Robot aspirateur et laveur de sol Saug Wisch Roboter Aspirapolvere e lavapavimenti rob...

Page 2: ...MMAIRE Instructions d utilisation et d entretien INHALT Gebrauchs und Wartungsanleitungen INDICE Istruzioni per l uso e la manutenzione INDEX Instructions for use and maintenance FR DE IT EN 5 19 33 4...

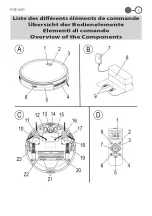
Page 3: ...edieningselementen Liste des diff rents l ments de commande Indicaci n de los elementos de manejo Elementi di comando Przegl d element w obs ugi A kezel elemek ttekint se Liste des diff rents l ments...

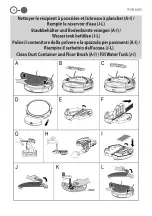
Page 4: ...L Pulire il contenitore della polvere e la spazzola per pavimenti A I Riempire il serbatoio dell acqua J L Oczy ci pojemnik na kurz i szczotk do pod ogi A I Nape ni zbiornik wody J L Tiszt tsa meg a p...

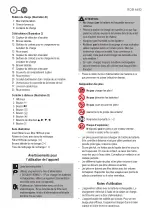
Page 5: ...n 39 Mise au rebut de la batterie rechargeable Mise au rebut de la batterie 39 Signification du symbole Poubelle 39 D ballage de l appareil 1 Sortez l appareil de son emballage 2 Retirez tous les mat...

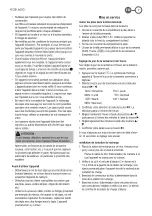
Page 6: ...lumi re directe du soleil ou d autres sources de chaleur N aspirez pas l humidit ou les liquides N utilisez pas la fonction d essuyage si vous souhaitez utiliser l appareil selon un horaire pr cis D s...

Page 7: ...ur brosse ou emp cher l appareil de nettoyer D tachez tous les objets susceptibles de tomber par exemple vases petites lampes objets de d coration etc Veillez ce qu aucun c ble cordon ou frange proven...

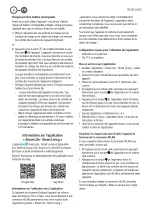
Page 8: ...d utiliser l appareil via votre r seau domestique Pour ce faire vous devez disposer d une connexion WLAN permanente avec votre routeur et de l application gratuite Smart Life Smart Living L applicati...

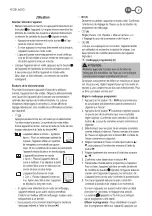
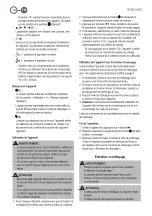
Page 9: ...e il passe auto matiquement ce dernier Vous pouvez tout moment interrompre le mode de nettoyage entam l aide du bouton 3 D marrer ou arr ter l appareil en mode veille Confirmez l entr e lors du r glag...

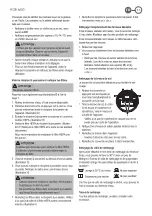
Page 10: ...de l appareil et maintenez le enfonc pour le mettre en marche 3 Appuyez sur le bouton Si les conditions de la pi ce le permettent l appareil nettoie la pi ce en mode zigzag 4 Si n cessaire s lectionne...

Page 11: ...le r cipient poussi re que lorsqu ils sont compl tement secs 7 Remettez les filtres dans le r cipient poussi re Veillez ce que la douille et le filtre HEPA soient correctement ins r s Illustration I 8...

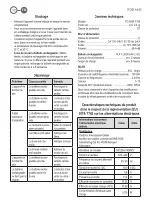
Page 12: ...e Rechargez la batterie rechar geable La batterie rechargeable ne tient pas la charge La batterie rechar geable est en fin de vie Contactez notre service apr s vente ou votre revendeur Donn es techniq...

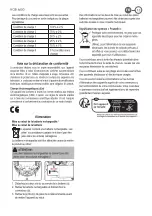
Page 13: ...u rebut des piles batteries rechargeables peuvent tre obtenues aupr s des autorit s locales ou des conseils municipaux Signification du symbole Poubelle Prot gez votre environnement ne jetez pas vos a...

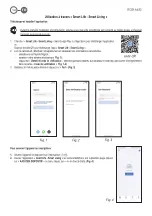
Page 14: ...Lors du lancement effectuez l enregistrement en saisissant vos informations personnelles s lectionner le Pays la R gion saisissez votre adresse lectronique Fig 1 cliquezsur Obtenirlecodedev rificatio...

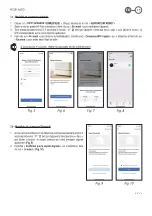
Page 15: ...ot clignote rapidement 4 Faire clic sur En avant pour terminer la r initialisation S lectionnez Connexion Wi Fi rapide sur le t l phone et faire clic sur En avant pour entrer dans l tat de veille Si l...

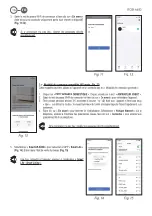
Page 16: ...ignote d abord rapidement puis lentement 4 Faire clic sur En avant pour terminer la r initialisation S lectionner Hotspot Network sur le t l phone acc der l interface des param tres r seau faire clic...

Page 17: ...Fig 17 6 D s que le dispositif a t raccord correctement la lumi re blanche du bouton Home s teint Fig 18 Nettoyage programm 1 Une fois entr sur la page cran du dispositif connect cliquer sur Programme...

Page 18: ...a d terminer sa position Fig 25 3 Autres interfaces a Centre personnel sur cette page il est possible de configurer des surnoms d utilisateurs partager le dispositif avec des parents et des amis et fo...

Page 19: ...Richtlinienkonformit t 13 Entsorgung 13 Akku Batterieentsorgung 13 Bedeutung des Symbols M lltonne 13 Auspacken des Ger tes 1 Nehmen Sie das Ger t aus seiner Verpackung 2 Entfernen Sie s mtliches Verp...

Page 20: ...s Wasser herauszutropfen Dies k nnte zu Sch den an Parkett und Laminat f hren Zudem laden Sie den Akku grunds tzlich ohne Wassertank um die Gefahr eines Stromschlags zu vermeiden Verlegen Sie das Kabe...

Page 21: ...Vasen kleine Lampen Dekorations artikel usw Sorgen Sie daf r dass dem Ger t keine Kabel Kordeln oder Fransen z B von Gardinen Tischdecken oder Teppichen zug nglich sind Falten Sie ggf die Teppich kant...

Page 22: ...wir hier jedoch keine genauere Beschreibung geben Um ein unbeabsichtigtes Einschalten von unterwegs vorzu beugen empfehlen wir das Ger t auszuschalten und den Netzteilstecker der Ladestation zu ziehe...

Page 23: ...Uhrzeit Siehe Kapitel Inbetrieb nahme Wochentag und Uhrzeit einstellen 5 Wenn Sie diese Taste dr cken beendet das Ger t den Betrieb und sucht die Ladestation auf Die beiden Kont rollleuchten in den T...

Page 24: ...n solange bis es den Raum vollst ndig gereinigt hat oder die Akkukapazit t auf ca 15 gesunken ist Das Ger t f hrt dann auto matisch zur Ladestation zur ck Wenn Sie die Taste dr cken beendet das Ger t...

Page 25: ...rrekt eingesetzt sind Abb I 8 Setzen Sie den Staubbeh lter wieder in das Ger t Er muss mit einem Klick einrasten Seitenb rsten reinigen wechseln Wenn die Seitenb rsten verschmutzt sind k nnen Sie dies...

Page 26: ...blockiert Reinigen Sie die Bodenb rste Das Ger t stoppt den Betrieb Der Akku ist leer Laden Sie den Akku auf Der Akku h lt die Aufladung nicht Der Akku hat das Ende seiner Le bensdauer erreicht Wenden...

Page 27: ...Kommunen oder die Gemeindever waltungen Bedeutung des Symbols M lltonne Schonen Sie unsere Umwelt Elektroger te ge h ren nicht in den Hausm ll Nutzen Sie die f r die Entsorgung von Elektro ger ten vo...

Page 28: ...e sich beim ersten Zugriff und geben Sie Ihre Zugangsdaten ein W hlen Sie Ihr Land Ihre Region geben Sie Ihre E Mail Adresse ein Abb 1 dr cken Sie die Schrift Den Verifizierungscode erhalten warten Si...

Page 29: ...schnell 4 Klicken Sie auf Weiter um das Zur cksetzen abzuschlie en W hlen Sie Schnelle Wi Fi Verbindung auf dem Smartphone und klicken Sie auf Weiter um in den Standby Modus zu wechseln Erfolgt die V...

Page 30: ...gsam 4 W hlen Sie Hotspot Netzwerk auf dem Smartphone rufen Sie die Schnittstelle f r die Netzwerkeinstellungen auf tippen Sie auf Verbinden um auf die Wi Fi Einstellungen des Smartphone zuzugreifen E...

Page 31: ...r t korrekt verbunden wurde erlischt das wei e Licht der Home Taste Abb 18 Programmierte Reinigung 1 Sobald man auf die Bildschirmseite des verbundenen Ger ts gelangt ist auf Programm klicken 2 Anschl...

Page 32: ...bt ein Ger usch ab und die Position des Roboters kann ermittelt werden Abb 25 3 Andere Schnittstellen a Pers nliches Zentrum Auf dieser Seite k nnen Sie Benutzernamen festlegen das Ger t f r Familie u...

Page 33: ...Smaltimento 57 Smaltimento della batteria ricaricabile Smaltimento della batteria 57 Significato del simbolo Eliminazione 57 Disimballaggio dell apparecchio 1 Togliere l apparecchio dal suo imballaggi...

Page 34: ...esposto alla luce diretta del sole o ad altre fonti di calore Non aspirare umidit o liquidi Non utilizzare la funzione di pulizia se si desidera far funzionare l apparecchio in modo programmato Non a...

Page 35: ...liarsi nell ugello o impedire all apparecchio di pulire Rimuovere tutti gli oggetti che potrebbero essere urtati ad es vasi piccole lampade oggetti decorativi ecc Assicurarsi che l apparecchio non abb...

Page 36: ...ratuita Smart Life Smart Living Tramite l app possibile accedere comodamente a tutte le funzioni dell apparecchio Poich l app viene costantemente migliorata non possiamo fornire una descrizione pi det...

Page 37: ...ora Vedere il capitolo Messa in fun zione Impostazione del giorno della settimana e dell ora 5 Premendo questo tasto l apparecchio smette di fun zionare e cerca la stazione di ricarica Le due spie di...

Page 38: ...o a quando non ha pulito completamente la stanza o la capacit della bat teria scesa a circa il 15 L apparecchio torna quindi automaticamente alla stazione di ricarica Se si preme il tasto l apparecchi...

Page 39: ...Rimettere il contenitore della polvere nell apparecchio Dovrebbe bloccarsi in posizione con un clic Pulizia sostituzione delle spazzole laterali Se le spazzole laterali sono sporche possibile pulirle...

Page 40: ...00mW Gamma di frequenza 2 4GHz Canali 1 13 Supporto Wi Fi protected access WPA WPA2 Si riserva il diritto di apportare modifiche tecniche e di design nel corso dello sviluppo del prodotto Specifiche d...

Page 41: ...i o i comuni Significato del simbolo Eliminazione Salvaguardare l ambiente gli elettrodomestici non vanno eliminati come rifiuti domestici Per l eliminazione degli elettrodomestici fare uso dei posti...

Page 42: ...accesso effettuare la registrazione e compilare le proprie credenziali selezionare il proprio Paese Regione inserire il proprio indirizzo e mail Fig 1 premere la scritta Ottieni il codice di verifica...

Page 43: ...l robot lampeggia velocemente 4 Fare clic su Avanti per terminare il ripristino Selezionare Connessione rapida Wi Fi sul telefono cellulare e fare clic su Avanti per entrare nello stato di attesa Se l...

Page 44: ...prima velocemente e poi lentamente 4 Fare clic su Avanti per terminare il ripristino Selezionare Hotspot Network sul telefono cellulare accedere all interfaccia delle impostazioni di rete fare clic su...

Page 45: ...erativa Fig 17 6 Dopo che il dispositivo stato collegato correttamente la luce bianca del tasto Home si spegne Fig 18 Pulizia pianificata 1 Una volta entrati nella schermata del dispositivo collegato...

Page 46: ...suono e si potr determinare la posizione del robot Fig 25 3 Altre interfacce a Centro personale in questa pagina possibile impostare soprannomi utente condividere il dispositivo con parenti e amici e...

Page 47: ...ry Disposal 21 Meaning of the Dustbin Symbol 21 Unpacking the Appliance 1 Remove the appliance from its packaging 2 Remove all packaging material such as foils filling material cable ties and cardboar...

Page 48: ...ren Observe polarity Danger of explosion Do not expose batteries to intense heat such as sunshine fire or similar Batteries can leak battery acid If the remote control will not be used for a longer pe...

Page 49: ...3 Confirm your selection with the button The selection changes to the hour entry 4 Now set the hour with the buttons and then change to the minute input with the button 5 Also set the minutes with the...

Page 50: ...nnection proceed as follows 1 If the appliance is in sleep mode switch on the appliance by briefly pressing and holding the button on the appliance 2 Press and hold the button on the Robot Vacuum Clea...

Page 51: ...ton 7 Now transmit the schedule to the appliance To do this the appliance must be in standby control lamp in the button flashes Point the remote control at the appliance and press the button A beep fr...

Page 52: ...aning Maintenance and Cleaning WARNING Always switch off the appliance before maintenance or cleaning Never immerse the appliance in water for cleaning It could cause an electric shock or fire CAUTION...

Page 53: ...t your dealer Storage Clean the appliance as described and let it dry com pletely We recommend that you store the appliance in its original packaging if you do not intend to use it for a long period o...

Page 54: ...teries accumulators do not belong in household waste The rechargeable battery must be removed before dispos ing of the product CAUTION Batteries rechargeable batteries must not be disposed of with hou...

Page 55: ...pp Smart Life Smart Living 2 The first time the app is started register and enter your credentials select your Country Region enter your email address Fig 1 click Get check code wait a few moments and...

Page 56: ...on the robot flashes quickly 4 Click Next to finish the reset Select Wi Fi Quick Connection on your mobile phone and click Next to enter the waiting state If interfacing is not successful repeat the...

Page 57: ...ot first flashes quickly and then slowly 4 Click Next to finish the reset Select Hotspot Network on your mobile phone enter the network setting interface click Connect to enter the wi fi setting of yo...

Page 58: ...enter the operation interface Fig 17 6 After the device is connected successfully the Home key white light off Fig 18 Planned cleaning 1 Once in the connected device screen click on Schedule 2 Then p...

Page 59: ...ot will make a sound and you can determine the location of the robot Fig 25 3 Other interfaces a Personal Center in this page you can set user nicknames share the device with relatives and friends and...

Page 60: ...Ed 07 2023 OHMEX SA Route de Lully 5C 1131 Tolochenaz Switzerland www ohmex ch OHMEX SA Route de Lully 5C 1131 Tolochenaz Switzerland www ohmex ch...

Reviews: