background image

Manuel d’utilisation

Gebrauchsanleitung

Libretto istruzioni d’uso

Instruction manual

SMX 6208

MULTIFUNCTION STAND MIXER

Robot ménager

Kúchenmaschine

Impastatrice multifunzione

FR

DE

IT

EN

Made in P.R.C

8

 in 

1

functions

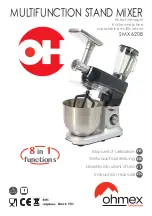
Summary of Contents for SMX 6208

Page 1: ...utilisation Gebrauchsanleitung Libretto istruzioni d uso Instruction manual SMX 6208 MULTIFUNCTION STAND MIXER Robot m nager K chenmaschine Impastatrice multifunzione FR DE IT EN Made in P R C 8 in 1...

Page 2: ......

Page 3: ...cke auf INDICE Istruzioni per l uso e la manutenzione Istruzioni originali Gentile Cliente Grazie per avere acquistato SMX 6208 Si prega di leggere attentamente questo manuale prima di mettere in funz...

Page 4: ...confermato dai risultati scientifici attualmente disponibili Questo apparecchio conforme alle direttive 2014 30 UE 2014 35 UE e 2011 65 UE Konformit tserkl rung Der Hersteller erkl rt auf seine Verant...

Page 5: ...mode de fonctionnement incorrect Instructions relatifs la s ret indispensable premier de l usage Lire attentivement les avertissements contenus dans le pr sent mode d emploicarilsfournissentd importan...

Page 6: ...sdoivent tretenus distancedel appareil et du cordon d alimentation Avant de brancher l appareil s assurer que les donn es indiqu es sur la plaque signal tique correspondent celles du r seau d alimenta...

Page 7: ...l emploidepi ces d tach esd origine Lenonrespectvdecetterecommandationpeutcompromettre la s curit de l appareil Sivousd cideriezdeneplusutiliserunappareildecetype ilestrecommand de lerendreinutilisabl...

Page 8: ...ise la terre de l installation Avantd effectuertouteop ration coupezl alimentationetd branchezlecordon d alimentation de la prise Ne pas brancher l appareil l alimentation lectrique travers des minute...

Page 9: ...e conduit 32 les mains les fourchettes les cuill res ou d autres ustensiles pour effectuer des pr l vements ou des interventions Ne pas introduire les doigts ou un ustensile dans le crochet p trisseur...

Page 10: ...les lames remplacer l ensemble du groupe si n cessaire Les lames 3 9 11a 11b 11c sont tr s aff t es les manipuler avec d attention Ne pas utiliser le gobelet 2 le conteneur 7 le bol 18 ou le conduit...

Page 11: ...lequelila t con u c est dire pour la transformation des aliments Touteautreutilisationest consid r ecommeimpropreetdoncdangereux Lefabricantnepeut tre tenu responsable pour tout dommage caus par une u...

Page 12: ...Bol 19 Crochet p trisseur pour p tes paisses 20 Malaxeur pour des pr parations moyennement consistantes 20a Crochet agitateur avec racle pour des pr parations moyennement consistantes 21 Fouet blancs...

Page 13: ...20 19 21 20a 16 22 18 17 10 24 1 23 14 8 7 11 11a 9 7 12 13 10 15 11b 11c 14a 24 24 9 SMX 6208 FR DESCRIPTION DE L APPAREIL 1 2...

Page 14: ...Bras 17 Axe d entra nement 18 Bol 19 Crochet p trisseur pour p tes paisses 20 Malaxeur pour des pr parations moyennement consistantes 20a Crochet agitateur avec racle pour des pr parations moyennement...

Page 15: ...5 4 2 3 15 15 6 6 2a 3 10 24 1 29 30 31 10 24 26 27 28 25a 25b 29a 30 33 25 34 29 11 SMX 6208 FR DESCRIPTION DE L APPAREIL 2 2...

Page 16: ...tation 220 240 V 50 60 Hz Puissance 1200W Capacit bol 8 Litres Capacit maximale gobelet 1500 ml Capacit maximale conteneur 1500 ml Vitesse r glable fonction turbo Trois programmes en mode intelligent...

Page 17: ...tatet nepr sententpasdefissures notammentlebolmixeur 2 etler cipient 7 Les lames 3 9 11a 11b 11c sont tr s aff t es les manipuler avec beaucoup d attention Essuyez le compartiment du corps de l appare...

Page 18: ...Appuyez la pour confirmer le choix et mettre en marche le fonctionnement Dans ce mode la vitesse est r gl e automatiquement MAX 24 24 UTILISATION COMME M LANGEUR Il est recommand de retirer le bol mix...

Page 19: ...les ingr dients dans le bol 18 Ne pas d passer la quantit maximale de 8 litre D placer le levier de s curit 10 dans le sens de la fl che et baisser la partie sup rieure 16 en position horizontale S as...

Page 20: ...s onctueuses il faut que les ingr dients soient tr s chauds par exemple les pommes de terre peine retir es de l eau bouillante Pour les p tes utiliser les ingr dients par exemple le beurre les oeufs l...

Page 21: ...u fourni et au travail demand Ne pas d passer les capacit s maximales conseill es Accessoires disponibles Accessoire agitateur Utiliser cet accessoire pour les p tes demi dures les sauces les cr mes d...

Page 22: ...ssures 22 Dans le cas o l appareil se bloque il faut l teindre imm diatement r gler une vitesse inf rieure Si l appareil est bloqu la vitesse 1 teindre l appareil d placerlapartiesup rieure 16 enposit...

Page 23: ...uvercle des curit 15 etlebolmixeur 2 nesont pas correctement accroch s Brancher la fiche d alimentation la prise de courant en s assurant que la tension du r seau correspond bien celle indiqu e sur la...

Page 24: ...attendre que les lames soient l arr t utiliser UNIQUEMENT des ustensiles appropri s Ne PAS le faire avec les doigts Conseils Pour un r sultat optimal proc der par cycles ne pas d passer 4 minutes cons...

Page 25: ...teindre imm diatement l appareil retirer la fiche de la prise retirer la partie de l aliment trait et attendre quelques minutes avant de reprendre la pr paration Mixage d aliments solides Les m lange...

Page 26: ...bouchon 5 Si apr s un usage prolong les r sultats de la mouture ne sont pas satisfaisants remplacer le groupe des lames 3 Ne pas t tonn d aiguiser les lames 3 UTILISATION COMME MIXEUR UTILISATION COM...

Page 27: ...n s assurant que la tension du r seau correspond bien celle indiqu e sur la plaque signal tique de l appareil D marrer l appareil en tournant le s lecteur de marche 24 sur la vitesse souhait e Pour ob...

Page 28: ...nteneur 7 Placer le r cipient 7 vide sur le bloc moteur 1 et le tourner dans le sens des ai guilles d une montre jusqu au click d accrochage Lapoign edur cipient 7 doit tre positionn comme sur la figu...

Page 29: ...assurant que la tension du r seau correspond bien celle indiqu e sur la plaque signal tique de l appareil D marrer l appareil en tournant le s lecteur de marche 24 sur la vitesse souhait Durantlapr p...

Page 30: ...IQUEMENT des ustensiles appropri s Ne PAS le faire avec les doigts Mixage d aliments chauds temp rature maximale 50 C Pour pr venir toute jection de vapeur retirer le pressoir 13a 13b du couvercle 12...

Page 31: ...eur est le degr de finition Plus les morceaux d aliments sont petits 3 cm au maximum meilleure est la qualit du r sultat Lors que l on pr pare des aliments durs comme les f ves de soja etc les tremper...

Page 32: ...6 Ins rez la base B dans le conteneur 7 Placer le r cipient 7 vide sur le bloc moteur 1 et le tourner dans le sens des ai guilles d une montre jusqu au click d accrochage Lapoign edur cipient 7 doit...

Page 33: ...ement du moteur Pour arr ter l appareil reporter le s lecteur 24 sur 0 UTILISATION COMME HACHOIR Ne pas utiliser les fonctions simultan ment Poser l appareil sur une surface horizontale plate propre s...

Page 34: ...biscuits 25b dans le conduit 32 en alignant les deux dents du disque avec les logements qui se trouvent dans le conduit 32 b2 Bloquer tout en serrant l crou 34 serrer avec les mains 32 26 27 28 32 34...

Page 35: ...urer que le s lecteur 24 est en position 0 teint b8 Brancher la fiche d alimentation laprise de courant en s assurant que la tension du r seau correspond bien celle indiqu e sur la plaque signal tique...

Page 36: ...oquer tout en serrant l crou 34 serrer avec les mains c4 Ensemble complet tel que d crit partir du point b3 le point b6 c5 Pr parer la viande qui doit tre coup et mis en sac avec les pices ajouter enl...

Page 37: ...saucisse que vous voulez Ne pas faire fonctionner l appareil en continu pendant plus de3minutes Alternantp riodesdefonctionnementdansles moments de pause d au moins 20 minutes Conseils utiles Pour vi...

Page 38: ...en serrant l crou 32 serrer avec les mains d4 Terminez l installation comme d crit du point b3 point b9 Ne pas utiliser la lame a toile 25 ni les disques pour hacherre 26 27 28 d5 Utilisez la viande...

Page 39: ...ement le presseur Ne pas faire fonctionner l appareil en continu pendant plus de 3 minutes Alternant p riodes de fonctionnement dans les moments de pause d au moins 20 minutes UTILISATION COMME HACHOI...

Page 40: ...iqueset lectroniques lesymboledelapoubelle barr e sur la plaque signal tique de l appareil ou sur les batteries indique que le produit et les piles la fin de la dur e de vie doivent tre collect s s pa...

Page 41: ...r dem Gebrauch unerl ssliche Sicherheitshinweise Aufmerksam die Hinweise durchlesen die in den vorliegenden Anleitungenenthaltensind dadiesewichtigeAngabenzurSicherheitbei der Installation Nutzung und...

Page 42: ...rseite des Ger ts F r Ihre Sicherheit empfiehlt es sich das Ger t ber einen Fehlerstrom Schutzschalter RCD mit Ansprechstrom nicht ber 30 mA versorgen zu lassen Sollten die Steckdose und der Stecker d...

Page 43: ...chtiggemachtwerden indemdasElektrokabelnachHerausziehen des Steckers durchgeschnitten wird Au erdem sollte man die Teile des Ger tes unsch dlich machen die eine Gefahrenquelle f r Kinder darstellen we...

Page 44: ...Schlie enSiedasGer tnichtmittelsexternenZeitschalternoderFernsteuersystemen an die Stromversorgung an Pr fen Sie dass das Stromkabel nicht aus der Auflagefl che hervorragt um zu vermeiden das jemand...

Page 45: ...h ssel 18 mit den darin Nahrungsmitteln zu erm glichen BeiGer tinBetrieb NIEMALSindenQuirl Becher 2 indenBeh lter 7 oder in den Einf llschacht 32 H nde Gabeln L ffel oder Werkzeuge einf hren um Entnah...

Page 46: ...n Die Klingen 3 9 11a 11b 11c nicht durch das Mixen oder Verarbeiten von harten oder tiefgefrorenen Lebensmitteln Kaffee Schalen Knochen Eisw rfel etc besch digen Nicht versuchen die Messer zu schleif...

Page 47: ...wendet werden f r den es entwickelt wurde dh f r dieVerarbeitung von Lebensmitteln Jede andereVerwendung ist unsachgem und daher gef hrlich DerHerstellerhaftetnichtf rSch den diedurchunsachgem e falsc...

Page 48: ...sskegel 15 Sicherheitsdeckel des Fleischwolfs 16 Arm 17 Antriebswelle 18 Sch ssel 19 Knethaken f r schwere Teigmassen 20 R hrhaken f r Teigmassen von mittlerer Konsistenz 20a R hrhaken mit Rakel f r T...

Page 49: ...20 19 21 20a 16 22 18 17 10 24 1 23 14 8 7 11 11a 9 7 12 13 10 15 11b 11c 14a 24 24 45 SMX 6208 DE BESCHREIBUNG DES GER TES 1 2...

Page 50: ...sskegel 15 Sicherheitsdeckel des Fleischwolfs 16 Arm 17 Antriebswelle 18 Sch ssel 19 Knethaken f r schwere Teigmassen 20 R hrhaken f r Teigmassen von mittlerer Konsistenz 20a R hrhaken mit Rakel f r T...

Page 51: ...5 4 2 3 15 15 6 6 2a 3 10 24 1 29 30 31 10 24 26 27 28 25a 25b 29a 30 33 25 34 29 47 SMX 6208 DE BESCHREIBUNG DES GER TES 2 2...

Page 52: ...220 240V 50 60Hz Leistung 1200W Fassungsverm gen Sch ssel 8 Liter Max Fassungsverm gen Becher 1500 ml Max Fassungsverm gen Beh lter 1500 ml Verstellbare Geschwindigkeit Turbo Funktion Drei Programme i...

Page 53: ...Im Besonderen gilt das f r den Mixbecher 2 und die R hrsch ssel 7 Die Messer 3 9 11a 11b 11c sind sehr scharf gehen Sie sehr vorsichtig damit um Reinigen Sie das Fach des Motorgeh use 1 mit einem feuc...

Page 54: ...pf zur Best tigung dr cken und den Betrieb starten In diesem Modus wird die Geschwindigkeit automatisch geregelt MAX 24 24 GEBRAUCH ALS KNEATMASCHINE Es wird empfohlen den Mixbecher 2 die Kaffeem hle...

Page 55: ...e von 8 Liter nicht berschreiten Den Sicherheitshebel 10 in Pfeilrichtung gedr ckt halten und die das Oberteil 16 in die waagerechte Betriebsstellung absenken Sicherstellen dass der Bedienschalter 24...

Page 56: ...mehr dreht Empfehlungen Um beim Sahne steif schlagen ein besseres Ergebnis zu erzielen die Zutat und den Beh lter vorher gut k hlen Um ein cremigeres P ree zu erhalten die Zutaten sehr warm verwenden...

Page 57: ...tungen bei der Geschwindigkeit 1 beginnen um Spritzer und den Aus tritt von Fl ssigkeiten zu vermeiden anschlie end nach und nach die Geschwindigkeit in Abh ngigkeit der aufgezeigtenTabelle und der ge...

Page 58: ...2 verwenden SolltedasGer tblockieren diesessofortausschalten eine niedrigere Geschwindigkeit w hlen Blockiert das Ger t bei Geschwindigkeit 1 das Ger t abstellen das Oberteil 16 nach oben kippen Teig...

Page 59: ...et nicht wenn der Sicherheitsdeckel 15 unddieMixbecher 2 nicht richtig eingerastet sind Den Stecker an die Stromsteckdose anschlie en und sich versichern dass die Netzspannung den Angaben auf dem Date...

Page 60: ...des Bechers zu entfernen oder die selben Nah rungsmittel erneut zu verarbeiten den Anlassschalter wieder auf 0 stellen abwarten dass die Klingen anhalten NUR geeignete Utensilien verwenden NICHT die F...

Page 61: ...bis man das gew nschte Resultat erh lt W hrend des Betriebs den Becher 2 mit der Hand festhalten Den Motor nicht berlasten Sollte dieser anhalten sofort das Ger t ausschalten den Stecker aus der Stec...

Page 62: ...n man warme Nahrungsmittel verarbeitet IMMER den Verschluss St psel 5 Falls nach l ngerem Gebrauch die Ergebnisse nicht mehr befriedigend sind m ssen die Klingen 3 ersetzt werden Versuchen Sie nicht d...

Page 63: ...ichern dass die Netzspannung den Angaben auf dem Datenschild des Ger ts ent spricht Das Ger t starten indem man den Schaltknopf 24 auf die gew nschte Geschwindig keit stellt UmdiebestenLeistungenzuerh...

Page 64: ...n den Beh lter 7 einf hren Die Lebensmittel in die R hrsch ssel 7 geben schlie en und im Uhrzeigersinn dre hen bis er mit einem Klick einrastet Der Griff des R hrsch ssel 7 hat gem Bild positioniert w...

Page 65: ...ngaben auf dem Datenschild des Ger ts entspricht Das Ger t starten indem man den Schaltknopf 24 auf die gew nschte Geschwin digkeit stellt W hrend der Verarbeitung der Lebensmittel darauf achten die R...

Page 66: ...nhalten NUR geeignete Utensilien verwenden NICHT die Finger gebrauchen Verarbeitung warmer Speisen H chsttemperatur 50 C Um zu verhindern dass unerw nscht Dampf entweicht wenn man hei e Lebens mittel...

Page 67: ...st cke sind max 3cm desto besser ist die Qualit t des Ergebnisses Beim Verarbeiten von harten Lebensmitteln wie Sojasamen etc diese vor der Ver wendung in Wasser oder anderer Fl ssigkeit einweichen Du...

Page 68: ...hmen Den Sockel B in den Beh lter 7 einf hren Die Lebensmittel in die R hrsch ssel 7 geben schlie en und im Uhrzeigersinn dre hen bis er mit einem Klick einrastet Der Griff des R hrsch ssel 7 hat gem...

Page 69: ...auszuschalten den Schalter 24 auf 0 stellen VERWENDUNG ALS FLEISCHWOLF Die Funktionen d rfen nicht gleichzeitig verwendet werden Das Ger t auf eine waagerechte ebene saubere trockene stabile und hitz...

Page 70: ...2 einsetzen indem die beiden Z hne der Scheibe mit den Aufnahmen der Kammer 32 ausgerichtet werden b2 Blockieren Sie es das Anziehen der berwurfmutter 34 von Hand festziehen 32 26 27 28 32 34 das Ster...

Page 71: ...stellen dass der Bedienschalter 24 sich in Stellung 0 AUS OFF befindet b8 Den Stecker an die Stromsteckdose anschlie en und sich versichern dass die Netz spannung den Angaben auf dem Datenschild des G...

Page 72: ...Hand festziehen c4 Montieren Sie weiter wie ab Punkt b4 bis Punkt b6 beschrieben Betrieb als Fleischhacker c5 Bereiten Sie das Fleisch zu hacken und verpacken mit allen Gew rzen zum Hinzuf gen indem S...

Page 73: ...e das gew nschte Wurst haben Betreiben Sie das Ger t nicht kontinuierlich f r mehr als 3 Minuten Wechseln Sie die Betriebszeiten mit Pausen von 20 Minuten Tipps Um zu vermeiden das die Haut platzt ver...

Page 74: ...Anziehen der berwurfmutter 32 von Hand festziehen d4 Montieren Sie weiter wie ab Punkt b3 bis Punkt b9 beschrieben VerwendenSiewederdasSternmesser 25 nnoch die Hackscheiben 26 27 28 d5 Verwenden Sie b...

Page 75: ...nsmittel zu dr cken Verwenden Sie NUR den Dr cker Betreiben Sie das Ger t nicht kontinuierlich f r mehr als 3 Minuten Wechseln Sie die Betriebszeiten mit Pausen von 20 Minuten VERWENDUNG ALS FLEISCHWO...

Page 76: ...t das durchgekreuzte M llkontainer auf dem Typenschild des Ger ts oder auf Batterien dass das Produkt und die Batterien am Ende ihrer Lebensdauer getrennt von anderen Abf llen gesammelt werden m ssen...

Page 77: ...corrette Avvertenze relative alla sicurezza indispensabili prima dell uso Leggere attentamente le avvertenze contenute nelle presenti istruzioni in quanto forniscono importanti indicazioni riguardant...

Page 78: ...ere lontano dall apparecchio e dal cavo di alimentazione i bambini di et inferiore agli 8 anni Prima di collegare elettricamente l apparecchio accertarsi che i dati targa siano rispondentiaquellidella...

Page 79: ...ericambi originali Il mancato rispetto di quanto sopra pu compromettere la sicurezza dell apparecchio Allorch sidecidadinonutilizzarepi unapparecchiodiquestotipo siraccomanda di renderlo inoperante ta...

Page 80: ...qualsiasi operazione spegnere l apparecchio e disinserire la spina di alimentazione dalla presa di corrente Non collegare l apparecchio all alimentazione elettrica mediante timer esterni o sistemi di...

Page 81: ...erefrullatore 2 nel contenitore 7 o nel condotto 32 mani forchette cucchiai o altri utensili per effettuare prelievi o interventi Nonintrodurreleditaoaltrioggettineiganci 19 20o20a onellafrusta 21 dur...

Page 82: ...ntare di affilare le lame se necessario sostituire l intero gruppo Le lame 3 9 11a 11b 11c sono molto taglienti manipolare con attenzione Nonutilizzareilbicchiere 2 ilcontenitore 7 laciotola 18 oilcon...

Page 83: ...e cio per la lavorazione di alimenti Ogni altro uso da considerarsi improprio e quindi pericoloso Il costruttorenonpu essereconsideratoresponsabilepereventualidanni derivanti da usi impropri erronei...

Page 84: ...di sicurezza unit tritacarne 16 Braccio 17 Albero di comando 18 Ciotola 19 Gancio impastatore per impasti pesanti 20 Gancio agitatore per impasti di media consistenza 20a Gancio agitatore con racla p...

Page 85: ...20 19 21 20a 16 22 18 17 10 24 1 23 14 8 7 11 11a 9 7 12 13 10 15 11b 11c 14a 24 24 81 IT SMX 6208 DESCRIZIONE APPARECCHIO 1 2...

Page 86: ...di sicurezza unit tritacarne 16 Braccio 17 Albero di comando 18 Ciotola 19 Gancio impastatore per impasti pesanti 20 Gancio agitatore per impasti di media consistenza 20a Gancio agitatore con racla p...

Page 87: ...5 4 2 3 15 15 6 6 2a 3 10 24 1 29 30 31 10 24 26 27 28 25a 25b 29a 30 33 25 34 29 83 IT SMX 6208 DESCRIZIONE APPARECCHIO 2 2...

Page 88: ...Alimentazione 220 240V 50 60Hz Potenza 1200W Capacit ciotola 8 Litri Capacit max bicchiere 1500 ml Capacit max contenitore 1500 ml Velocit regolabile funzione turbo Tre programmi in modalit intelligen...

Page 89: ...presentino fessurazioni in particolar modo il bicchiere 2 ed il contenitore 7 Le lame 3 9 11a 11b 11c sono molto taglienti manipolarle con estrema attenzione Pulire il vano del corpo apparecchio 1 con...

Page 90: ...vviare il funzionamento In questa modalit la velocit viene regolata automaticamente MAX 24 24 UTILIZZO COME IMPASTATRICE Si consiglia di rimuovere il bicchiere frullatore 2 il macinacaff 2a il conteni...

Page 91: ...redienti nella ciotola 18 Non superare la quantit massima di 8 Lt Spostare la leva di sicurezza 10 nella direzione della freccia ed abbassare la parte superiore 16 in posizione di operativit in orizzo...

Page 92: ...ato Consigli Per una migliore riuscita della panna montata utilizzare l ingrediente ed il contenito re ben freddi Per ottenere puree pi cremosi utilizzare ingredienti molto caldi p e le patate appe na...

Page 93: ...evitare spruzzi e fuoriuscita di liquidi aumentare successivamente poco alla volta la velocit in funzione alla tabella fornita ed al tipo di lavorazione da eseguire Non superare le capacit massime su...

Page 94: ...pparecchio senza coperchio paraspruzzi 22 Nelcasol apparecchiosiblocchispegnerloimmediatamente e impostare una velocit inferiore Se l apparecchio risulta bloccato alla velocit 1 spegnere l apparecchio...

Page 95: ...parecchiononsiavviaseilcoperchio disicurezza 15 eilbicchiere 2 nonsono correttamente agganciati Collegare la spina di alimentazione alla presa di corrente assicurandosi che la tensione di rete corrisp...

Page 96: ...i alimento dalle pareti del bicchiere 2 o rilavorare gli alimenti stessi riportare l interruttore di avviamento su 0 attendere che le lame siano ferme utilizzare SOLO appropriati utensili NON usare le...

Page 97: ...gere il risultato desiderato Durante il funzionamento tenere il bicchiere 2 con la mano Non sovraccaricare eccessivamente il motore Se quest ultimo si arresta spegnere immediatamente l apparecchio tog...

Page 98: ...ando si lavorano alimenti caldi togliere SEMPRE il tappo 5 Se dopo un uso prolungato i risultati di lavorazione non fossero pi soddisfacenti provvedere alla sostituzione del gruppo lame 3 Non tentare...

Page 99: ...i corrente assicurandosi che la tensione di rete corrisponda a quella indicata sulla targa dati dell apparecchio Avviare l apparecchio ruotando il selettore di avviamento 24 sulla velocit desiderata P...

Page 100: ...B nel contenitore 7 Posizionare il contenitore 7 vuoto sulla base motore 1 e ruotarlo in senso orario sino a sentire il click di aggancio L impugnatura del contenitore 7 deve essere posizionata come...

Page 101: ...dell apparecchio Avviare l apparecchio ruotando il selettore di avviamento 24 sulla velocit deside rata Durantelalavorazionedeglialimentiprestareattenzioneanonriempire il contenitore 7 oltre la capac...

Page 102: ...me utilizzare SOLO appropriati utensili NON usare le dita Lavorazione di alimenti caldi temperatura massima 50 C Per prevenire ed evitare indesiderati sbruffi di vapore rimuovere il pressino 13 dal co...

Page 103: ...3 cm migliore la qualit del risul tato ottenuto Lavorando alimenti duri quali semi di soia etc ammollarli lasciandoli a bagno in acqua o altro liquido prima di utilizzarli Aggiungendo del liquido lat...

Page 104: ...il coper chio 6 Inserire la base B nel contenitore 7 Posizionare il contenitore 7 vuoto sulla base motore 1 e ruotarlo in senso orario sino a sentire il click di aggancio L impugnatura del contenitor...

Page 105: ...rsi Per fermare l apparecchio riportare il selettore 24 su 0 UTILIZZO COME TRITACARNE Non utilizzare insieme le funzioni Posizionare l apparecchio su una superficie orizzontale piana pulita asciutta s...

Page 106: ...per biscotti 25b nel condotto 32 allineando i due denti del disco con le sedi presenti nel condotto 32 b2 Bloccare il tutto avvitando la ghiera 34 serrarla con le mani 32 26 27 28 32 34 la lama a stel...

Page 107: ...ntazione 32 b7 Assicurarsi che il selettore 24 sia in posizione 0 Spento b8 Collegare la spina di alimentazione alla presa di corrente assicurandosi che la ten sione di rete corrisponda a quella indic...

Page 108: ...la ghiera 34 serrandola con le mani c4 Completare il montaggio operando come descritto dal punto b3 al punto b6 c5 Preparare la carne che deve essere tritata ed insac cata con le eventuali spezie da...

Page 109: ...ere la salsiccia desiderata Non far funzionare in continuo l apparecchio per pi di 3 minuti Alternare periodi di funzionamento con momenti di pausa di almeno 20 minuti Consigli utili Per evitare di fa...

Page 110: ...la con le mani d4 Completare il montaggio operando come descritto dal punto b3 al punto b9 Non utilizzare n la lama a stella 25 n i dischi per tritare 26 27 28 d5 Utilizzare carne gi tritata anche pi...

Page 111: ...esclusivamente il pressino Nonfarfunzionareincontinuol apparecchioperpi di3minuti Alternare periodi di funzionamento con momenti di pausa di almeno 20 minuti UTILIZZO COME TRITACARNE PULIZIA Prima di...

Page 112: ...e il simbolo delcassonettobarratoriportatosullatargadatidell apparecchioosullebatterie indicacheprodottoe batterieallafinedellapropriavitautiledevonoessereraccoltiseparatamentedaglialtririfiuti L uten...

Page 113: ...afety essential before use Carefully read the instructions in this booklet as they provide important information about safe installation use and maintenance Keep this booklet with care for future refe...

Page 114: ...liance by means of a differential circuit breaker RCD with an operating current of no more than 30 mA Should the wall outlets and the unit plug be incompatible with each other have the wall outlet rep...

Page 115: ...plianceasatoy The installation must be carried out following the manufacturer instructions Awronginstallationcouldcausedamagestopeople animals or things for which the manufacturer cannot be considered...

Page 116: ...nd taps Beforeinsertingthepluginthepowersocket makesurethattheswitch 24 ison 0 Do not insert foods whose temperature is higher than 50 C in the glass bender 2 or in the container 7 Insertfoodstoblendi...

Page 117: ...on 0 pay attention to the blades and to the disc for holding accessories because both will rotate for another few seconds Turn off the appliance OFF switch knob on 0 before approaching to the parts t...

Page 118: ...es spray cans etc EXPLOSION AND FIRE DANGER Whenyou refinishedusingtheappliancealwaysturnitoffanddisconnectitfrom the power outlet When you re finished using the appliance always accurately clean all...

Page 119: ...f Any repair intervention on the appliance carried out by unauthorized personnel automatically invalidates warranty even if its duration has not come to an end TECHNICAL DATA 8 in 1 device Planetary k...

Page 120: ...it safety cover meat grinder 16 Arm 17 Control shaft 18 Bowl 19 Mixer hook for heavy mixes 20 Agitator hook for medium consistency mixes 20a Stirrer hook with scraper for medium consistency mixes 21 W...

Page 121: ...20 19 21 20a 16 22 18 17 10 24 1 23 14 8 7 11 11a 9 7 12 13 10 15 11b 11c 14a 24 24 117 SMX 6208 EN APPLIANCE DESCRIPTION 1 2...

Page 122: ...r 14 Filter 14a Cone 15 Unit safety cover meat grinder 16 Arm 17 Control shaft 18 Bowl 19 Mixer hook for heavy mixes 20 Agitator hook for medium consistency mixes 20a Stirrer hook with scraper for med...

Page 123: ...5 4 2 3 15 15 6 6 2a 3 10 24 1 29 30 31 10 24 26 27 28 25a 25b 29a 30 33 25 34 29 119 SMX 6208 EN APPLIANCE DESCRIPTION 2 2...

Page 124: ...tact and they don t report cracking in particular the glass 2 and the container 7 The blades 3 9 11a 11b 11c are very sharp use them very carefully Clean the appliance body compartment 1 with a wet cl...

Page 125: ...ing The speed is adjusted automatically in this mode MAX 24 24 USE AS MIXER To remove the glass blender 2 the coffee grinder 2a the container 7 and the refuelling duct 32 from the respective locations...

Page 126: ...without the splash protection cover 22 Pour the ingredients in the bowl 18 Do not exceed the maximum quantity of 8 Lt Keep the safety lever pressed 10 and move it towards the arrow direction lower th...

Page 127: ...t Do not insert fingers before the appliance has stopped Advices To get the best whipped cream use both the ingredient and the container when they re cold To get more creamy purees use very hot ingred...

Page 128: ...amalgamate ingredients and to avoid splashes and liquids leakage then increase speed gradually according to the supplied table and to the type of processing to be performed Do not exceed the maximum...

Page 129: ...not use the appliance without splash protection cover 22 Iftheapplianceblocksitselfimmediatelyturnitoff andset a lower speed If the appliance is blocked at speed 1 turn it off move the upper part 16 i...

Page 130: ...5 The appliance doesn t start if the safety cover 15 and the glass 2 are not correctly hooked Connect the power plug to the power outlet making sure that the mains voltage corresponds to the one indic...

Page 131: ...tch activates To remove food residues from the glass 2 sides or to reprocess the foods them selves move the start switch back on 0 wait for the blades to stop use appropriate tools ONLY DO NOT use fin...

Page 132: ...reaching the desired result During functioning hold the glass 2 with your hand Do not overload the motor excessively If the motor stops turn off the appliance immediatly remove the plug from the outl...

Page 133: ...l at a time When working hot foods ALWAYS remove the cap 5 If after a prolonged use the processing results are not satisfactory anymore provide for the blades group 3 change Do not try to sharpen the...

Page 134: ...e power outlet making sure that the mains voltage corresponds to the one indicated on the appliance data plate Start the appliance by turning the starting switch 24 on the desired switch To obtain the...

Page 135: ...nto the container 7 Place the empty container 7 on the motor base 1 and rotate it clockwise until you hear the hooking click The container 7 handle must be place as shown in the picture Insert the acc...

Page 136: ...cated on the appliance data plate Start the appliance by turning the starting switch 24 on the desired speed During the foods processing pay attention not to fill the container 7 over the maximum capa...

Page 137: ...blades to stop use appropriate tools ONLY DO NOT use fingers Hot foods processing maximum temperature 50 C To prevent and avoid unwanted clouds of steam remove the tamper 13a 13b from the cover 12 whe...

Page 138: ...e smaller the processed food pieces max 3 cm the better the result quality When working hard foods like soya beans etc let them to soak in water or in other liquids before using them Adding some liqui...

Page 139: ...ver 6 Insert the base B into the container 7 Place the empty container 7 on the motor base 1 and rotate it clockwise until you hear the hooking click The container 7 handle must be place as shown in t...

Page 140: ...the motor cool down To stop the appliance move the switch 24 back on 0 USE AS MEAT GRINDER Do not use the functions together Place the appliance on a plane horizontal clean dry stable and heat resist...

Page 141: ...5b into the pipe 32 aligning the two teeth on the disc with the seats present in the pipe 32 b2 Block everything by fastening the seal 34 tighten it with your hands 32 26 27 28 32 34 the star blade 25...

Page 142: ...lling duct 32 b7 Make sure that the switch 24 is in 0 position Off b8 Connect the power plug to the power socket making sure that the mains voltage corresponds to the one indicate on the appliance dat...

Page 143: ...he seal 34 tighten ing it with your hands c4 Complete the assembly operating as described from section b3 to section b6 c5 Prepare the meat to be minced and stuffed togeth er with possible spices to a...

Page 144: ...ing the desired sausage Do not let the appliance work continuously for more than 3 minutes Alternatefunctioningperiodsandbreaksofatleast 20 minutes Useful tips To keep the skin from exploding try not...

Page 145: ...34 tightening it with your hands d4 Complete the assembly operating as described from sec tion b3 to section b9 Neither use the star blade 25 nor the discs to mince 26 27 28 d5 Use already minced mea...

Page 146: ...foods Use only the tamper Do not let the appliance work continuously for more than 3 minutes Alternate functioning periods and breaks of at least 20 minutes HOW TO USE AS MEAT GRINDER CLEANING Before...

Page 147: ...equipment waste the crossed out wheelie bin symbol on the equipment nameplate or on its batteries indicates that the product and the batteries at the end of their useful life must be collected separa...

Page 148: ...Ed 01 2021 OHMEX SA Route de Lully 5C 1131 Tolochenaz Switzerland www ohmex ch OHMEX SA Route de Lully 5C 1131 Tolochenaz Switzerland www ohmex ch...

Reviews: