background image

SI

 | 

Navodila za uporabo

SI-1

Prevod originalnega navodila za uporabo

Kazalo                                                                                                                   Stran


Slika


1 - 4


Razlaga opozorilnih znakov na napravi


5 - 6

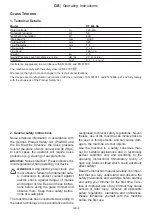
1.  Tehnični podatki


SI - 2

2.  Splošna varnostna opozorila


SI - 2

3.  Varnostna opozorila


SI - 3

 1) 

Navodilo za varnostno delo


2) Vzdrževanje


3) Splošna opozorila

 4) 

Navodilo za uporabo

4.   Namen uporabe


SI - 4

5.  Pred uporabo 


SI - 5

Namestitev stranskega kolesa

Namestitev varovalne zaščite
Namestitev dodatnega ročaja

6.  Priprava kose za uporabo


SI - 5

7.   Vklop kose z nitko 


SI - 6

8.   Košnja trave in plevela 


SI - 6

9.   Podaljšanje kosilne nitke


SI - 6

10. Zamenjava kosilne nitke


SI - 6

11. Tehnične težave 

SI - 6

12.  Shranjevanje 

SI - 6

13. Odlaganje med odpadke in varovanje okolja

 SI - 7

14.  Nadomestni deli


SI - 7

15. Garancijski pogoji 

SI - 7

16. 

Servisna služba


SI - 7

17. ES Izjava o skladnosti                                                                                                          

SI - 7


Summary of Contents for RT 600 DA

Page 1: ...truzioni per l uso Traduzione delle istruzioni per l uso originali GB Operating Instructions Translation of the original Operating Instructions Read operating instructions before use DE Vor Inbetriebnahme Gebrauchsanweisung lesen Gebrauchsanweisung Originalbetriebsanleitung Pred zagonom preberite navodilo za uporabo Navodilo za uporabo Prevod originalnega navodila za uporabo SI ...

Page 2: ...entlastung 11 Verriegelung Winkelverstellung 12 Netzleitung mit Stecker DE Bezeichnung der Teile 1 On Off switch 2 Additional handle 3 Locking mechanism height adjustment 4 Telescopic tube 5 Locking mechanism rotary handle 6 Motor housing 7 Edging wheel 8 Cutting head 9 Protective cover 10 Cable strain relief 11 Locking mechanism adjusting the cutting head angle 12 Mains cable with plug GB Descrip...

Page 3: ...racavo 11 Bloccaggio regolazione dell angolo 12 Linea di rete con connettore IT Descrizione del prodotto 1 Stikalo za vklop izklop 2 Dodaten ročaj 3 Zaklepni mehanizem nastavitev dolžine 4 Teleskopska cev 5 Zaklepni mehanizem vrtenje ročaja 6 Ohišje motorja 7 Stransko kolo 8 Rezalna glava 9 Zaščitni pokrov 10 Zatič za kabel 11 Zaklepni mehanizem nastavitev kota rezalne glave 12 Vtikač napajalnega ...

Page 4: ...3 a 10 9 11 b 6 3 4 11 7 11 5 8 90 ...

Page 5: ...4 12 13 14 1 1 2 3 15 1 2 3 4 ...

Page 6: ...klärung der Piktogramme Pictogram illustration and explanation Razlaga opozorilnih znakov na napravi Illustrazione e spiegazione dei simboli DE 1 Warnung 2 Dieses Elektrowerkzeug nicht dem Regen aussetzen 3 Augen und Gehörschutz tragen 4 Dritte aus dem Gefahrenbereich halten 5 Bei Beschädigung oder Durchschneiden der An schlussleitung sofort Stecker ziehen 6 Gebrauchsanweisung lesen 7 Achten Sie a...

Page 7: ...colta pubblico 9 Classe di sicurezza II 10 Conferma la conformità dell elettroutensile alle diret tive della Comunità Europea 11 Livello di potenza sonora garantito LWA 96 dB A 12 PERICOLO DI FERIMENTO Lama di taglio SI 1 Pozor 2 Orodja ne uporabljajte kadar dežuje 3 Uporabljajte zaščito za oči in ušesa 4 Opazovalci ne smejo biti v nevarnem delovnem območju 5 Če se napajalni kabel poškoduje ga tak...

Page 8: ......

Page 9: ...bnahme DE 5 Montieren des Führungrades Montieren der Sicherheitsvorrichtung Montieren des Zusatzhandgriffs 6 Vorbereiten des Rasentrimmers für den Gebrauch DE 6 Einstellung des Teleskopstiels Einstellen des Schneidkopfes Kantenschneidmodus Verlängerungskabelhalter 7 Starten des Rasentrimmers DE 6 8 Rasen trimmen DE 6 9 Schneidfaden verlängern DE 6 10 Fadenspule erneuern DE 7 11 Störungen DE 7 12 A...

Page 10: ...eierta gen sowie an Werktagen von 20 00 Uhr bis 7 00 Uhr nicht in Betrieb genommen werden Beachten Sie zusätzlich auch die lan desrechtlichen Vorschriften zum Lärm schutz Achtung Beim Gebrauch von Elektrowerkzeu gen sind zum Schutz gegen elektrischen Schlag Verletzungs und Brandgefahr folgende grund sätzliche Sicherheitsmaßnahmen zu beachten Lesen und beachten Sie alle diese Hinweise bevor Sie die...

Page 11: ... Sie die Maschine nicht in Reichweite von Kindern c elektrisch betriebene Trimmer sollten nur von autorisierten Personen instand gesetzt wer den d benutzen Sie nur Ersatz und Zubehörteile die vom Hersteller empfohlen sind e Schneidkopf regelmäßig von Gras reinigen f Schneidkopf regelmäßig in kurzen Abständen überprüfen Bei wahrnehmbaren Verände rungen Vibration Geräusche sofort Trim mer abschalten...

Page 12: ... Abhängen oder in unebenem Gelände Rutschgefahr 8 Auf Abhängen nur quer zur Neigung trim men Vorsicht beim Wenden 9 Auf Baumstümpfe und Wurzeln achten Stol pergefahr 10 Vermeiden Sie den Gebrauch des Trimmers bei schlechten Wetterbedingungen beson ders wenn Gefahr eines Gewitters besteht 11 Die hohe Drehzahl des Schneidwerkzeuges und der Stromanschluss bringen besondere Gefahren mit sich Deshalb s...

Page 13: ...chgemäßer Benut zung andere Restrisiken auftreten Warnung Die ausgedehnte Nutzung eines Werkzeugs setzt den Nutzer Erschütterungen aus die zur Weißfingerkrank heit Raynaud Syndrom oder zum Karpaltunnelsyndrom führen können Dieser Zustand verringert die Fähigkeit der Hand Tem peraturen zu empfinden und zu regulieren verursacht Taubheit und Hitzeempfindungen und kann zu Nerven und Kreislaufschäden u...

Page 14: ...Sie das Ende der Schleife um den Kabelhal ter b und stellen Sie sicher dass es ausreichend unter Zug steht damit es sich beim Arbeiten mit dem Trimmer nicht lösen kann 3 Verbinden Sie die Buchse des Verlängerungskabels mit dem Kabelstecker des Rasentrimmers 7 Starten des Rasentrimmers 1 Schließen Sie das Verlängerungskabel an eine Steckdose an 2 Um den Rasentrimmer einzuschalten drücken Sie die Ei...

Page 15: ...n einer umweltgerechten Wiederverwendung gemäß örtlichen Vorschriften zugeführt werden Nur für EU Länder Werfen Sie Elektrowerkzeuge nicht in den Hausmüll Gemäß europäischer Richtlinie 2012 19 EG über Elek tro und Elektronik Altgeräte und Umsetzung in nati onales Recht müssen verbrauchte Elektrowerkzeuge getrennt gesammelt werden und einer umweltgerechten Wiederverwertung zugeführt werden Recyclin...

Page 16: ...lich Änderungen entspricht Zur sachgerechten Umsetzung der in den EG Richtlinien genannten Sicherheits und Gesundheitsanforderungen wurden folgende Normen und oder technische Spezifikation en herangezogen EN 60335 1 2012 A11 2014 EN 50636 2 91 2014 EN 62233 2008 AfPS GS 2014 01 PAK EN 55014 1 2017 EN 55014 2 2015 EN 61000 3 2 2014 EN 61000 3 3 2013 gemessener Schallleistungspegel 93 9 dB A garanti...

Page 17: ...cation GB 5 5 Before use GB 5 Fitting the edging wheel Fitting the safety guard Fitting the auxiliary handle 6 Preparing the line trimmer for use GB 6 Telescopic shaft adjustment Adjusting the cutting head Edging mode Extension cord retainer 7 Starting the line trimmer GB 6 8 Trimming grass and weeds GB 6 9 Adjusting nylon line GB 6 10 Replacement of spool GB 6 11 Trouble shooting GB 6 12 Storing ...

Page 18: ...plications and in technically perfect condition only and according to the operating instructions Immediately rectify or have any faults rectified which could adversely affect safety Read the instruction manual carefully It is impor tant that you fully understand and observe the safety precautions and warnings before starting and using your trimmer for the first time Care less or improper use of an...

Page 19: ...ion is checked for creases or damage l Inspect cooling air slots on the motor housing at regular intervals for clog ups and clean as necessary 2 Maintenance a Always switch off your trimmer and discon nect it from the power supply before taking a break and after finishing work Do not forget maintenance Plug disconnected Only carry out maintenance and repairs described in these operating instructio...

Page 20: ...ways maintain a good balance and secure footing 4 Use particular caution while working in dense growth areas where your view of the ground is obscured 5 Never leave your trimmer outdoors in rain 6 Do not cut wet grass or other growth Never use in rain 7 Take special care in slippery conditions on slopes and uneven ground 8 Work in a line across the slope and take special care when turning around 9...

Page 21: ...uctions contained in the instruction manual other residual risks may result due to improper use Warning Prolonged use of a tool will subject the user to vibration and shocks that could lead to Raynaud s syndrome or Carpal tunnel syndrome This condition reduces the ability of the hand to sense and regulate temperature causes numbness and a sen sation of heat and can cause damage to the nervous and ...

Page 22: ...observe the following instructions Never use the line trimmer without its safety devices Do not cut grass when it is wet The best results are achieved on dry grass To switch ON your line trimmer press the On Off switch a To switch OFF your line trimmer let go of the On Off switch a Do not move the line trimmer against the grass until the switch is pressed i e wait until the line trimmer is running...

Page 23: ...uipment can also be taken to a collection facility which disposes of it in the sense of the national recycling man agement and waste acts This does not pertain to the accessory parts and auxiliary equipment without electri cal components accompanying the waste equipment 14 Spare parts Please contact our service department if you need ac cessories or spare parts When working with this machine do no...

Page 24: ...ents mentioned in the Directives the following standards and or technical specification s have been respected EN 60335 1 2012 A11 2014 EN 50636 2 91 2014 EN 62233 2008 AfPS GS 2014 01 PAK EN 55014 1 2017 EN 55014 2 2015 EN 61000 3 2 2014 EN 61000 3 3 2013 measured acoustic capacity level 93 9 dB A guaranteed acoustic capacity level 96 dB A Competent institution 0036 TÜV Süd Conformity assessment m...

Page 25: ... za uporabo 4 Namen uporabe SI 4 5 Pred uporabo SI 5 Namestitev stranskega kolesa Namestitev varovalne zaščite Namestitev dodatnega ročaja 6 Priprava kose za uporabo SI 5 7 Vklop kose z nitko SI 6 8 Košnja trave in plevela SI 6 9 Podaljšanje kosilne nitke SI 6 10 Zamenjava kosilne nitke SI 6 11 Tehnične težave SI 6 12 Shranjevanje SI 6 13 Odlaganje med odpadke in varovanje okolja SI 7 14 Nadomestn...

Page 26: ... tehnièno brez hibne in v skladu z varnostnimi predpisi Kate rokoli tehnièno napravo je treba popraviti da se zagotovi varnost Pomembno je da pazljivo preberete varnostna navodila saj je lahko njihovo neupoštevanje življenjsko nevarno 3 Varnostna opozorila Pozor Prebrati je treba celotna navodila Kljub temu pa lahko pri uporabi naprave pride do nevarnosti za zdravje in življenje uporabnika ali tre...

Page 27: ...e Vedno oèistite ostanke trave iz rezilne glave f Pri delu obèasno preverjajte rezilno gla vo V kolikor opazite spremembe vibracije povečan zvok takoj izkljuèite napravo iz vtiènice odložite napravo na tla tako da se rezilna glava popolnoma ustavi in napravo izkljuèite z elektriènega omrežja Preglejte rezilno glavo bodite pozorni na eventuelne poškodbe g Poškodbe na glavi takoj odpravite èetudi na...

Page 28: ...rodajalec strokovnjak vas bo opozoril o naèinu dela in vzdrževanju naprave 13 Ta naprava ni namenjena za to da jo uporabljajo osebe vključno z otroci ki so omejene v telesnih senzoričnih ali duševnih zmogljivostih ali jim primanjkuje izkušenj in ali znanja razen v primeru če jih nadzira oseba odgovorna za njihovo varnost ali pa so od te osebe dobili navodila o tem kako se napravo uporablja 14 Otro...

Page 29: ...ice ni dlani naj bodo tople Zagotovite da je naprava dobro vzdrževana Orodje z razrahljanimi deli povzroča več vibracij Ročaj vedno držite trdno vendar ga ne zagrabite premčno Pogosto naredite premor Vsi zgoraj omenjeni napotki ne morejo zagotovo preprečiti razvoja Raynaudovega sindroma ali sindroma zapestne ga pretoka Zato vam priporočamo da ob daljši uporabi naprave spremljate stanje dlani in pr...

Page 30: ... na varovalni zaščiti da preprečite nepotrebno vibriranje in pazite da najprej koso izklopite 9 Podaljšanje kosilne nitke slike 12 in 13 Redno pregledujte ali je kosilna nitka poškodovana in zadostne dolžine Kadar je najlon nitka krajša držite vklopljeno kosilno glavo malenkost nad travo Rezilno glavo na hitro pri tisnite k tlom S tem se bo nitka avtomatsko podaljšala na ustrezno dolžino V kolikor...

Page 31: ...rabe napačnih priključkov popravil z neoriginalnimi rezerv nimi deli uporabe sile udarcev in zloma ter namerne preobremenitve motorja Zamenjava v okviru garancije zajema samo poškodovane dele in ne celega aparata Garancijska popravila lahko opravlja samo pooblaščena delavnica ali servisna služba Pri tujem posegu garancija preneha veljati Poštnina stroški pošiljanja in posledični stroški so breme k...

Page 32: ...otezione di sicurezza Installazione della maniglia ausiliaria 6 Preparazione all uso del decespugliatore IT 6 Regolazione del braccio telescopico Regolazione della testina di taglio Modalità di bordatura Fermo della corda di estensione 7 Avvio del decespugliatore IT 6 8 Tosatura del prato IT 6 9 Allungamento del filo tagliente IT 7 10 Sostituzione della bobina IT 7 11 Individuazione guasti IT 7 12...

Page 33: ...go prendere conoscenza delle norme regionali Attenzione Durante l uso di elettroutensili vanno osservate le seguenti regole di base per preservarsi dal rischio di scariche elettri che ferite o pericolo di incendio Leggete e attenetevi a queste indicazioni prima di usare questo elettroutensile Conservate bene i pre sente avvisi sulla sicurezza Le macchine sono costruite secondo il più recente livel...

Page 34: ...e solo ricambi originali k Prima di ogni intervento sull apparec chiatura staccare la spina dalla presa di corrente Prima di regolare o pulire l apparecchio o prima di eseguire del le verifiche per accertare se il cavo di alimentazione è dan neggiato in un cer to qual modo è necessario spegnere l apparecchio ed estrarre la spina dalla presa di corrente l Se necessario pulire le feritoie per l aria...

Page 35: ...unga in modo che non venga dan neggiata e che non crei il pericolo di inciampare 14 Attenzione che la prolunga non sfreghi su bordi e oggetti appuntiti o taglienti e che non venga schiacciata per es in fessure di porte o di finestre 15 Nel trasporto del tagliabordi a breve di stanza p es in un altro punto di lavoro rilasciare l interruttore staccare la spina 4 Istruzioni d impiego 1 Durante l inse...

Page 36: ...prio Il prodotto è progettato per essere utilizzato da persone con età superiore ai 14 anni di età Nel caso in cui il prodotto sia utilizzato da bambini a partire da 8 anni di età o da persone con facoltà fisiche psichiche e mentali ridotte o che manchino di esperienza e cono scenze specifiche in merito al suo uso devono essere sorvegliate o devono aver ricevuto un adeguata forma zione in merito a...

Page 37: ...are la testina di taglio all angolo desiderato Rilasciare il pulsante 11 e assicurarsi che la testina di taglio si blocchi in posizione Modalità di bordatura Fig 8 e 9 AVVERTENZA Prima di effettuare questa modi fica assicurarsi che il decespugliatore sia spento e scollegato Per usare il decespugliatore come bordatrice eseguire le seguenti regolazioni 1 Premere il pulsante della testina rotante 5 s...

Page 38: ...o e chiudete il coperchio della te stina Se il filo di nylon è esaurito inserite un rocchetto nuovo Non cercate di eseguire nessun altra riparazione da soli ma rivolgetevi per verifiche e riparazioni ad un punto assistenza autorizzato In caso di disturbi o di necessità di pezzi di ricambio rivolgersi al proprio rivenditore Nota Ozito Industries non si riterrà responsabile di danni o lesioni causat...

Page 39: ...dell apparecchio per fini di riparazione si prega di descrivere il difetto identificato Service Vi preghiamo di rivolgervi al magazzino officina specia lizzata più vicino a Su Internet al sito www lagerhaus at troverete l indica zione del magazzino officina specializzata più vicino a 17 Dichiarazione CE di Conformità Noi Ikra GmbH Schlesierstraße 36 D 64839 Münster Germany dichiariamo sotto la ns ...

Page 40: ......
Reviews: