background image

|

OKIFAX 5750/5950

58

FLASH/EARTH/NORMAL

Speed access no. 51

This function sets the type of PBX line your machine is
connected to (if your machine is connected to a PBX).

Available settings are 

NORMAL (N)

, flash (F) and earth (E).

NORMAL (N)

 is the default setting.

DIAL PREFIX

Speed access no. 52

If your machine is connected to a PBX, use this function to
tell your machine what access number is used to obtain an
outside line from your PBX. You can enter up to 4 digits.

Available settings are ON and 

OFF

.

OFF

 is the default setting.

To change this setting, see “Setting Basic Features,
Connecting to a PBX.”

Incoming Call Parameters

Incoming Ring

Speed access no. 60

This function offers a soft ringing sound through the
machine’s built-in speaker when a call is received.

If the function is set to OFF, the machine does not emit a
ringing sound during incoming calls.

If the function is set to ON, the machine emits a ringing
sound when the machine is set to TEL (manual receive mode)
or Ring Response is set to 20 sec (except 1 ring). When set to
DRC, the machine emits a ringing sound for each incoming
call with the same tone even if the Distinctive Ring
parameter is set to ON.

Available settings are 

ON

, OFF and DRC.

ON

 is the default setting.

Remote Receive

Speed access no. 61

This function allows switching from telephone to fax mode
to receive an incoming fax. Use the keypad on the optional
handset or external telephone to enter the remote receive
number programmed into the machine.

Available settings are: 

OFF

, 00, 11, 22, 33, 44, 55, 66, 77, 88,

99, ** or ##.

OFF

 is the default setting.

Summary of Contents for 59502

Page 1: ...User s Guide P N 59332101...

Page 2: ...ns Department Contact Information Please address any comments on this publication to MailingAddress Oki DataAmericas Inc Training and Publications Department 2000 Bishops Gate Boulevard Mount Laurel N...

Page 3: ...ve the Number 14 Checking Information During Transmissions 15 References 16 Recording Addresses and Passwords 16 Introduction 17 Oki Data Web Site 17 Features 17 Getting to Know Your Machine 20 Compon...

Page 4: ...Help Key 48 Setting Features 48 Using StepAccess 48 Using Speed Access 49 SpeedAccess Numbers 49 Setting Basic Features 52 Setting the Date and Time 52 Setting the Language 52 Setting Your Fax Machin...

Page 5: ...One Touch Speed Dials 62 2 or 3 Digit Speed Dials 63 Group Faxing 63 Programming One Touch and 2 or 3 Digit Speed Dial Numbers 63 Collect Information 64 Program the Information 64 Programming a Speed...

Page 6: ...ived in Memory Without Printing Them 78 Messages in Memory and Power Losses 79 Power Outage Report 79 DualAccess 79 What You Can Do While Making Copies 79 What You Can Do While Sending a Fax 79 What Y...

Page 7: ...98 Call Forwarding 98 Set a Forwarding Number 98 Set the Auto Answer Mode to FWD 99 Clear Forwarding Mode 99 Forward on Paper Toner Error 99 Setting a Paper Toner Error Forwarding Number 99 Relay Faxi...

Page 8: ...ve 113 Instant Dial 113 RestrictAccess 113 ECM Function 114 Sender ID Switch 114 Pulse Dial Rate 114 Pulse Make Ratio 114 Pulse Dial Type 114 T F Timer Prg 115 CNG Count 115 Ring Response 115 Distinct...

Page 9: ...port Options 123 MCF Single Loc 124 MCF Multi Loc 124 Image in MCF 124 Err Report MCF 124 Power Outage Report 124 Broadcast Entry Report 124 Confidential Reception Report 125 Codes Used in Reports 125...

Page 10: ...Standby Mode 142 Error Messages 142 Counters 145 Accessing the Print Scan Counters 145 Resetting the Image Drum Counter 145 Problem Checklist 145 Shipping Your Machine 150 United States and Canada 15...

Page 11: ...vides valuable information to help you operate the machine This section summarizes the features and capabilities directly connected to saving money and time Details for these features and capabilities...

Page 12: ...Multiple Locations Broadcast 4 Sending a Fax to a Single Location 5 Copying 6 Delayed Faxing 7 Function Settings 8 Report Printing 9 Message Confirmation Report Function List The Function List is a re...

Page 13: ...ess to Your Machine You can control access to your machine The method you use determines the amount of access control A password must be entered or the machine cannot be used The machine can only be u...

Page 14: ...and prepare a document for sending while the machine is receiving or sending another fax You do not have to wait for one operation to finish before beginning another For more information refer to Bas...

Page 15: ...heet s provide space for Speed Dial numbers 1 through 40 Model 5750 or 1 through 80 Model 5950 For for higher Speed Dial numbers program the number s and print the Telephone Directory For more informa...

Page 16: ...t 3 Telephone Directory This report provides a complete listing of all of the telephone numbers programmed into your machine s Speed Dial numbers See Reports Telephone Directory 4 Group Directory This...

Page 17: ...ta s Web Site You may reach the Oki Data Web Site at www okidata com Features The machine includes the following features Help Button Pressing this button causes the unit to print a Help List and the...

Page 18: ...adation 64 levels of gray Advanced transmission and reception functions Includes delayed transmission broadcasting multi location transmission confidential message transmission reception relay broadca...

Page 19: ...r or paper No paper reception Allows continued reception of documents when toner or paper run out by storing data not yet printed in the built in memory Polling Allows the transmission reception of do...

Page 20: ...Display Panel Displays status of machine and operation in progress 2 One Touch Keypad Use for one touch dialing of preprogrammed telephone numbers and for entering alphabetic numeric and special chara...

Page 21: ...ne on each side to gain entry to the toner image drum area 6 Power Switch Press 1 to turn on and 0 to turn off 7 Control Panel Programming Keys These are the main keys used for programming machine set...

Page 22: ...ion for supporting long documents 14 Paper Tray Holds 250 sheets of paper universal type legal letter A4 15 Paper Indicator Shows level of paper remaining in paper tray 16 Copy Output Lever Up positio...

Page 23: ...s and Accessories 20 IEEE 1284 Parallel Port The optional Multi Function Printer MFP Kit uses this port The MFP software allows your fax machine to interface with a computer With the MFP Kit your fax...

Page 24: ...transfers it to the printing paper Install a new image drum unit when Replace Drum appears on the display panel Only install image drum units specified by OKI for use in this machine See Maintenance...

Page 25: ...User s Guide English 25 Control Panel Keys and Indicators...

Page 26: ...ayer when programming the machine Move to the lower row from the upper row when data such as telephone numbers is listed in two rows 5 Shift Right Key Use this key to Move to the next operational laye...

Page 27: ...ne dialing during the current call This key can also be used during programming to create numbers with mixed pulse tone operation 14 0 Unique Key Use this key as 0 when dialing telephone numbers When...

Page 28: ...ed this key is relabeled E Mail Press this key before entering an e mail address directly from the One Touch keypad Use the One Touch key 39 for the functions described above See the Feature Set Guide...

Page 29: ...red Telephone Directory Using One Touch Keys for Dialing To use One Touch keys for dialing after the telephone number s for the key have been programmed simply load the document to be faxed and press...

Page 30: ...u need to dial a number longer than 40 digits you can dial the number using any combination of Speed Dial numbers or the numeric keypad To enter a chain dial number into a Speed Dial number press the...

Page 31: ...ed each time a key is pressed Error Tone If an inappropriate key is pressed the machine emits three short beeps If there is a problem with operations during communications the machine emits five long...

Page 32: ...ge and Image Drum Handling Emergency First Aid Getting Started Where to Install Your Fax Machine Unpacking Setting Up Your Fax Machine Installing the Toner Cartridge Attaching the Document Stacker Con...

Page 33: ...electrically and is equipped with a three wire grounded power cord For your safety do not attempt to defeat your power cord s grounding plug The electrical outlet and phone jack should be installed n...

Page 34: ...is not intended to be used in parallel with any other telephone devices Toner Cartridge and Image Drum Handling Leave unused toner cartridges and image drums in their packages until needed When replac...

Page 35: ...ek medical attention IF TONER GETS IN THE EYES Flush eyes with large quantities of cool water for 15 minutes keeping eyelids open with fingers Seek medical attention Getting Started Where to Install Y...

Page 36: ...any items are missing contact Oki Data immediately Keep your packing materials and carton in case you need to ship or transport the unit 1 Fax Machine 2 Toner cartridge 3 Image drum inside machine 4 P...

Page 37: ...r s Guide English 37 Setting Up Your Fax Machine 1 Lift up on the document tray and swing it up and out of the way 2 Press the release buttons located on both sides of the copy stacker Lift up the sta...

Page 38: ...e image drum cartridge then lift it out Caution Do not touch the green drum surface 4 Grasp the protective sheet and pull it out 5 Put the image drum cartridge back into place 6 Press down at each end...

Page 39: ...inning of this section Important This machine will only operate using toner cartridges specified by OKI for this facsimile machine The use of any other toner will result in the display of an operation...

Page 40: ...5750 5950 40 4 Lower the right side down into the toner well 5 Push the lock lever in the direction of the arrow until it stops 6 Close the copy stacker and document tray Make sure the cover is firmly...

Page 41: ...the document exit stacker on the back of the machine using the latching mechanism provided Connecting to the Telephone Line 1 Insert one end of the telephone cord into the LINE jack in the back of th...

Page 42: ...pplied telephone cord into the jack located on the back of the cradle 3 Insert the end of the cord into the TEL jack on the back of the fax machine The two TEL jacks are provided to allow you to conne...

Page 43: ...e and Telephone 1 Connect your answering machine to your fax machine 2 Plug your external telephone s cord into the telephone jack on your answering machine You must have the TAD mode feature turned o...

Page 44: ...ngth of the received page image is automatically reduced to fit on the paper loaded down to 75 of the original length Your fax machine is set at the factory to use letter size paper To use a different...

Page 45: ...User s Guide English 45 4 Remove the paper from its wrapper Note the print side notice printed on the label Fan the paper 5 Load the paper into the paper tray print side down...

Page 46: ...functions Press Menu Exit c to access the menu The machine functions are organized in a menu structure Functions are shown in the display as you navigate through the menu using the navigation keys If...

Page 47: ...and settings For example Polling TX RX includes 2 options Polling TX and Polling RX Each of these options includes a number of possible settings Primary Menu Functions Delayed TX Delayed Batch TX Prio...

Page 48: ...settings you want to change the speed access method takes you directly to most points on the menu Speed access numbers are only assigned to Set Up menu functions 1 Using Step Access To navigate throug...

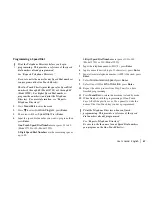
Page 49: ...unction you only need to press three keys From the standby mode with no document loaded 1 Press Menu Exit 2 Press 4 key 3 Press 0 key 4 Redial Tries function appears 5 Enter the setting you want Speed...

Page 50: ...ork 22 Toner Save 23 Sender ID Switch 24 1st Paper Size 25 2nd Paper Size This is active only when the second paper tray is installed Dial Options 40 Redial Tries 41 Redial Interval 42 Auto Start 43 D...

Page 51: ...inctive Ring Report Options 70 MCF Single Loc 71 MCF Multiple Loc 72 Message in MCF 73 Error Report MCF LAN Options for Internet Fax feature set 80 Auto Tray SW 81 Paper Size Check 82 LAN Print T O 83...

Page 52: ...the Enter key will not operate 4 Press Menu Exit to return to standby mode Setting the Language 1 Press Menu Exit to enter the menu 2 Using the numeric keys 0 9 enter speed access number 13 3 Select...

Page 53: ...16 characters will also be used as your Personal ID which may appear on the displays or reports of other fax machines you are communicating with Setting the TSI CSI and Sender ID 1 Press Menu Exit to...

Page 54: ...can answer from an external telephone connected to your machine If you pick up the hand set and hear fax machine tones press the Start key to receive the fax If you do not answer the phone and someone...

Page 55: ...ration function to print out data stored in memory during Memory Reception mode You can set a password USER PROGRAMMING under MEM PASSWORD PRG to disable the Memory Reception mode Forwarding Mode FWD...

Page 56: ...er Settings Redial Tries Speed access no 40 This function controls how many times your machine automatically redials a number that is busy or does not answer Available settings are from 0 to 10 tries...

Page 57: ...er like a rotary telephone MF multi frequency dialing touch tone which uses different tones to dial a number MF is the default setting Tone MF Duration Speed access no 49 If the machine is set to the...

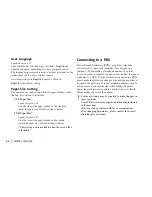
Page 58: ...ringing sound through the machine s built in speaker when a call is received If the function is set to OFF the machine does not emit a ringing sound during incoming calls If the function is set to ON...

Page 59: ...ble settings are ON and OFF ON is the default setting This parameter is available only if an optional MFP Kit is installed Other Basic Parameters Monitor Volume Speed Access no 11 The machine is equip...

Page 60: ...ter This setting is only available when the second tray is installed Connecting to a PBX Private Branch Exchanges PBXs are private telephone systems used to route calls internally for example in a com...

Page 61: ...tside line from the PBX press Enter 6 Press Menu Exit to return to standby mode Dial Prefix can also be accessed from the main menu by entering its speed access code 52 Remember that all outside telep...

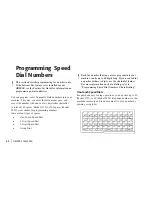
Page 62: ...5750 or 230 spaces Model 5950 are available for programming numbers there are four types of spaces One Touch Speed Dial 2 Digit Speed Dial 3 Digit Speed Dial Group Dial Each fax number that you enter...

Page 63: ...led two digit because you access them by entering their two digit space designation 3 Digit Speed Dial Numbers are spaces 100 to 140 Model 5750 or 230 Model 5950 They are called three digit because yo...

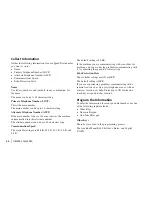
Page 64: ...cations Speed The available settings are 33 6 K 28 8 K 14 4 K 9 6 K and 4 8 K The default setting is 33 6 K If the machine you are communicating with is an older fax machine and you are having problem...

Page 65: ...e this key to switch between uppercase and lowercase when entering alphanumeric characters Unique Key One Touch key 20 Use the same as the 0 of the numeric keypad Also used to enter Symbols Internet c...

Page 66: ...OKIFAX 5750 5950 66 See next page...

Page 67: ...spaces 01 to 40 Model 5750 or 80 Model 5950 2 Digit Speed Dial Numbers are the remaining spaces up to 99 3 Digit Speed Dial Numbers are spaces 100 to 140 Model 5750 or 230 Model 5950 5 Input the tele...

Page 68: ...to erase the existing speed dial information Using Clear To program new information refer to Programming Speed Dial Numbers To use DEL refer to Programming Speed Dial Numbers When the existing number...

Page 69: ...s and minor corner folds If you are not sure how a document will fax first make a copy on your machine Load the document face down and press the Copy If your documents are heavily bent creased or torn...

Page 70: ...13 millimeters Capacity 50 sheets of standard paper 20 pound 80 g m Loading Documents To prevent paper jams and problems during operation Stack your documents neatly Align document edges before loadin...

Page 71: ...n default For documents with small type or other fine details use FINE or EX FINE resolution For documents with photos or many shades of gray use PHOTO resolution Contrast For documents with normal co...

Page 72: ...l 1 Press the Speed Dial Search key 2 Enter the Speed Dial number 2 or 3 digit using the numeric keypad 3 Press the Enter Key Wait 4 The document will begin faxing Using the Search Function 1 Press th...

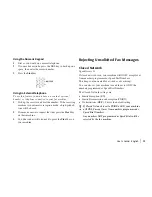
Page 73: ...r machine 3 You the sender will also need to press the Start key on your machine Rejecting Unsolicited Fax Messages Closed Network Speed Access 21 If closed network is on your machine will ONLY accept...

Page 74: ...t when power is restored the Power Outage Report prints Power Outage Report Use this report to determine which received messages you may have lost and which transmissions you may have to resend For mo...

Page 75: ...on press the Enter key once with no documents loaded A message displays on the control panel confirming your transmission To print the Message Confirmation Report MCF press the Enter key a second time...

Page 76: ...low on toner it displays TONER LOW REPLACE TONER CART If user function 16 NO TONER MEM RX is set to OFF default setting and the print quality is still legible you can continue to use the toner cartrid...

Page 77: ...l This amount varies depending on what has already been entered into memory A battery in your fax machine prevents the loss of data stored in memory at the time of a power outage Typical memory backup...

Page 78: ...ception password has been set enter the 4 digit password Press Enter 4 All data in memory is printed If you switch to Auto Receive Mode disabling Memory Reception Mode all messages stored in memory ar...

Page 79: ...fax from memory This feature increases your productivity and reduces the time you spend waiting for other operations to finish Dual Access applies while making a copy while sending a fax while receiv...

Page 80: ...essages are printing if your machine is set to receive faxes into memory 3 Enter the fax number before loading a document Why is this important Documents are placed FACE DOWN on the feeder of your mac...

Page 81: ...er the number of copies you want Use the numeric keypad 5 Press Copy again The machine begins making copies Manual Paper Feeder Use the manual paper feeder to make a copy on paper different from the p...

Page 82: ...ed The machine can process copies in two ways stacked with printed side up or with print side down The position of the lever located on the side of the machine above the power switch determines how th...

Page 83: ...fax sent to several locations A group fax is meant to be repeated The group is a collection of fax numbers to which you regularly or repeatedly send communications This set of numbers is saved program...

Page 84: ...ations Each group is listed by a group dial number Each group can be assigned a name Group ID for alphabetic searches Programming a Group The locations you use to create a group MUST BE programmed as...

Page 85: ...is automatically deleted You DO NOT delete the assigned numbers from their Speed Dial locations You DO DELETE the entries assigned to the group 1 Press Menu Exit to enter the Menu 2 Press to select Lo...

Page 86: ...use the Speed Dial Search enter the first letter of the name of the group and scroll through the list Group Directory Report This report is a reference of group numbers already programmed See Reports...

Page 87: ...ved programmed into the machine The locations you use during a broadcast CAN BE programmed as One Touch 2 digit or 3 digit Speed Dials before you create a broadcast Refer to Programming Speed Dial Num...

Page 88: ...OKIFAX 5750 5950 88 5 At this point you have three options Press Enter to display the locations for the broadcast Press Enter twice to print the locations for the broadcast Press Start to begin faxing...

Page 89: ...ents at a specified time and date It frees you from having to manually start the transmission You can scan the document and store the data in memory The fax machine can send documents at different spe...

Page 90: ...ansmissions Delayed Batch Transmissions can ONLY use One Touch Keys 31 through 40 Sending a Delayed Fax 1 Load the document s 2 Press Menu Exit to enter Menu 3 Press or to access Delayed TX Then press...

Page 91: ...specified time is a daily event the faxes are sent at the same time every day Imagine that your fax machine is located in the main office and you send faxes to your sales force Your machine can be pro...

Page 92: ...6 Press Menu Exit to exit Send a Fax as Part of a Delayed Batch 1 Load the document s 2 Press Menu Exit key to enter the menu 3 Press toselectDelayed Batch TX pressEnter 4 Enter the Speed Dial number...

Page 93: ...thing else A priority transmission document will be sent before any previously scanned documents any received incoming documents Sending a Priority TX 1 Load the document s 2 Press Menu Exit to enter...

Page 94: ...d in a safe place If you forget a password you will need to contact a Service Dealer for assistance Programming Personal Confidential Mailboxes Speed access no 04 A personal confidential mailbox or su...

Page 95: ...speed access no 04 wait 3 Enter the number of the personal mailbox to be modified press Enter 4 Press Enter to select Password Change 5 Input the existing old 4 digit numeric password press Enter 6 I...

Page 96: ...r is the secured memory of a machine An address and password are used to access the personal mailbox Your machine can send messages to up to 64 designated mailboxes in remote machines You cannot acces...

Page 97: ...he mailbox You cannot access a mailbox without the address and password A confidential fax is stored in memory and will not print until the proper password is entered Be sure to record both the addres...

Page 98: ...4 Enter the personal mailbox number 1 16 that is holding the message press Enter 5 Enter a 4 digit password for the mailbox press Enter 6 When Box No XX Conf Printing displays press Stop 7 Print Pers...

Page 99: ...ile the machine was set to forward will still forward Forward on Paper Toner Error Your machine can provide a backup in case it runs out of toner or paper When a Paper Toner Error forwarding number is...

Page 100: ...itiating station and a relay key station hub The relay key station hub can send a confirmation report to the relay initiating station when the relay fax session is complete This confirmation report is...

Page 101: ...elay password that is programmed into the relay key station hub Relay Group Numbers These 2 digit numbers are the numbers of groups of locations programmed into the relay key station hub Relay Key Sta...

Page 102: ...led the Relay Broadcast Report To receive the report the telephone number of the relay initiating station must be programmed into the specified Auto Dial location For your machine that location is Aut...

Page 103: ...e your machine as a relay key station hub you must program the number s of the destination machine s into your machine create a group or groups of the destination machine numbers create a relay passwo...

Page 104: ...is called the Relay Broadcast Report For your machine to send the report the telephone number of the relay initiating station must be programmed into Auto Dial location 99 of the initiating station Th...

Page 105: ...Cardiology Critical Care etc for prescription orders Staff can load the prescription orders into the unit facsimile machine The pharmacy facsimile contacts each unit facsimile and requests the orders...

Page 106: ...Mailbox Several remote machines can contact your machine and request the document You may also load several documents Memory Polling Bulletin allows for repeat polls The remote machines can contact y...

Page 107: ...eder Document Tray Polling is a one time occurrence It can only be repeated by re loading the document Memory Polling During Memory Polling remote machines contact your machine and request poll data d...

Page 108: ...retrieve the document as many times as needed Memory Polling Bulletin is designed to be repeated by multiple remote machines Create a Polling Mailbox 1 Press Menu Exit key to enter Menu 2 Input speed...

Page 109: ...ber and pressing Enter press the Stop key to stop the printing process The message Print Personal Box Memory Cancel displays Press Enter and the fax will be deleted without printing Dialing Another Fa...

Page 110: ...polling 1 Press Menu Exit to enter the menu 2 Press Enter to select Print from Memory 3 Press toselectPrint Memory Poll pressEnter 4 Faxes stored in memory print The machine returns to standby mode Ca...

Page 111: ...through the multi level structure of the menu Identifying Current Settings The Configuration Report is a list of current settings Printing a Configuration Report 1 Press Menu Exit to enter the menu 2...

Page 112: ...ation Functions Remote Diagnosis Speed access no 14 The remote diagnostics feature allows service personnel to remotely dial and service the machine This setting should remain OFF unless a service rep...

Page 113: ...re ON and OFF The default setting is OFF Instant Dial Speed access no 18 In the ON state the document is scanned into memory and dialing starts immediately Although the function relies on memory avail...

Page 114: ...ber of the sender on each page of every fax sent Pulse Dial Rate Speed Access no 46 If the machine is set to Dial Pulse this function controls the rate of the dialing pulses which vary by country Avai...

Page 115: ...onse Speed access no 66 This function controls how long the machine waits before answering an incoming call The available settings are 1 ring 5 10 15 and 20 seconds The default setting is 1 Distinctiv...

Page 116: ...t know the password you can t make changes or print memory data Only one memory password can be programmed in your machine Setting a Memory Password 1 Press Menu Exit to enter menu 2 Enter speed dial...

Page 117: ...a Service Dealer for assistance 1 Press Menu Exit to enter menu 2 Enter speed access no 06 wait 3 Enter department number 1 24 press Enter 4 Input 4 digit password 0000 9999 using the numeric keypad...

Page 118: ...75 inches whichever comes first before a logical jam occurs MDY DMY This setting controls how the machine displays and prints the date mm dd yy or dd mm yy Time Date Print This setting controls if and...

Page 119: ...nfirmation Report After transmission press the Enter key once with no documents loaded to see a report confirming your transmission on your machines display To print the report press the Enter key a s...

Page 120: ...ssion or reception The name or telephone number of the fax machine you were communicating with DISTANT STATION ID The communication mode used The number of pages The result Service codes Printing the...

Page 121: ...ion provided on this report includes The date and time at which the broadcast started The total amount of time used to complete the broadcast For each location the Location ID the number of pages sent...

Page 122: ...the menu 2 Press to select Report Print press Enter 3 Press or until the report you want appears on the display Press Enter 4 Print all the reports you want then press Menu Exit to return to standby...

Page 123: ...tion ID or telephone number of the fax machine you were communicating with DISTANT STATION ID The communication mode The number of pages The result Service codes If any error occurred during the commu...

Page 124: ...to OFF the report does not automatically print The Result Code 0000 on an MCF Report means that the fax communication was successful Power Outage Report Your machine has a 72 hour built in battery ba...

Page 125: ...mail box into which the message was received The number of pages received The result Service codes Codes Used in Reports Two types of codes are used in reports Result Codes Communication Codes Result...

Page 126: ...le to receive the entire message in memory S_JAM A document jam occurred in the sending fax machine STOP The Stop key was pressed ending the communication session Communication Codes Communication cod...

Page 127: ...h Replacing the Toner Cartridge Replacing the Image Drum Resetting the Image Drum Counter Cleaning the Scanner Path For the best possible scanning quality clean the paper lint and dust accumulated in...

Page 128: ...s on the type of documents you usually receive or copy A toner cartridge will print about 2 500 pages letter size of standard business communications at a typical print coverage of 4 equivalent of CCI...

Page 129: ...ads CAUTION HOT This part is extremely hot do not touch it 1 Lift up on the document tray and swing it up and out of the way 2 Press the release buttons located on both sides of the copy stacker Lift...

Page 130: ...Carefully lift the toner cartridge out of the image drum unit For disposal place it in the plastic bag you received with your new toner cartridge 5 Unwrap the new toner cartridge and gently shake it t...

Page 131: ...the direction of the arrow until it stops 9 Use the cleaning wipe provided with your new toner cartridge Gently wipe back and forth across the full length of the LED array Use a clean section of the w...

Page 132: ...or more than 5 minutes Never expose the image drum unit to direct sunlight Always hold the image drum unit by the ends Never touch the surface of the green drum inside the image drum unit CAUTION When...

Page 133: ...the release buttons located on both sides of the copy stacker Lift up the stacker 4 Firmly lift up to disengage the drum cartridge with its toner cartridge then lift it out Wrap it in the packaging m...

Page 134: ...ge See Maintenance Replacing the Toner Cartridge Resetting the Drum Counter Use this function to reset the drum counter when you replace the image drum and to clear the CHANGE DRUM message To reset th...

Page 135: ...sult an Oki Data Authorized Sales and Service Dealer Order toll free by phone at 1 800 654 3282 1 800 OKI DATA using a major credit card Check office supply catalogs or your local stationery store Mos...

Page 136: ...733302 Sheet One Touch 41 80 Bottom Level Model 5950 only Options Part Number Description 40755302 2 MB Memory Expansion Kit 40755312 4 MB Memory Expansion Kit 70029401 2nd Paper Tray Kit UST 550 7003...

Page 137: ...directly to your fax machine and works like a telephone Multifunction Product MFP PC Interface Kit The MFP PC Interface Kit is a software package that allows your fax machine to interface with a compu...

Page 138: ...under the back cover of the machine Only one memory slot is available in your machine Therefore only one of the available memory options may be installed at one time 2 MB Adds approximately 160 pages...

Page 139: ...tching and shading To print a cleaning page 1 Press the Menu Exit key to activate the menu mode 2 Press continuously until Printer Cleaning displays 3 Press Enter After a moment the cleaning page prin...

Page 140: ...you are experiencing frequent paper jams it may be due to the type of paper you are using For best results select a paper which has been developed specifically for photocopying or laser printing Be s...

Page 141: ...of the machine Set it aside on a clean dry surface out of direct sunlight Warning Do not touch the green drum surface 5 Pull out any paper caught inside the machine 6 Pull out the paper tray 7 Remove...

Page 142: ...rtridge Display Panel Messages This section lists the status and error messages that may appear on your machine s display panel and explains what they mean and how to correct any problem they indicate...

Page 143: ...cument Jam RELOAD DOCUMENT Paper feed error A document to be faxed or scanned has not fed into the scanner properly Remove the document and reload it into the document tray 14 14 FAX CHANGE DRUM SOON...

Page 144: ...INVALID TONER CART REFER TO USER GUIDE This error will occur if an incorrect toner cartridge is installed This machine will only operate using toner cartridges specified by OKI for use in this machin...

Page 145: ...twice 4 Press Clear twice 5 Press Menu Exit to return to standby mode Problem Checklist Your fax unit is a complex machine with many features and functions that allow it to operate in different ways...

Page 146: ...f problems You may be trying to communicate with an incompatible fax machine Your machine can only communicate with ITU T Group 3 fax machines The remote machine may not be able to perform the functio...

Page 147: ...ng you the fax and ask them to change their Resolution and Type of Original settings Ask the person to make a copy of the document on their fax machine to ensure that it is working properly Then ask t...

Page 148: ...clock to the correct time See Setting Basic Features Setting the Date and Time Your machine disconnected before you could answer a voice request You must answer a voice request while the warbling tone...

Page 149: ...you make or receive a voice call Try pressing the Stop key Your machine will return to standby mode so that you can converse This condition may happen infrequently due to telephone line conditions or...

Page 150: ...arning DO NOT ship the machine with the image drum unit installed 4 For instructions on shipping your machine to an authorized service center call Call 1 800 654 3282 1 800 OKI DATA English only Latin...

Page 151: ...is listed in this order 5750 5950 Dialing One Touch 40 80 Auto Dials 100 150 Groups 20 up to 140 230 numbers each Broadcast Transmissions 150 240 locations General Protocol ITU T G3 Modem Speed Maximu...

Page 152: ...8 5 inches 21 5 centimeters Scan Length 5 to 14 inches 12 8 to 35 6 centimeters Gray Scale 64 levels Consumables Toner Yield The number of pages you can print with one toner cartridge depends on the...

Page 153: ...A4 50 sheets of 13 to 20 lb paper 49 to 75 g m2 30 sheets 21 to 28 lb paper 79 to 105 5 g m2 Single sheet of 32 lb paper 121 g m2 Universal Tray Letter legal 13 inch legal 14 inch Executive A4 A5 A6...

Page 154: ...C 15 50 50 Hz 2 Battery Backup 72 hours Power Modes Ready Standby Warmup Time From Standby 30 seconds Environmental Temperature Operating 50 to 90 degrees Fahrenheit 10 to 32 degrees Celsius Storage 1...

Page 155: ...Key 28 Alphanumeric Caps Key 30 Programming the Keys 29 Telephone Directory 18 ALT Speed Dial Number 64 Alternate Number 18 29 Answering Machine and Telephone Install 43 Installation 43 Remote Receiv...

Page 156: ...n Dial 30 Number 30 Plus Key 30 Characters Caps Key 30 Unique Key 27 Cleaning Cleaning Page 139 Scanner Path 127 Clear Clear Key Location 27 Document Jams 139 Printing Paper Jams 140 Clock Adjustment...

Page 157: ...tput Lever 22 Copy Stacker 22 Copy Stacker Extension 22 Copy Stacker Release Buttons 21 Dual Access 79 Face Up or Face Down 82 Copy Output Lever 22 Making Copies 80 Start Copy Key 28 Counters 145 Acce...

Page 158: ...EARTH NORMAL 58 Variations by Country MF 57 Dimensions 153 Display Blank Display 145 Display Messages Normal Display 142 Transmission 74 Display Panel 17 Location 20 26 Display Panel Messages 142 Dis...

Page 159: ...Multiple Page 70 Receiving Confidential Faxes 97 Sending a Delayed Batch 92 Sending a Delayed Fax 90 Sending Confidential Faxes 96 Sending to a Group 85 Single Page Specifications 69 to Multiple Loca...

Page 160: ...elay Key Station 100 Humidity Specifications 154 Hyphen Key 28 I ID Deleting Characters 30 ID Password Programming 49 Space Key 30 Identification Sender ID 53 Sender ID on Transmitted Fax 114 TSI CSI...

Page 161: ...4 Setting the Paper Size 60 LINE Jack Connecting 41 Loading Documents Dual Access 70 Resolution 71 Setting the Contrast 71 Setting the Resolution 71 Type of Original 71 LOC Speed Dial Number 64 Locati...

Page 162: ...No paper reception 19 Specifications 152 and 600 dpi TX 152 Installation Limitations 152 Optional 152 Standard 152 Menu Help Key 48 Menu Exit Key Location 27 Navigating 47 Primary Functions 47 Setting...

Page 163: ...on and Maintenance Safety 34 Operation Functions 112 Changing 111 CNG Count 115 Distinctive Ring 115 ECM Function 114 Instant Dial 113 Memory Full Save 113 Memory Password 116 Pulse Dial Rate 114 Puls...

Page 164: ...53 Documents 69 70 Envelopes 153 Handling 153 Manual Feeder 153 Single Sheet 153 Universal Tray 153 Width Guides 44 Paper Indicator 22 Location 22 Paper Tray Capacity 22 Location 22 Paper Sizes 22 Par...

Page 165: ...n t print 149 Reports 119 Activity Report 120 Message Confirmation Report MCF 119 Sender ID on Transmitted Fax 114 Speed 151 Priority Transmission 93 Problem Solving 139 Alarm Indicator 26 Audible Ala...

Page 166: ...27 30 65 Time 52 Tone Key 27 TSI CSI 52 53 Unique Key 27 Programming Functions Deleting Characters 30 Programming Keys See Control Panel Keys Location Protective Sheet for Image Drum 38 Protocol Facs...

Page 167: ...n 100 Using Your Machine as a 101 Relay Key Station Hub 100 101 Printing the Relay Fax 104 Requirements 103 Using Your Machine as a 103 Relay Password 101 RELOAD DOCUMENT 75 Remote Diagnosis 112 Remot...

Page 168: ...and Maintenance 34 Toner Handling 34 if swallowed 35 in the eyes 35 Inhaled Toner 35 Saving Money 12 Control Access to Your Machine 13 Passwords 13 Restrict Phone Numbers 13 Delayed Transmission 13 R...

Page 169: ...Settings 118 MYD DMY 118 Time Date Print 118 TSI Print 118 Settings Selecting 46 Shift Keys Down 26 Left 26 Right 26 Up 26 Shipping 36 150 Signals CNG Count 115 Distinctive Ring 115 Signal Tones 31 S...

Page 170: ...ection 64 Group 63 86 Keys don t work 147 Name 64 Numeric Keypad 27 65 One Touch Keypad 65 Primary Telephone Number 64 Programming 63 64 67 Collect Information 64 Speed Dial Numbers 62 Speed Dial Sear...

Page 171: ...lation 43 Temperature Specifications 154 Time Setting 52 Setting for Delayed Fax 148 Timing Ring Response 115 T F Timer Prg 115 Tone MF Duration 57 Tone Key 27 Tone Plus MF DP 57 Toner Cleaning 34 Han...

Page 172: ...s 27 Unique Key 27 30 Unpacking Missing Items 36 Unsolicited Faxes 73 149 Closed Network 73 Unwanted Faxes 149 Uppercase Caps Key 30 User Language Changing 60 V Ventilation Installing the Machine 35 V...

Reviews: