background image

C9800 User’s Guide> 88

S

TAPLE


JAMS

 – F

INISHER

 (

OPTIONAL


ACCESSORY

)

C

HECK

 F

INISHER

, S

TAPLE

 J

AM

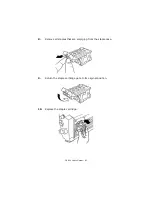
When the display indicates a staple jam has occurred, clear the jam 
as follows:

1.

Open the Finisher front cover.

White area of paper 

is lightly stained. 

Paper contains static. 

Use paper stored in proper 

temperature and humidity 

conditions. 

Too thick paper is used. 

Use thinner paper. 

The toner is low. 

Replace the toner cartridge. 

Periphery of the 

letters is smudged. 

The LED head is dirty. 

Wipe the head with LED lens 

cleaner or with a soft cloth. 

Toner comes off 

when it is rubbed. 

The thickness and type 

of the paper are 

incorrectly set. 

Set the correct value of 

[Media Type] and [Media 

Weight] in the menu setup 

or set one value thicker for 

[Media Weight]. 

Recycled paper is used.

Set one value thicker for 

[Media Weight] in the menu 

setup. 

Glossiness is not 

uniform. 

The thickness and type 

of the paper are 

incorrectly set. 

Set the correct value of 

[Media Type] and [Media 

Weight] in the menu setup 

or set one value lighter for 

[Media Weight]. 

SYMPTOMS 

POSSIBLE CAUSES

STEPS TO TAKE

Summary of Contents for C9800hdn

Page 1: ......

Page 2: ...s and manuals are available from the Oki web site http www okidata com and http my okidata com Copyright 2005 Oki Data Americas Inc Second Edition April 2005 Oki and Microline are registered trademark...

Page 3: ...s 1 to 5 22 MP tray 22 Face down stacker 23 Face up stacker 23 Duplex unit 23 Tray and stacker examples 24 Loading Trays 1 to 5 24 Using the MP Tray 26 Using the stackers 28 Control panel 30 Buttons a...

Page 4: ...al accessories 54 Accessory order information 55 Installing accessories 55 Troubleshooting 56 Paper jams printer 56 Open cover paper jam tttttt side cover 56 Open cover paper jam side cover 58 Open co...

Page 5: ...onfiguration example monochrome pages printed 101 Print Pages 102 Print Information example demonstration page 102 Print Secure Job 103 Menus 104 Tray Configuration 104 System Adjust 108 Menus example...

Page 6: ...additional information to supplement the main text CAUTION A caution provides additional information which if ignored may result in equipment malfunction or damage WARNING A warning provides additiona...

Page 7: ...s in the print queue through either your web browser or software balance the workflow of networked devices manage color profiles save templates on the hard disk for faster processing and printing of j...

Page 8: ...0 dpi dots per inch print resolution for high quality image production showing the finest detail Single Pass Color Digital LED technology for high speed processing of your printed pages 10Base T and 1...

Page 9: ...tapling or saddle stitching printer output Punch unit to extend Finisher functionality EFI Color Profiler Kit ABOUT THIS GUIDE NOTE Images used in this manual may include optional features that your p...

Page 10: ...Windows users and Mac users to help you operate your printer effectively and efficiently This is an electronic document stored on the Documentation CD Configuration Guide to provide machine configura...

Page 11: ...marks down the left hand side of your screen click on the topic of interest to jump to the required topic If the bookmarks are not available use the Contents on page 3 In the list of bookmarks click o...

Page 12: ...e is 1 From the toolbar select File then Print or press the Ctrl P keys 2 Choose which pages you wish to print a All pages 1 for the entire manual b Current page 2 for the page at which you are lookin...

Page 13: ...E TOP COVER To open the top cover squeeze the top cover handle 1 to release the catch and raise the cover To close the top cover push gently 1 until the cover stops midway and then push harder 2 to cl...

Page 14: ...onents of your printer are identified in the graphics below 1 Paper holding arm 2 Top cover face down stacker 3 MP Tray multi purpose tray 4 Tray 1 side cover 5 Paper size label 6 Paper gauge 7 Tray 1...

Page 15: ...C9800 User s Guide 15 10 Face down stacker 11 Power on off switch 12 Face up stacker 13 Duplex unit 10 12 11 13...

Page 16: ...C9800 User s Guide 16 14 Interface unit 15 Network interface connector 16 Parallel interface connector 17 USB interface connector 18 Power connector 19 Ventilation openings 14 18 19 15 16 17...

Page 17: ...tridge Cyan 21 Image drum cartridge and toner cartridge Magenta 22 Image drum cartridge and toner cartridge Yellow 23 Image drum cartridge and toner cartridge Black 24 Toner cartridge 25 Image drum ca...

Page 18: ...C9800 User s Guide 18 28 Belt unit 29 Drum basket handle 30 Drum basket 28 29 30...

Page 19: ...PPLIED CDs Printer Drivers Contains PCL and PS drivers utilities and productivity software for the PCL driver Documentation Contains documentation in electronic form to describe how to use the printer...

Page 20: ...posed to the high fuser temperatures used in the printing process Envelopes should be free from twist curl or other deformations They should also be of the rectangular flap type with glue that remains...

Page 21: ...in L 5 82 18 in 17 57 lb Any Tray Face up Stacker Custom W 3 12 12 91 in L 3 54 18 in 15 71 lb MP Tray Face up Stacker Banner W Letter width L 18 48 in 34 lb recommended MP Tray Face up Stacker Index...

Page 22: ...edia weights and special media The multi purpose tray can handle the same sizes as the standard trays but in weights up to 71 3 lb 268 g m For very heavy paper stock use the face up paper stacker This...

Page 23: ...ver setting of Face Down will successfully direct prints to the Face Down stacker The face up stacker can hold up to 250 sheets of 20 lb 80 g m standard paper and can handle stocks up to 71 3 lb 268 g...

Page 24: ...he paper rear stopper tab 1 and adjust the tab to the required paper size 3 Fan the paper to be loaded then tap the edges of the stack on a flat surface to make it flush 4 Load the paper face down and...

Page 25: ...ace between the paper and the guides and rear stopper Do not overfill the paper tray Capacity depends on the paper type Do not load damaged paper Do not load paper of different sizes or types at the s...

Page 26: ...USING THE MP TRAY 1 Squeeze the handle 1 and open the multi purpose tray 2 Fold out the paper support section and swivel out the extension supports 2 3 Adjust the paper guides 3 to the size of the pa...

Page 27: ...p and top edge into the printer For two sided duplex printing on letterhead load the paper with pre printed side down and top edge away from the printer Envelopes should be loaded face up with long ed...

Page 28: ...stacker 1 on the left side of the printer is closed its normal position paper is ejected to the face down stacker on the top of the printer Face up stacker The face up exit path is used for heavy pape...

Page 29: ...C9800 User s Guide 29 2 Flip out the paper support 2 3 Swivel out the paper support extension 3 2 3...

Page 30: ...ed for ease of use BUTTONS AND LIGHTS The parts of the control panel are identified and briefly explained below 1 Shutdown Restart button Hold down for more than 2 seconds for a soft shutdown You can...

Page 31: ...ge 5 Up arrow button Enters menu mode and enables upward movement through the displayed list of menu items 6 Down arrow button Enters menu mode and enables downward movement through the displayed list...

Page 32: ...of the display panel show the printer status The bottom of the display panel normally shows a bar chart of the toner usage MENU FUNCTIONS INFORMATION There are three types of menu functions informatio...

Page 33: ...When an error has occurred press the Help button Information displays that will help you correct the error DISPLAY PANEL MESSAGES The display panel messages supplemented by the Help messages where ap...

Page 34: ...s menu 4 Press the Up arrow or Down arrow buttons repeatedly until the desired Item is highlighted 5 Press the Enter button to select this Item 6 Press the Up arrow or Down arrow buttons repeatedly un...

Page 35: ...GETTING STARTED This section provides information to help you get started with using your printer PRINTER LOCATION Check that you have sufficient space for access around your printer 60cm 60cm 20cm 8i...

Page 36: ...C9800 User s Guide 36 above your printer TURNING OFF ON TURNING OFF 1 Hold down the Shutdown Restart button 1 on the control panel for more than 2 seconds to start the shutdown process 70cm 28in 1...

Page 37: ...turn off the printer Please wait as this may take a short time TURNING ON NOTE If the display panel shows that you can either turn off or restart the printer press Shutdown Restart to turn on the prin...

Page 38: ...inting the configuration document the printer returns to the ready to print status 9 You can use this document to check your printer configuration System values and installed accessories are listed at...

Page 39: ...etween the printer and computer 3 Turn on the printer and then the computer CONNECTING THE USB INTERFACE Do not connect the USB cable at this time You will be instructed when to connect the USB cable...

Page 40: ...C9800 User s Guide 40 2 Remove the protective cover from the network connector on the printer 3 Connect an Ethernet cable between the printer and an Ethernet hub...

Page 41: ...the Software Installation Guide and Configuration Guide for further details on how to configure the network connection before installing the printer drivers NOTE Administrator s authority is required...

Page 42: ...C9800 User s Guide 42 OPERATION USING THE PRINTER For full details of how to use the printer and any optional accessories to print jobs efficiently and effectively please refer to the Printing Guide...

Page 43: ...maintenance item is left by using the appropriate menus For example enter the menu system and follow the path Configuration Supplies Life Cyan Toner The percentage of Cyan Toner remaining is displaye...

Page 44: ...lack 30 000 Letter pages avg 42918104 Image drum Cyan 30 000 Letter pages avg 42918103 Image drum Magenta 30 000 Letter pages avg 42918102 Image drum Yellow 30 000 Letter pages avg 42918101 Staples 3...

Page 45: ...cartridge a LED lens cleaner is enclosed with each replacement toner cartridge if printing is showing signs of faded images white stripes or blurred letters You can use a LED lens cleaner or dry soft...

Page 46: ...2 With an LED lens cleaner or soft cloth gently wipe each of the four heads 1 Move the cleaner as shown using a clean section of the cleaner with each pass Be careful not to damage the guards 2 3 Clo...

Page 47: ...an the paper feed rollers if paper jams frequently occur 1 Remove items like a wrist watch or bracelet then use the Shutdown Restart button followed by the On Off switch to turn the printer off 2 Open...

Page 48: ...User s Guide 48 3 Remove Tray 1 completely from the printer 4 Gaining access through the gap left by Tray 1 wipe the 3 paper feed rollers 2 with a soft cloth lightly moistened with water 5 Replace Tra...

Page 49: ...C9800 User s Guide 49 6 Return the paper guide plate to its original position and close Tray 1 side cover 7 Turn on the printer...

Page 50: ...CASING 1 Turn the printer off by using the Shutdown Restart button followed by the On Off switch 2 Wipe the printer surface with a soft cloth moistened sparingly with water or neutral detergent 3 Use...

Page 51: ...the printer EMPTYING THE PUNCH CHIP BOX PUNCH UNIT OPTIONAL ACCESSORY When the display panel indicates that the punch chip box is full empty the box as follows 1 Operate the Finisher lever and move th...

Page 52: ...User s Guide 52 2 Pull out the punch chip box being careful to keep it level so as not to spill any chips 3 Discard the chips in an appropriate place 4 Replace the punch chip box carefully into the Fi...

Page 53: ...C9800 User s Guide 53 5 Check that the punch chip box has been replaced correctly then move the Finisher back into position being careful not to trap your fingers...

Page 54: ...ty high capacity feeder equivalent to three paper trays C9800hdn only NOTE 1 Tray configurations are Tray 1 only Tray 1 2nd Tray Tray 1 2nd Tray 3rd Tray Tray 1 HCF Tray1 2nd Tray HCF 2 The C9800hdtn...

Page 55: ...er MFP Upgrade Kit and Punch unit must be installed by an authorized engineer For the following accessories you have to make the appropriate setting in your printer driver s paper tray s Finisher Refe...

Page 56: ...x A Display Panel Messages on page 95 PAPER JAMS PRINTER If a paper jam occurs a message appears on the display panel in the printer Control Panel You can press the Help button to display guidance on...

Page 57: ...C9800 User s Guide 57 2 Holding it by the tab 2 turn the paper guide outward 3 Carefully remove the jammed paper 4 Put the paper guide back into position and close Tray 1 side cover 2...

Page 58: ...C9800 User s Guide 58 OPEN COVER PAPER JAM SIDE COVER 1 If the MP Tray is open close it so that the side cover 1 is visible 2 Pull the release lever 2 and pull open the side cover 1 2...

Page 59: ...C9800 User s Guide 59 3 Carefully remove the jammed paper 4 Close the side cover...

Page 60: ...OPEN COVER PAPER JAM TOP COVER 1 Squeeze the top cover handle 1 and open the top cover 2 Squeeze the basket handle 2 and raise the drum basket WARNING Be careful not to touch the fuser unit which is h...

Page 61: ...ver 3 in the direction shown to release the unit Holding the fuser unit 4 by the handle lift it out of the printer and place it on a flat surface WARNING Be careful not to touch the fuser unit which m...

Page 62: ...User s Guide 62 5 Pull up the jam release levers 5 and remove the jammed paper 6 Carefully replace the fuser unit into the printer and turn the lock lever 6 in the direction shown to lock the fuser un...

Page 63: ...C9800 User s Guide 63 7 If paper is jammed near the paper exit open the face up stacker 7 8 Open the side cover paper exit 8 and remove the jammed paper 7 8...

Page 64: ...C9800 User s Guide 64 9 Close the side cover paper exit and then the face up stacker 10 Return the image drum basket 9 into position and check it is locked 9...

Page 65: ...ose the top cover and ensure it is latched PAPER JAMS DUPLEX UNIT CHECK DUPLEX UNIT PAPER JAM 1 If a Finisher unit is attached to your printer operate the lever 1 of the Inverter unit to separate the...

Page 66: ...C9800 User s Guide 66 2 Operate the duplex cover release button 2 and open the cover 3 Carefully remove any jammed paper 2...

Page 67: ...C9800 User s Guide 67 4 Operate the levers 3 and pull out the duplex unit 5 Holding the front top cover by the grip 4 push it gently inwards and raise it 3 3 4...

Page 68: ...C9800 User s Guide 68 6 Remove any jammed paper 7 In similar manner check for and clear any paper jammed under the rear top cover...

Page 69: ...C9800 User s Guide 69 8 Replace the two top covers 9 Raise the front cover of the duplex unit...

Page 70: ...C9800 User s Guide 70 10 Push the duplex unit back into position 11 If you detached a Finisher unit to gain access to the duplex unit replace the Finisher unit...

Page 71: ...nel to check the number displayed You will need this to be able to clear the paper jam The following paragraphs explain what to do for each of the indicated numeric codes 591 592 593 599 643 645 PAPER...

Page 72: ...C9800 User s Guide 72 3 Open the Finisher top cover 4 Carefully remove any jammed paper 5 Close the Finisher top cover...

Page 73: ...User s Guide 73 6 Move the Finisher back into position and connect it to the Inverter 594 597 598 644 646 PAPER JAM IN FINISHER 1 Operate the Finisher lever 1 and move the Finisher away from the Inver...

Page 74: ...C9800 User s Guide 74 2 Open the Finisher front cover 2 3 Continue to turn the lower knob 3 clockwise until any jammed paper is completely ejected 2 3...

Page 75: ...C9800 User s Guide 75 4 Remove the ejected paper 5 Close the Finisher front cover...

Page 76: ...C9800 User s Guide 76 6 Open the Finisher right side cover 7 Carefully remove any jammed paper...

Page 77: ...C9800 User s Guide 77 8 Close the Finisher right side cover 9 Move the Finisher back into position and connect it to the Inverter...

Page 78: ...s Guide 78 590 PAPER JAM IN FINISHER PUNCH UNIT 1 Operate the Finisher lever 1 and move the Finisher away from the Inverter 2 Move the tab 2 on the right side of the Finisher to align it with the mar...

Page 79: ...C9800 User s Guide 79 3 Open the Finisher top cover 4 Carefully remove any jammed paper 5 Close the Finisher top cover...

Page 80: ...C9800 User s Guide 80 6 Move the Finisher back into position and connect it to the Inverter CHECK INVERTER PAPER JAM 1 Operate the Finisher lever 1 and move the Finisher away from the Inverter 1...

Page 81: ...C9800 User s Guide 81 2 Squeeze the recessed handle 2 and open the left side cover of the Inverter 3 Carefully remove any jammed paper 2...

Page 82: ...C9800 User s Guide 82 4 Close the Inverter left side cover 5 Move the Finisher back into position and connect it to the Inverter...

Page 83: ...C9800 User s Guide 83 6 Operate the Inverter lever 3 and separate the Inverter from the printer 7 Open the right side door 4 of the Inverter 3 4...

Page 84: ...C9800 User s Guide 84 8 Remove any jammed paper 9 Close the right side door...

Page 85: ...dia is damp or charged with static electricity Use media that has been stored in appropriate temperature and humidity conditions Your print media is creased or curled Use appropriate media Decurled me...

Page 86: ...printed page The LED head is dirty Wipe the LED head with a LED lens cleaner or with a soft cloth The toner is low Replace the toner cartridge Foreign materials may be present in the image drum Repla...

Page 87: ...aper is moist or dry Use paper stored in proper temperature and humidity conditions Vertical lines appear The image drum cartridge is damaged Replace the image drum cartridge The toner is low Replace...

Page 88: ...f the letters is smudged The LED head is dirty Wipe the head with LED lens cleaner or with a soft cloth Toner comes off when it is rubbed The thickness and type of the paper are incorrectly set Set th...

Page 89: ...C9800 User s Guide 89 2 Turn the knob in the direction indicated until the colored indicator appears 3 Remove any paper that awaits stapling in the paper ejection area 4 Pull out the staple unit...

Page 90: ...C9800 User s Guide 90 5 Turn the knob in the direction indicated to move the stapler to the front 6 Grip both sides of the staple cartridge pull it up and remove it 7 Raise the staple cartridge gate...

Page 91: ...C9800 User s Guide 91 8 Remove all staples that are emerging from the staple case 9 Return the staple cartridge gate to its original position 10 Replace the staple cartridge...

Page 92: ...er s Guide 92 11 Ensure that the staple cartridge is securely installed back into the staple unit then push the staple unit fully home 12 Close the Finisher front cover being careful not to trap your...

Page 93: ...b 55 268 g m Paper output Face down stacker 500 sheets Face up stacker 250 sheets Interfaces Parallel USB 2 0 10Base T and 100Base TX Duty cycle 150 000 pages month maximum Toner life 15 000 Letter pa...

Page 94: ...C9800 User s Guide 94 Noise level Operating 53dBA maximum Standby 40dBA maximum Power save 40dBA maximum after 30 mins background level ITEM SPECIFICATION...

Page 95: ...ssory Invalid Data Press ONLINE Button Invalid data has been received by the printer Press the ONLINE button to clear this warning Change Paper in tttttt mmmmmm pppppp Press ONLINE button Please see H...

Page 96: ...paper jam has been cleared Open tttttt side cover to check for additional paper You can access help details by pressing the HELP button Check Image Drum cccccc Please see HELP for details Check that t...

Page 97: ...vided or a command that can be executed to display or print a status or setting value Emboldened values followed by an A denote default values associated with locations where A4 is default paper size...

Page 98: ...ge nnnnnn Displays number of monochrome printed pages converted to Letter equivalent Traym nnnnnn Displays total printed pages from Traym where m is in range 1 to 5 MP Tray nnnnnn Displays total print...

Page 99: ...xxxx drum as a percentage where xxxx can be Cyan Magenta Yellow Black Belt Remaining nnn Displays the remaining life span of the belt unit as a percentage Fuser Remaining nnn Displays the remaining l...

Page 100: ...Displays detected paper size of Traym MP Tray Similar to values for Traym Displays detected paper size of the MP Tray ITEM VALUE DESCRIPTION Serial Number xxxxxxxxxxxxxxx Displays serial no of the pr...

Page 101: ...to select this menu 4 Press the Up arrow or Down arrow buttons repeatedly until Print Page Count is highlighted 5 Press the Enter button to select this Item 6 Press the Up arrow or Down arrow buttons...

Page 102: ...ALUE DESCRIPTION PS Test Page Execute Prints the PostScript sample page Configuration Execute Prints printer configuration details Job Log Execute Prints EFI job log details Color Charts disk only Exe...

Page 103: ...D when printing When you print a Secure document it is deleted from the HDD When you print a document Stored to HDD it prints and remains stored on the HDD until you manually delete it Not Found no jo...

Page 104: ...s in range 1 to 5 similar arrangement for all trays Paper Size Tray Size Custom Sets paper in Traym X Dimension 3 9 8 3 A 8 5 L 12 9 inch 100 210 A 216 L 328 mm Sets Custom paper width for Traym Sets...

Page 105: ...detects A3 Nobi A3 Wide and Tabloid Extra sizes as the same Use this setting to tell the printer which of the three sizes is loaded in Traym Legal 14 Paper Legal 14 Legal 13 5 Sets the length of the...

Page 106: ...Monarch Envelope DL Envelope Landscape Postcard Double postcard C5 C4 Envelope Index Card Sets paper size for MP Tray X Dimension 3 8 3 A 8 5 L 12 9 inch 76 210 A 216 L 328 mm Sets Custom paper width...

Page 107: ...t Medium Light Medium Medium Heavy Heavy Ultra Heavy 1 Ultra Heavy 2 Ultra Heavy 3 Sets the media weight for MP Tray Tray Usage Normal Tray Tray selection switching uses this tray as the normal tray W...

Page 108: ...cally clear when a new print job is received Auto Continue ON OFF Sets whether the printer is automatically recovered when Memory Overflow or Tray Request occurs Manual Timeout OFF 30 sec 60 sec If pa...

Page 109: ...as been cleared OFF Cancels a job including the page currently jammed Print Position Adjust X Adjust 0 00 0 25 2 00 2 00 0 25 mm 0 00 0 01 0 08 0 08 0 01 in Adjusts the position of the whole printing...

Page 110: ...side printing of duplex printing adjusts the location of the whole printing image 0 25 mm 0 01 in interval parallel to the direction of paper movement i e vertically xxxx Darkness 0 1 3 4 1 Adjusts t...

Page 111: ...int results or light specks or streaks result when printing in Plain Paper Color setting Decrease the value if light specks or streaks or snow flake like printing results in high density print areas T...

Page 112: ...on is highlighted 5 Press the Enter button to select this Item 6 Press the Up arrow or Down arrow buttons repeatedly until Tray1 Config is highlighted 7 Press the Enter button to select this Item 8 Pr...

Page 113: ...ed 5 Press the Enter button to select this Item 6 Press the Up arrow or Down arrow buttons repeatedly until MP Tray Config is highlighted 7 Press the Enter button to select this Item 8 Press the Up ar...

Page 114: ...United States Oki Data Americas Inc 2020 Bishops Gate Blvd Mt Laurel NJ 08054 USA Phone 1 800 654 3282 USA and Canada only Fax 1 856 222 5247 Canada Oki Data Americas Inc 2735 Matheson Blvd East Unit...

Page 115: ...31 ready 31 interface Ethernet 39 parallel 38 39 USB 38 39 M maintenance items order details 44 replacing 43 menu Admin Setup 97 Calibration 97 Configuration 97 98 Menus 97 104 Print Information 102 P...

Page 116: ...C9800 User s Guide 117 T troubleshooting 56 turning off 36 on 37 U unsatisfactory printing 86 user s guide printing 12...

Reviews: