5-14 R
eceiving
faxes
Separator page
The separator page function can separate each received document by inserting blank
paper on the top of the received document. For example, if you use colored paper for the
separator page, it is easy to see the individual received document.
Setting the Separator page
1
Press <Menu>, <2>, <2>, <1>, <2>, <Enter>.
Separator Page :Off
/
/Enter
2
Press <
q
> or <
p
> to select the mode you want.
To turn the “Separator Page” on, select “On” and proceed to step 3.
To turn it off, select “Off” and skip to step 6.
3
Press <Enter>.
1st Cassette
/
/Enter
NOTE
The paper source which has not been attached to your machine will be not displayed on
the LCD.
4
To select the paper source for the separator page using the cursor key.
5
Press <Enter>.
Print on S.Page :Off
/
/Enter
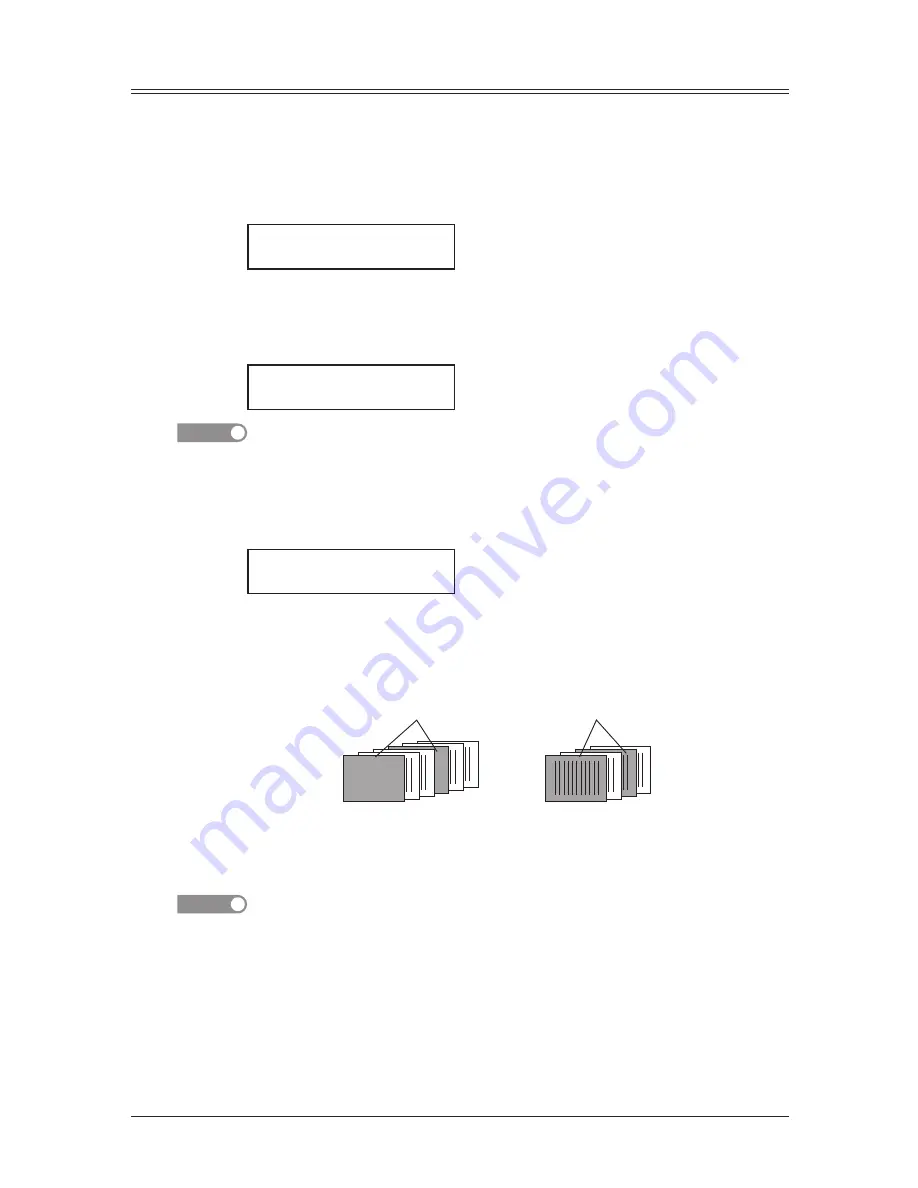
Determine if the separator page will be printed blank or not.
If you wish that the separator page will be printed blank, select “Off”.
If you wish to print the first page of the received documents on the separator page,
select “On”.
1 2
1 2
1 2
1 2
Separator page separates each received document.
Print on the separator page: Off
Print on the separator page: On
Blank
6
Press <Enter> to save the settings.
To return to the standby mode, press <Reset>.
NOTE
After setting, you can turn on or off by pressing <Advanced Functions> until “Separa-
tor Page” appears on the LCD and press <Enter>. Then select “On” or “Off” and press
<Enter>.
– or –
If you assigned “Separator Page” to the soft key (page 8-2), you can turn the “Separator
Page” function “On” or “Off” by simply pressing that key.
Summary of Contents for F0305
Page 60: ...3 12 Autodialler Dialling options This page intentionally left blank ...
Page 98: ...5 16 Receiving faxes This page intentionally left blank ...
Page 140: ...9 14 Security features This page intentionally left blank ...
Page 180: ...12 24 Maintenance Problem solving This page intentionally left blank ...
Page 187: ...MEMO ...
Page 188: ...MEMO ...


