background image

4 ADVANCED FUNCTIONS

70    Recovery Transmission

Recovery Transmission

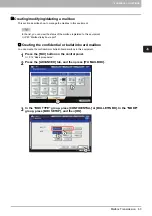
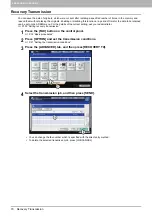
You can save the data of originals, which were not sent after redialing a specified number of times, in the memory and 
resend them without placing the originals. Enabling or disabling this function or a period of time for the data to be retained 
can be set on the ADMIN menu. For the details of the current setting, ask your administrator.


 P.102 “Setting recovery transmission”

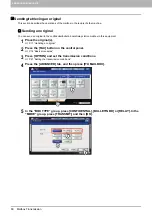
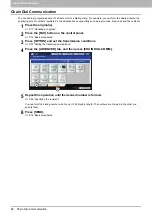
1

Press the [FAX] button on the control panel.


 P.14 “Basic procedures”

2

Press [OPTION] and set the transmission conditions.


 P.21 “Setting the transmission conditions”

3

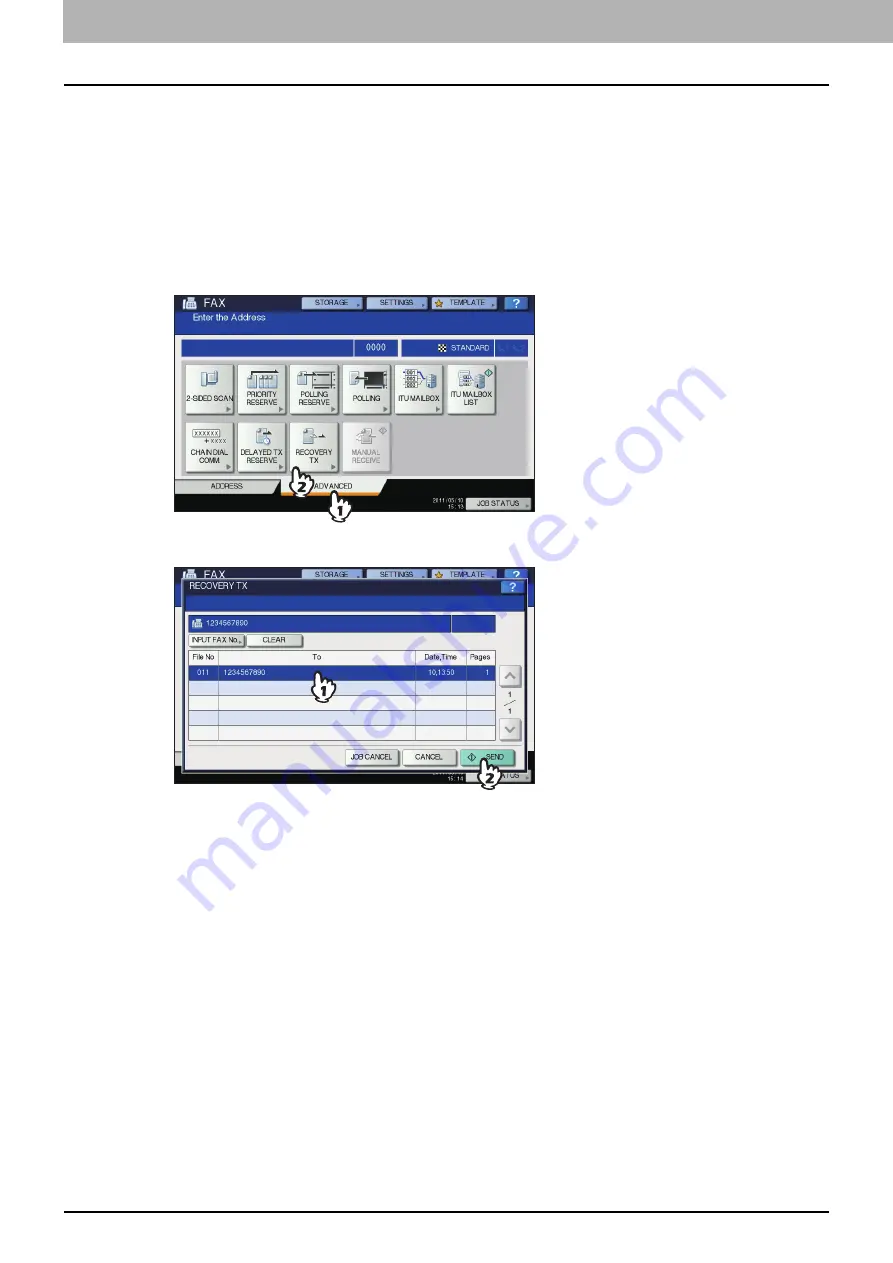
Press the [ADVANCED] tab, and then press [RECOVERY TX].

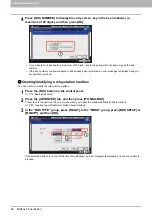
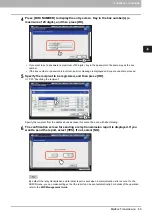
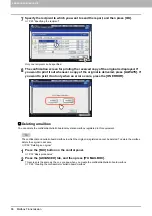
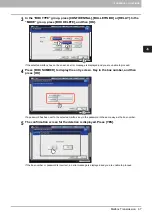
4

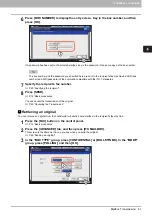
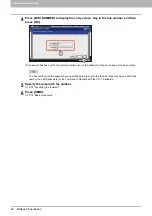
Select the transmission job, and then press [SEND].

y

You can change the fax number which is specified with the direct entry method.

y

To delete the selected transmission job, press [JOB CANCEL].

Summary of Contents for GD-1320

Page 1: ...MULTIFUNCTIONAL DIGITAL COLOR SYSTEMS MULTIFUNCTIONAL DIGITAL SYSTEMS Operator s Manual for FAX Unit GD 1320 GD 1260 for ES9455 MFP ES9465 MFP ES9475 MFP...

Page 2: ...2013 Oki Data Corporation All rights reserved Under the copyright laws this manual cannot be reproduced in any form without prior written permission of Oki Data...

Page 3: ...escribes how to use the fax functions troubleshooting and its maintenance etc Before using the fax functions thoroughly read and understand this Operator s Manual To ensure that the fax functions are...

Page 4: ...e A B format If you use paper in the LT format the display or the order of buttons in the illustrations may differ from that of your equipment Options For the available options refer to Options in the...

Page 5: ...laced in a landscape direction Example A4 size original on the original glass Paper or originals of A3 B4 LD or LG can only be placed in a landscape direction therefore R is not added to these sizes T...

Page 6: ...is attributable to either acts omissions events or accidents beyond the reasonable control of Oki Data Corporation including without limitation acts of God war riot civil commotion malicious or delibe...

Page 7: ...ING AND CANCELING THE COMMUNICATIONS Checking Communications 42 Checking reserved transmissions 42 Checking communication status log 43 Canceling the Transmission 45 Canceling the memory transmission...

Page 8: ...ansmission report 86 Multi transmission report 86 Multi polling report 87 Relay TX orig terminal report 87 Relay TX relay station report 88 Relay TX end terminal report 88 Relay station report 89 Mail...

Page 9: ...FORE USING FAX This chapter describes the basics of this equipment you should learn before you start using it Description of Each Component 8 Control panel 8 Touch panel 10 Options 11 Connecting Cable...

Page 10: ...or the fax function 3 Digital keys Use these keys to enter fax numbers etc 4 RESET button Use this button to clear all current selected functions and return to the default settings 5 STOP button Use t...

Page 11: ...1 BEFORE USING FAX Description of Each Component 9 1 BEFORE USING FAX This lamp does not light when the equipment is in the Super Sleep mode...

Page 12: ...tion object area Operation related buttons and text boxes are shown here 4 Alert message indication area Messages are shown here to inform you of various alerts such as the replacement time of toner c...

Page 13: ...1 1 BEFORE USING FAX Options This section describes the options related to the fax function y FAX Unit This unit enables the use of the fax function y 2nd Line for FAX Unit GD 1260 This board enables...

Page 14: ...eries 1 LINE2 Connect a telephone line when the 2nd Line for FAX Unit is installed 2 LINE Connect a telephone line 3 TEL Connect an external telephone y Do not connect this equipment and the external...

Page 15: ...bes how to send and receive a fax Sending a Fax 14 Basic procedures 14 Handling an original 17 Setting the transmission conditions 21 Specifying the recipient 25 Other transmissions 32 Receiving a Fax...

Page 16: ...the original s on the original glass or RADF Reversing Automatic Document Feeder in the correct direction The illustration above shows the original placed on the original glass P 17 Handling an origi...

Page 17: ...ssion mode the original is scanned into memory Once a connection has been made this equipment automatically starts sending the scanned document In the direct transmission mode the fax number is dialed...

Page 18: ...inal If an original is placed on the original glass and its scanning is completed the confirmation screen for the next original is displayed If you want to continue scanning of the next original place...

Page 19: ...ng sizes it is automatically rotated and sent as described below A4 A4 R A5 R A5 B5 R B5 LT LT R ST R ST Original scanning range The following figures show the original scanning area Any information i...

Page 20: ...original 2 Align the original against the left inner corner of the glass y Different size originals can also be sent in one transmission y When an original of any size other than LT A4 is placed in t...

Page 21: ...35 to 80 g m2 9 3 to 20 lb or 16 mm 0 62 in height y 2 sided originals can be set and sent P 50 Transmitting 2 Sided Originals y When an original of any size other than LT A4 is placed in the directio...

Page 22: ...ting the transmission conditions Precautions for using the RADF Do not use the following originals as they may misfeed or become damaged The following originals should be handled carefully 1 Badly wri...

Page 23: ...urn to the default settings after the transmission y Each default setting of resolution original mode exposure transmission mode and ECM is adjustable P 92 Fax settings Making settings Pressing OPTION...

Page 24: ...t and fine illustrations U FINE This is suitable for an original with ultra fine illustrations MEMORY TX Send the original after the scanned data are saved in the memory Up to 100 transmissions of up...

Page 25: ...en this mode is set to ON originals are sent at a slower speed than usual and the chances of errors occurring decrease MAIL BOX COMMUNICATION For the communication compatible with ITU T International...

Page 26: ...Press OPTION The illustration above shows the original placed on the original glass If you place an original on the RADF Reversing Automatic Document Feeder and press the CONTINUE button during scanni...

Page 27: ...e For details of the operation refer to the MFP Management Guide or TopAccess Guide Direct entry with digital keys You can specify the recipient by entering its fax number on the control panel 1 Press...

Page 28: ...ss SINGLE tab to display the list of the addresses and then press the recipient s FAX icon y Press or to switch the pages y Alternatively you can select the recipient by pressing the address name box...

Page 29: ...ll the recipients are selected For the multi address transmission you can also specify recipients by combining with other entry methods The number of groups you can simultaneously specify is limited t...

Page 30: ...fax number and an E mail address have been registered to the recipient s address both of them are selected y To cancel the selected recipient press it again y In the memory transmission mode you can s...

Page 31: ...s of the LDAP server ask your network administrator 1 Press SEARCH y To display the recipient search menu press SEARCH while the address list is displayed Perform this operation when you want to searc...

Page 32: ...l address have been registered to the recipient s address both of them are selected y To cancel the selected recipient press it again y In the memory transmission mode you can specify multiple recipie...

Page 33: ...ents You can confirm the recipients which you specified or delete unnecessary recipients 1 Press DESTINATION 2 The recipient list screen is displayed Select the recipient you want to delete and then p...

Page 34: ...cify the recipients you must specify the recipient in advance by following the procedures below Specify the recipients and then press MONITOR 5 Specify the recipients P 25 Specifying the recipient y F...

Page 35: ...ephone to dial the machine dials each number you enter If you make a mistake when dialing the fax number replace the handset to cut the line and then pick up the handset again to redial 6 When you hea...

Page 36: ...ce it on the original glass or RADF Reversing Automatic Document Feeder and then press the START button on the control panel y To delete the page being previewed press DELETE PAGE y To replace the pag...

Page 37: ...all Users do not have to do anything when receiving a fax When the 2nd Line for FAX Unit is installed the reception mode of the 2nd line is limited to AUTO reception MANUAL reception Faxes are manuall...

Page 38: ...in the memory and printing is resumed as soon as this equipment is ready As the memory reception function is always enabled you do not need to make any setting y During copying or printing y During pr...

Page 39: ...ng on the length of the original RX reduction printing or Discard printing both of them are set to ON by manufacturer default are applied P 100 Setting RX printing When an original is shorter or the s...

Page 40: ...size is not available in most cases the scanned original is printed on paper of a larger size However the sender s fax machine may reduce the scanned original to fit the paper size available in the r...

Page 41: ...ce the scanned original to fit the paper size available in the recipient s fax machine this equipment Ex A3 A4 y The paper priority varies according to the RX reduction printing and Discard printing s...

Page 42: ......

Page 43: ...check and cancel fax communications Checking Communications 42 Checking reserved transmissions 42 Checking communication status log 43 Canceling the Transmission 45 Canceling the memory transmission...

Page 44: ...or to switch the pages y To print the list of the reserved transmissions jobs press RESERVATION LIST y In the Status column the status of each job is indicated as follows Line1 Sending on the 1st line...

Page 45: ...IONS Checking Communications 43 3 CHECKING AND CANCELING THE COMMUNICATIONS Checking communication status log You can check the log of fax transmissions and receptions 1 Press JOB STATUS 2 Select the...

Page 46: ...lumn the status is indicated as follows Registering recipients fax numbers to the address book To register recipient s fax numbers in the address book from the send receive log screen select a record...

Page 47: ...memory transmission when an original is placed on the original glass 1 When scanning is completed the confirmation screen for the next original is displayed Press JOB CANCEL If you leave the screen u...

Page 48: ...control panel while the originals are being scanned Scanning is paused 2 The confirmation screen for the next original is displayed Press JOB CANCEL y If you press JOB FINISH the scanned originals are...

Page 49: ...transmissions You can cancel the direct transmission during scanning Even if you cancel transmission in the direct TX mode the part of the original that was scanned before transmission is canceled ha...

Page 50: ...is step is the same as that for checking the reserved transmission P 42 Checking reserved transmissions 2 Select the reserved transmission you want to delete and then press DELETE More than one job ca...

Page 51: ...lling transmission 53 Polling reception 54 Mailbox Transmission 55 Registering printing deleting an original 56 Sending retrieving an original 60 Creating modifying deleting a mailbox 63 Chain Dial Co...

Page 52: ...ndling an original When you place a 2 sided original of the LT A4 size change the direction of the original depending on its bound position as follows 1 Right to left book type original 2 Top to botto...

Page 53: ...4 ADVANCED FUNCTIONS Transmitting 2 Sided Originals 51 4 ADVANCED FUNCTIONS 6 Specify the recipient s fax number P 25 Specifying the recipient 7 Press SEND P 14 Basic procedures...

Page 54: ...ace the original s P 17 Handling an original 2 Press the FAX button on the control panel P 14 Basic procedures 3 Press OPTION and set the transmission conditions P 21 Setting the transmission conditio...

Page 55: ...pecific recipients to receive the original using the polling transmission To use the polling communication function with the password verification applied the fax machines of both the sender and recip...

Page 56: ...and then press POLLING 3 If the password is set to the data of the original in the sender s fax machine press PASSWORD to display the entry screen Key in the password and then press OK If you do not h...

Page 57: ...e mailbox Relay station mailbox Using this mailbox an original sent from a fax machine is relayed to pre registered multiple recipients To inform a user of the result of the relay a report called RELA...

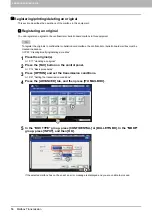
Page 58: ...l or bulletin board mailbox must be created in advance P 63 Creating modifying deleting a mailbox 1 Place the original s P 17 Handling an original 2 Press the FAX button on the control panel P 14 Basi...

Page 59: ...n the password in the same way as the box number If you have selected the confidential mailbox it is not necessary to key in a password since it is not verified y If the box number or password is inco...

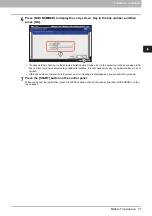
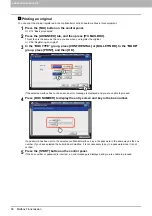
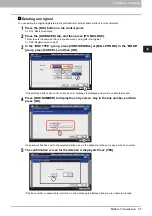
Page 60: ...FIDENTIAL or BULLETIN BD In the MODE group press PRINT and then OK If the selected mailbox has not been set an error message is displayed and you are unable to proceed 4 Press BOX NUMBER to display th...

Page 61: ...Registering an original 3 In the BOX TYPE group press CONFIDENTIAL or BULLETIN BD In the MODE group press CANCEL and then OK If the selected mailbox has not been set an error message is displayed and...

Page 62: ...bulletin board relay station mailbox in this equipment 1 Place the original s P 17 Handling an original 2 Press the FAX button on the control panel P 14 Basic procedures 3 Press OPTION and set the tr...

Page 63: ...rds 7 Specify the recipient s fax number P 25 Specifying the recipient 8 Press SEND P 14 Basic procedures You can cancel the transmission of the original P 45 Canceling the Transmission Retrieving an...

Page 64: ...to the selected mailbox key in the password in the same way as the box number The box number and the password you specified here are sent to the recipient s fax machine as SUD box number and SID pass...

Page 65: ...ailbox registered to this equipment P 80 Mailbox relay box report Creating the confidential or bulletin board mailbox You can create the confidential or bulletin board mailbox in this equipment 1 Pres...

Page 66: ...oceed Creating modifying a relay station mailbox You can create or modify the relay station mailbox 1 Press the FAX button on the control panel P 14 Basic procedures 2 Press the ADVANCED tab and then...

Page 67: ...ble to proceed 5 Specify the recipient to be registered and then press OK P 25 Specifying the recipient Specify the recipient from the address book because this cannot be done with direct dialing 6 Th...

Page 68: ...n error occurs press the ON ERROR Deleting a mailbox You can delete the confidential bulletin board relay station mailbox registered in this equipment The confidential and bulletin board mailbox in wh...

Page 69: ...n error message is displayed and you are unable to proceed 4 Press BOX NUMBER to display the entry screen Key in the box number and then press OK If a password has been set to the selected mailbox key...

Page 70: ...1 Place the original s P 17 Handling an original 2 Press the FAX button on the control panel P 14 Basic procedures 3 Press OPTION and set the transmission conditions P 21 Setting the transmission cond...

Page 71: ...press DELAYED TX RESERVE 5 Key in the date hour and minute using the digital keys on the control panel and then press OK y The acceptable range of reservation is up to one month later y Press and to m...

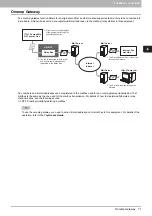
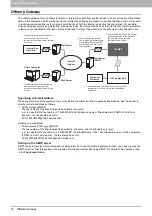
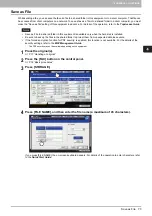
Page 72: ...set on the ADMIN menu For the details of the current setting ask your administrator P 102 Setting recovery transmission 1 Press the FAX button on the control panel P 14 Basic procedures 2 Press OPTION...

Page 73: ...eate modify delete a relay station mailbox see the following section P 63 Creating modifying deleting a mailbox To use the onramp gateway you need to set an E mail address and Internet Fax to this equ...

Page 74: ...yy FQDN The fax number of the final recipient is specified in xxxxxxxx and the subaddress in yyyy e g In case that the fax number is 1234567890 the subaddress is 1234 and the domain name of this equip...

Page 75: ...rd disk is installed y Be sure to back up the files in the shared folder to protect them from unexpected data loss events y If the forced encryption function for PDF security is enabled this function...

Page 76: ...the shared folder of the hard disk in this equipment it is saved in the TXFAX folder under the FILE_SHARE folder When PDF SINGLE TIFF SINGLE or XPS SINGLE is selected another folder with the same fil...

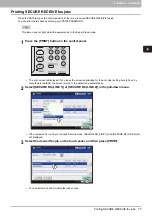
Page 77: ...e PRINT button on the control panel y The print screen is displayed If you leave the screen unattended for the auto clear setting time 45 sec by manufacturer default the screen returns to the default...

Page 78: ...IONS 76 Printing SECURE RECEIVE fax jobs 4 Press PASSWORD 5 Enter the password for printing a received SECURE RECEIVE fax and then press OK to start printing y Use the password set by your administrat...

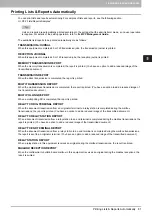
Page 79: ...Printing Lists Reports Automatically 81 Lists Reports Samples 82 Transmission journal 82 Reception journal 83 Reservation list 83 Mailbox relay box report 84 Memory transmission report 85 Transmissio...

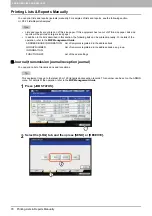
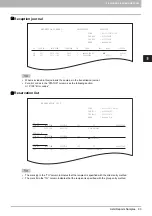
Page 80: ...wing lists can be printed manually For details of the operation refer to the MFP Management Guide Journal transmission journal reception journal You can print a list of transmissions and receptions Th...

Page 81: ...S AND REPORTS 3 Press JOURNAL If JOURNAL is pressed with the transmission reception records selected the journal of the selected file is printed Reservation list You can print a list of the reserved t...

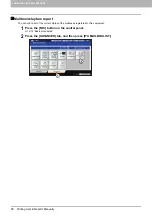
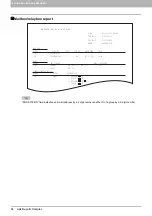
Page 82: ...orts Manually Mailbox relay box report You can print a list of the current status of the mailboxes registered to this equipment 1 Press the FAX button on the control panel P 14 Basic procedures 2 Pres...

Page 83: ...sion is completed the report is printed You have an option to add a reduced image of the transmitted document MULTI POLLING REPORT When a multi polling RX is completed the report is printed RELAY TX O...

Page 84: ...nication result and error code OK Succeeded 4 digit error code Failed Special communication mode P Polling communication SB Mailbox communication SR R Relay mailbox communication SF F Forward mailbox...

Page 85: ...group entry method NO FILE NO DATE TIME DURATION PGS FROM DEPT MODE STATUS 001 003 05 10 14 23 00 00 0 Aaabbb USA HQ NG 00B1 002 007 05 10 17 20 00 32 1 3109998888 EC 603 OK RECEPTION JOURNAL XXXXXXXX...

Page 86: ...TYPE PGS FILE NO DATE TIME FROM 11222 BULLETIN BD 11231 CONFIDENTIAL 1 008 05 10 17 24 LOCAL MAILBOX RELAY BOX REPORT TIME 05 10 2012 18 00 FAX NO 1 2131234567 FAX NO 2 2131235678 NAME Aaabbb L A RELA...

Page 87: ...odes in the STATUS column see the following section P 108 Error codes FILE NO 004 DATE 05 10 17 11 TO ABC EXPRESS DOCUMENT PAGES 1 START TIME 05 10 17 13 END TIME 05 10 17 14 STORED TIME 05 10 23 14 P...

Page 88: ...specified with the direct entry method NO FILE NO DATE TIME DURATION PGS TO DEPT MODE STATUS 002 007 05 10 17 20 00 32 1 3109998888 EC 603 OK TRANSMISSION REPORT XXXXXXXXXXX XXXX XXX TIME 05 10 2012 1...

Page 89: ...irect entry method FILE NO 014 DATE 05 10 18 02 START TIME 05 10 18 17 END TIME 05 10 18 18 SUCCESSFUL ADDRESS BOOK 001 Cccddd ADMIN UNSUCCESSFUL FAX NUMBER 2139998888 MULTI POLLING REPORT TIME 05 10...

Page 90: ...SUCCESSFUL GROUP NUMBER 002 USA 1 ADDRESS BOOK 001 005 ASIA 1 UNSUCCESSFUL ADDRESS BOOK PAGE SENT 001 Cccddd ADMIN 0 RELAY TX RELAY STATION REPORT TIME 05 10 2012 14 46 FAX NO 1 2131234567 FAX NO 2 2...

Page 91: ...ATE 05 10 13 33 RELAY BOX 777 DOCUMENT PAGES 1 FROM 214 RELAY STATION REPORT TIME 05 10 2012 13 33 FAX NO 1 2131234567 NAME Aaabbb L A FILE NO 016 DATE 05 10 18 22 BOX NUMBER 12345 BOX TYPE CONFIDENTI...

Page 92: ......

Page 93: ...settings related to the fax function User Settings 92 Fax settings 92 Administrator Settings 95 Registering the terminal ID 97 Setting the initial setup 98 Setting RX printing 100 Setting recovery tra...

Page 94: ...6 SETTING ITEMS 92 User Settings User Settings Fax settings Set the initial settings for the fax transmission functions 1 Press the RESET button on the control panel 2 Press FAX...

Page 95: ...riginal with regular size text FINE This is suitable for an original with small size text and detailed illustrations U FINE This is suitable for an original with ultra detailed illustrations TEXT This...

Page 96: ...oth the sender and the receiver must have the ECM function to make ECM communication available y When affected by noise during communication communication time is slightly longer than usual Even when...

Page 97: ...section describes the FAX menu managed by the administrator Follow the procedures below to display the menu you want to operate 1 Press the RESET button on the control panel 2 Press ADMIN tab and the...

Page 98: ...6 SETTING ITEMS 96 Administrator Settings 4 Press FAX The FAX menu is displayed The following section describes each menu...

Page 99: ...g edge on the transmitted original and receiver information on the trailing edge on the received fax P 92 Fax settings 1 Press TERMINAL ID 2 Set each setting option and then press OK y You can enter u...

Page 100: ...the bottom edge of the received copy of the original Setting the initial setup You can set the initial settings for the fax functions 1 Press INITIAL SETUP 05 10 2012 15 08 FROM Aaabbb 1234567890 T 0...

Page 101: ...AUTO reception MONITOR VOLUME COMPLETION TONE VOLUME Monitor tone volume line tone when on hook and Reception completion tone volume You hear this tone when reception is completed Each volume can be s...

Page 102: ...ptions For details of the operation to print the list refer to the MFP Management Guide 1 Press RX PRINT 2 Set each option and then press OK DISCARD You can switch discard printing ON or OFF With it b...

Page 103: ...on differs depending on the received document size as shown in the figures below Received LD LG LT A3 A4 or B4 sized documents are printed so that they can be bound along the long edge of the directio...

Page 104: ...nabling or disabling this function 1 Press RECOVERY TX 2 Press 24H or 1H to set the document stored time and then press OK When the screen is returned to the one shown in step 1 above make sure that a...

Page 105: ...al ID y Set the dial type P 98 Setting the initial setup 1 Press LINE 2 MODE 2 Set how you want to use the 2nd line and then press OK TX RX The 2nd line is used for both transmission and reception RX...

Page 106: ...day of the week WEEKLY SCHEDULE by administrators The SECURE RECEIVE function can be manually enabled disabled or automatically enabled disabled at a specified time and day of the week y If the equipm...

Page 107: ...t y To enable the function throughout the day set DISABLE ENABLE to 00 00 00 00 y To disable the function throughout the day set DISABLE ENABLE to 00 00 24 00 To clear the entered time press the Clear...

Page 108: ...Press RETYPE NEW PASSWORD enter the same password again and then press OK y Up to 20 alphanumeric characters including the following symbols can be entered for the passward You can use alphanumerics a...

Page 109: ...SPECIFICATIONS This chapter describes troubleshooting and specifications of GD 1320 GD 1260 Troubleshooting 108 Error codes 108 Error messages 108 Transmission reception trouble 109 Specifications of...

Page 110: ...polling document exists 0042 Memory full Make sure that there is sufficient memory before making the call again 0050 Line busy Retry communications 0053 Security mismatch in relay or mail box transmis...

Page 111: ...s the original placed correctly facing up When placing the original on the original glass specify the original size Black lines are shown in the image that was sent Is the scanning area of the Reversi...

Page 112: ...riginal North America LD LG LT LT R ST ST R COMP Size of Original A B format A3 A4 A4 R A5 A5 R B4 B5 B5 R FOLIO Recording Paper Size North America 11 x 17 LD 8 5 x 14 LG 8 5 x 11 LT 5 5 x 8 5 ST 10 1...

Page 113: ...modifying a relay station mailbox 64 deleting a mailbox 66 deleting an original 59 printing an original 58 registering an original 56 retrieving an original 61 sending an original 60 MEMORY TX 22 93...

Page 114: ...Save as File 73 SECURE RECEIVE FORCED SETTING 94 Sender information 97 98 Sending 14 SETTING button 8 SMTP server 72 Specifications 110 START button 8 STOP button 8 T Telephone line 12 Terminal ID 97...

Page 115: ...ES9455 MFP ES9465 MFP ES9475 MFP...

Page 116: ...www okiprintingsolutions com Oki Data Corporation 4 11 22 Shibaura Minato ku Tokyo 108 8551 Japan 45686101EE...

Reviews: