Replacing Consumables / Maintenance Units
- 61 -
2
1
3
4
5
6
7
4
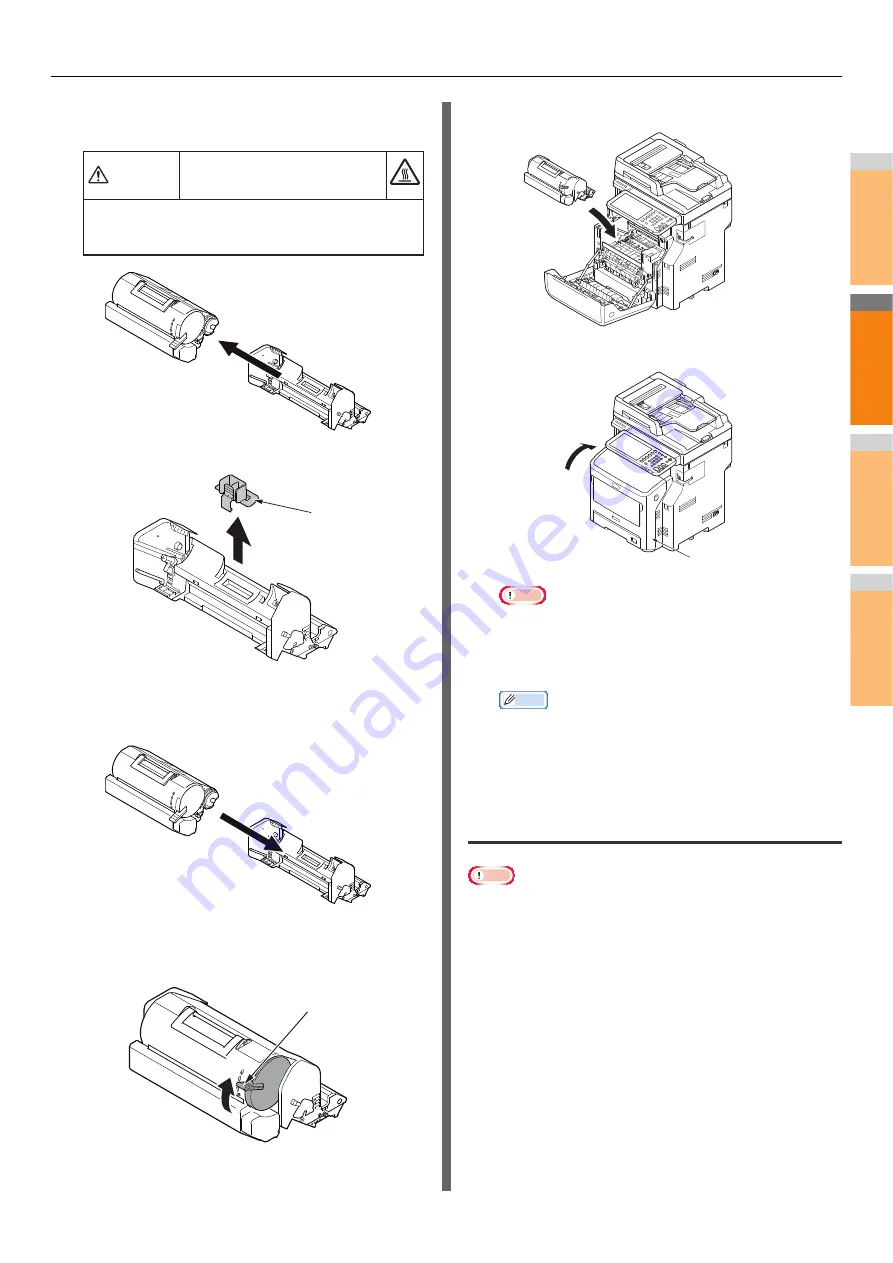
Lift the toner cartridge in the direction of
the arrow, and place it on a flat surface.
5
Remove the toner cover and desiccant.
6
Insert the toner cartridge taken out in step 5
into the image drum in the direction of the
arrow.
7
Turn the blue lever of the toner cartridge
fully in the direction of the arrow while
pressing the top of the toner cartridge.
8
Place a new image drum into the printer.
9
Close the front cover.
Note
• The front cover cannot be closed completely if the top
cover is not closed.
10
Please recycle used image drums.
Memo
• If you must dispose of an image drum, put it in a plastic
bag or similar container and dispose of it in accordance
with your municipality's ordinances or guidelines.
Replace the Image Drum and Toner
Cartridge Simultaneously
Note
• The image drum (the green tube) is very delicate. Handle it
carefully.
• Do not expose the image drum to direct sunlight or very
bright interior light (approximately more than 1,500 lux).
Even under the normal interior light, do not leave it for more
than 5 minutes.
• In order for the printer to exhibit its full performance, please
use genuine Oki Data consumables.
• Service for problems due to use of consumable items other
than genuine OKI consumables will incur fees even in the
warranty period or the maintenance contract period. (Use of
consumable items other than genuine OKI consumables
does not always cause problems, but please exhibit caution
when using those.)
Possible to get burned.
Do not throw a used image drum and toner
cartridge in the fire. They may explode, and the
toner inside may fly off and cause getting burned.
Warning
Toner cover
Blue lever
Front cover
Summary of Contents for MB760dnfax
Page 1: ...User s Manual Troubleshooting Guide...
Page 79: ...2 1 3 4 3 Battery Disposal P 80 Appendix...
Page 81: ...2 1 3 4 4 Index...
Page 83: ...May 2013 45611502EE Rev1...


