- 355 -
9. Operating Management/ Specifications
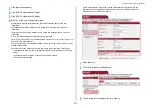
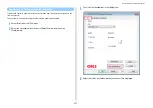
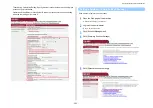
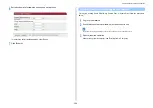
Depending on the setting for [User Authentication Options...] in the [Device Options] tab, [Password],
[Authentication Type], [Summary Account Name], and [Use User Authentication] may not be displayed.
6
Select the [Use User Authentication] check box if it is displayed.
Clear the [Use User Authentication] check box if you want to use the Job Accounting Client PIN as the user
authentication information.
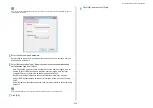
7
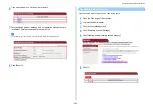
Enter the user name and password.
Depending on the setting for [User Authentication Options...] in the [Device Options]
tab, user name may be fixed to the logon name.
Select the [Use logon name as user name] check box if you use the logon name to
Windows as a user name.
8
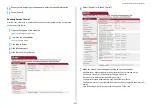
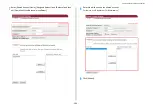
If [Authentication Type] is displayed, select user's authentication destination
and authentication type from the list.
•
Auto: Follows the logon method to Windows. When the user has logged on to the
domain, [Server LDAP] is used and when the user logged on to the local computer,
[Device Local] is used as the authentication method.
•
Device Local: Authenticates with the user information stored in the machine.
•
Server LDAP: Authenticates with the user information stored in the server using
LDAP.
•
Server Kerberos: Authenticates with the user information stored in the server using
Kerberos.
Default authentication type can be set in [User Authentication Options...] in the [Device Options] tab.
9
If [Summary Account Name] is displayed, set a type of summary account
(account) to be charged usage amount of printing (points) and name.
If you want to add up for each user and group to which the user belongs, select a group
from [Type] and specify the group name in [Name].
If you want to add up for shared account which multiple users can use, select a shared
account from [Type] and specify the shard account name in [Name].
10
Click [OK].
11
Change other settings if necessary, and then click [OK].
12
Click [Print] on the [Print] screen.
• Setting User Authentication Options
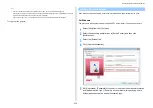
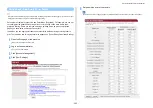
Set the user authentication options of printer driver from the [Device Options] tab
or [Device Settings] tab in Printer Properties.
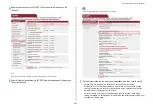
1
Click [Start], and then select [Devices and Printers].
2
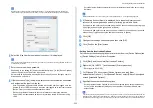
Right-click [OKI MC573 *] and then select [Printer properties].
* Driver type (ex. PCL6/PS)
3
For Windows PCL driver, select [Device Options] and click [User
Authentication Options...]. For Windows PS driver, select [Device Options] and
extend [Installable Options].
4
Specifies the user authentication options.
•
Set User Authentication Options for each user: Displays [Use User Authentication]
on the [User Authentication] dialog box to set whether to enable or disable user
authentication.
If the [Set User Authentication Options for each user] check box is clear, use user authentication and follow the
Windows logon method as an authentication type. When the user has logged on to the domain, [Server LDAP] is
used and when the user logged on to the local computer, [Device Local] is used as the authentication method.
Summary of Contents for MC573
Page 1: ...MC573 ES5473 MFP Advanced Manual...
Page 18: ...18 1 Basic Operations 7 Select a volume level...
Page 31: ...2 Copy Useful Functions For a Better Finish Color Settings Advanced Copy Settings...
Page 141: ...141 4 Print 5 Press Color Menu 6 Press Adjust Registration 7 Press Yes...
Page 489: ...489 11 Utility Software Storage Manager plug in Create or edit a file to download to a device...
Page 507: ...46532802EE Rev2...


