78
Appendix B: Menu Selections
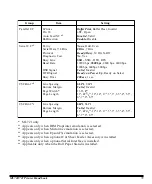
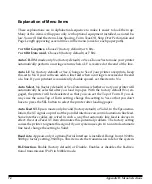
Power Saving.
Enable (factory default) or Disable. Enables or disables the power save
mode. When the power save mode is enabled, the printer enters the power save mode
when the time set in the Power Save Time option elapses while the printer is idle. The
SEL LED flashes and other LED turn off when the printer enters the power save mode.
Print DEL Code.
Microline mode only. Choose No (factory default) or Yes.
Print Mode.
Utility (factory default) NLQ Courier, NLQ Gothic, DRAFT. Choose one
of the NLQ fonts for letter quality printing; choose utility for higher-speed draft print-
ing. Choose DRAFT for HSD or SSD. It prints either of HSD or SSD which is selected
at the DRAFT MODE.
Print Registration.
0 (factory default), 0.05 mm Left, 0.15 mm Left, 0.20 mm Left, 0.25 mm
Left, 0.25 mm Right, 0.20 mm Right, 0.15 mm Right, 0.10 mm Right, or 0.05 mm Right.
Change the setting as required to obtain the best registration for bi-directional printing.
Print Suppress Effective.
Yes (factory default) or No. Enables/disables print sup-
press command. The factory default enables the print suppress command: the printer
will ignore all data it receives after it accepts the print suppress command. Change to
No to cause your printer to ignore the print suppress command.
Proportional Spacing.
No (factory default) or Yes. Change to Yes to engage propor-
tional spacing of characters.
Protocol.
Appears only if optional Serial Interface is installed. Selects the type of pro-
tocol your system uses: Ready/Busy (factory default) or X-On/X-Off.
Receive Buffer Size.
64K (factory default), 1 Line, 32K, or 128K. Selects the amount of
memory devoted to holding received data. Choosing 1 Line will tie up your computer
during printing, but if you about the print job the printer will stop printing much sooner.
Reset Inhibit.
No (factory default) or Yes. Change to Yes if you want your printer to
ignore the reset command sent by software. This will prevent your software reset
command from changing the settings you have made through the front panel con-
trols or through printer commands. If you engage this feature, don’t forget that it will
also prevent your software from clearing out existing settings when you finish print-
ing one document and switch to another.
Summary of Contents for MICROLINE 720
Page 1: ...MICROLINE 720 721 Printer Handbook...
Page 9: ...2 Introduction...
Page 31: ...24 Loading Paper...
Page 59: ...52 Working with Software...
Page 87: ...80 Appendix B Menu Selections...
Page 101: ...94 Appendix D ASCII Character Codes Lower ASCII Character Sets 2 4...
Page 102: ...ML720 721 Printer Handbook 95 Lower ASCII Character Sets 3 4...
Page 103: ...96 Appendix D ASCII Character Codes Lower ASCII Character Sets 4 4...
Page 104: ...ML720 721 Printer Handbook 97 Upper ASCII Character Sets Upper ASCII Character Sets 1 4...
Page 105: ...98 Appendix D ASCII Character Codes Upper ASCII Character Sets 2 4...
Page 106: ...ML720 721 Printer Handbook 99 Upper ASCII Character Sets 3 4...
Page 107: ...100 Appendix D ASCII Character Codes Upper ASCII Character Sets 4 4...
Page 108: ...ML720 721 Printer Handbook 101 Epson International Character Substitutions...
Page 109: ...102 Appendix D ASCII Character Codes IBM International Character Substitutions...
Page 110: ...ML720 721 Printer Handbook 103 MICROLINE International Character Substitutions...
Page 111: ...104 Appendix D ASCII Character Codes Code Page Character Sets Code Page Character Sets 1 3...
Page 112: ...ML720 721 Printer Handbook 105 Code Page Character Sets 2 3...
Page 113: ...106 Appendix D ASCII Character Codes Code Page Character Sets 3 3...

