Registering Address Book
- 110 -
z
Registering Address Book
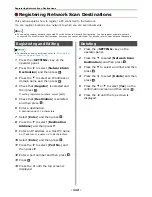
This section explains how to register and deleted the address book and group list.
You can register e-mails to the address book and create groups for broadcasting messages. The Address
Book and the Group List can be used to specify the destination in Scan to e-mail and internet fax
functions.
Address Book
You can register up to 100 e-mail addresses to
the address book.
Registering and Editing
Reference
z
For details on how to enter text, refer to
"Entering Text
Using the Operator Panel" P. 26
.
1
Press the <
SETTING
> key on the
operator panel.
2
Press the to select [
Address Book
]
and then press .
3
Check that [
E-mail Address
] is selected
and then press .
4
Press the to select a number and then
press .
You cannot select a number which is specified in
Auto Deliver function.
5
Check that [
Register
] is selected and
then press .
If editing registered addresses, select [
Edit
].
6
If necessary, specify a name.
a) Check that [
Name
] is selected and then
press the .
b) Enter a name up to 16 characters.
c)
Select [
Enter
] and then press
.
7
Press the to select [
E-mail Address
]
and then press .
8
Enter an e-mail address up to 80
characters and then press .
9
Press .
Registering From Transmission
History
You can add e-mail addresses to the address
book from e-mail transmission histories.
Note
z
The sending history only displays recipient addresses to
which an e-mail was sent by directly entering the
recipient's address.
1
Press the <
SCAN
> key on the operator
panel.
2
Check that [
] is selected and then
press .
3
Press the to select [
E-mail Tx
History
] and then press .
4
Press the to select the entry you want
and then press .
5
Check the entry and then press the .
6
Make sure [
Register To Address Book
]
is selected and then press .
7
Repeat the steps 4 to 9 in
"Registering
and Editing"
.
The e-mail address is automatically entered. You
do not have to enter it manually.
Deleting
1
Press the <
SETTING
> key.
2
Press the to select [
Address Book
]
and then press .
3
Check that [
E-mail Address
] is selected
and then press .
4
Press the to select an entry number
and then press .
5
Press the to select [
Delete
] and then
press .
6
Press the or to select [
Yes
] on the
confirmation screen and then press .
Note
z
You cannot delete an e-mail address which is specified in
Auto Deliver function.
OK
OK
OK
OK
OK
OK
OK
OK
OK
OK
OK
OK
OK
OK
OK
OK


