background image

1.


Copy(Color):   

Press to start a color copy.

2.


Copy(B/W):   

Press to start a black-and-white copy

3.


Power/Copy LED:

   The LED indicator turns green when power is on and flashes

during copying.

4.


All Clear:

  Clear your current settings and return to the default settings.

5. 

Auto/Text/Photo: 

Selects the type of original - Photo or Text.  Auto results in the

DS600C selecting the appropriate mode.

6.


Normal/Quality:

  Select your Copy quality: 

Normal

 (300 dpi), or 

Quality

 (600 dpi).

7.


Copy Count:

  Choose the number of copies from 1 to 99.    Increase the value of the

numeric entries by the 

(

 )

 button or decrease the value by the 

(

)

  button.

8.


Select:

 Press to select your desired setting. (An asterisk, appearing in the right-hand

side of the Message Display Window indicates the latest selection you made.)

9.


 :  

Go to the previous item displayed in the Message Display window or increase

the value of the numeric entries.

10.


 :

  Go to the next item displayed in the Message Display window or decrease the

value of the numeric entries.

11.


Menu:

  Select a paper size, a printer language, an image pattern, or the mirror

function.

Refer to Figure 3.1 on Page 3-1

3-2

Summary of Contents for OKICOLOR8cccs

Page 1: ...8 SETUP GUIDE INCLUDED WITH YOUR PRINTER IF YOU ARE USING THIS PRODUCT AS A CONVENIENCE COLOR COPIER SYSTEM NOT ATTACHED TO A COMPUTER you ll need to visit the Oki Data Web Site at www okidata com co...

Page 2: ......

Page 3: ...chanical magnetic optical chemical manual or otherwise without the prior written permission of the manufacturer Material scanned by this product may be protected by governmental laws and other regulat...

Page 4: ...he interference by one or more of the following measures Reorient or relocate the receiving antenna Increase the separation between the equipment and receiver Connect the equipment into an outlet on a...

Page 5: ...Printer as a Convenience Copier ________________________2 3 2 4 Connecting the DS600C so you can also Print to the OKICOLOR 8________________________________2 4 2 5 Document Placement_________________...

Page 6: ...______________________________________________ 3 10 3 4 6 Choosing your Copy Quantity ________________________________________________________ 3 17 3 4 7 Enhancing your Copy Quality __________________...

Page 7: ...check all the items against Figure 1 1 If there are any parts missing or damaged please contact 1 800 OKI DATA 800 654 3282 1 Installation User s Guide 2 Power Adapter 3 Shipping Foam 4 DS600C Main SU...

Page 8: ...ve heat may cause damage to the unit Do not install the DS600C in a humid or dusty location Be sure to use a 115 vac 60 hz AC power source Place the DS600C securely on an even flat surface Tilted or u...

Page 9: ...ing shipment the DS600C is designed with a lock switch beneath the main unit Therefore before using the DS600C you MUST unlock the DS600C by moving the lock switch to the USE position See Figure 2 1 1...

Page 10: ...ity only 1 DS600C main unit 2 To Printer port 3 Printer Cable Not Included See Note 4 Power Jack 5 Power Adapter 6 OKICOLOR 8 Printer Figure 2 2 Convenience Copier Cable Connection NOTE The cable incl...

Page 11: ...tion provides copyingand printing capability NOTE An IEEE 1284 bi directional parallel cable maximum length 10 feet is required 2 4 1 DS600C main unit 2 Power Adapter 3 DS600C Cable Included 4 PC Para...

Page 12: ...2 5 DOCUMENT PLACEMENT As shown in Figure 2 4 place the document on the glass face text down 1 Document Cover 2 Home Position Mark 3 Document 4 Document Glass 5 Control Panel 2 5...

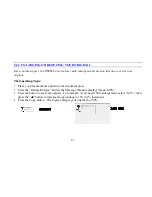
Page 13: ...3 OPERATING THE DS600C COPIER 3 1 THE DS600C CONTROL PANEL Figure 3 1 Control Panel 3 1 Scan Function is not supported...

Page 14: ...7 Copy Count Choose the number of copies from 1 to 99 Increase the value of the numeric entries by the button or decrease the value by the button 8 Select Press to select your desired setting An aste...

Page 15: ...y the button Decrease level of color intensity by the button 15 Reduce Enlarge Reduce enlarge or auto zoom your original document Press to select the preset ratios 100 115 122 141 200 400 Auto 25 50 a...

Page 16: ...ow displays Letter If your current paper supply is letter size press the Select button The Message Window displays Size Letter This means you have successfully changed the default size to letter If le...

Page 17: ...inal face down on the document glass 2 Press the Copy button The Message window displays Copy and the Ready LED is flashing 3 Within a few seconds the copying is done The Message window then displays...

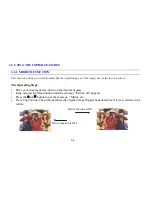
Page 18: ...The Operating Steps 1 Place your document face down on the document glass 2 Keep on pressing Menu button until the message Mirror off appears 3 Press the or button to get the message Mirror on 4 Pres...

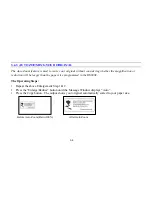
Page 19: ...teps 1 Place your document face down on the document glass 2 Press the Reduce Enlarge button the Message Window displays Ratio 100 3 Press the button to see more options For example if you need 150 en...

Page 20: ...ction will be larger than the paper size programmed in the DS600C The Operating Steps 1 Repeat the above Enlargement Step 1 2 2 Press the Enlarge Reduce button until the Message Window displays Auto 3...

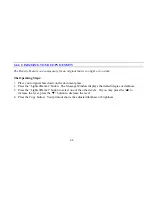
Page 21: ...e down on the document glass 2 Press the Lighter Darker button The Message Window displays the default degree of darkness 3 Press the Lighter Darker button to select one of the other levels Or you may...

Page 22: ...feature helps you to attain the desired color saturation The Operating Steps 1 Place your original face down on the document glass 2 Press the Color Intensity button The Message Window displays the d...

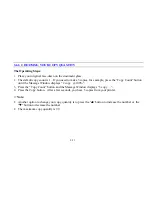
Page 23: ...e Copy Count button until the Message Window displays 2 copy 100 3 Press the Copy Count button and the Message Window displays 3 copy 4 Press the Copy button After a few seconds you have 3 copies from...

Page 24: ...lows your printout to reveal more image details The Operating Steps 1 Place your document face down on the document glass 2 Press the Normal Quality button The Message Window displays Normal mode 3 Pr...

Page 25: ...e quality of a text heavy copy However if the amount of photo images is almost the same as the amount of text in the original document select Auto Mode to get the best copy The Operating Steps 1 Place...

Page 26: ...The Operating Steps 1 Place your 3D object on the document glass Be careful not to scratch the glass 2 Press the Normal Quality button and the Message Window displays Normal mode 3 Press the Normal Qu...

Page 27: ...u have not used the DS600C over an hour it automatically enters Power Saving Mode The Message Window will display Power Saving and the READY LED will flash To return to the READY Status press any of t...

Page 28: ...e a quick solution DS600C serial revision number located on the bottom of the Digital Scan Copier OKICOLOR 8 Serial Number located at the back of the printer Hardware configuration e g your host CPU t...

Page 29: ...20dpi x 720dpi Copy Area Max 8 5 inches x 14 0 inches Legal size Copy Features Zooming from 25 400 Auto Zooming Auto Photo Text Separation Printer Interface IEEE 1284 bi directional ECP SPP Power Sour...

Page 30: ...t will be shipped to you via air express Have your credit card available as our representative will be asking for this information You will receive the exchange Avision DS 600 Copier Flatbed Unit the...

Page 31: ...d Warranty is available by contacting the Oki Data dealer from whom the product was purchased by contacting Oki Data directly at 1 800 OKI DATA U S and Canada English only or at 1 856 222 5276 Spanish...

Page 32: ...Part Number 59331802...

Reviews: