background image

User’s Guide

29

English

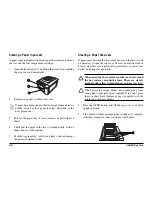
Put the drum cartridges where they will not be scratched
and not exposed to strong light.

3.

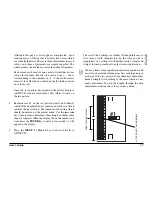
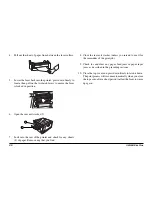
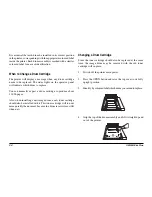
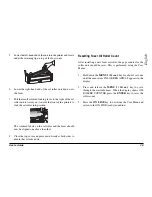
Inspect the paper path for sheets of paper. Carefully remove
any sheets (2) you find.

Paper jammed under the first image drum should be pulled
forwards through the paper path if possible, not backwards,
to avoid spillage of unfused toner into the paper input
area.

Be especially careful not to scratch the transfer belt. Avoid
using sharp instruments.

4.

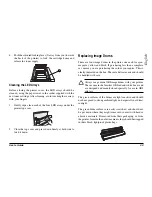
Lower each image drum cartridge back into position via its
two locating slots at each side of the printer, being careful
to match the coloured label on each cartridge with its
corresponding coloured label in the printer.

5.

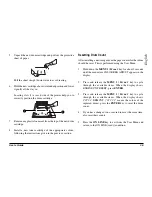
Close the top cover and press down firmly at both sides to
ensure that it is locked down.

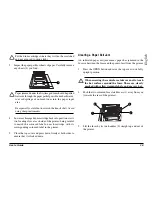
Clearing a Paper Exit Jam

An indicated paper exit jam means paper has jammed in the
fuser or between the fuser and the point of exit from the printer.

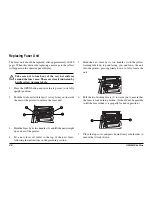
1.

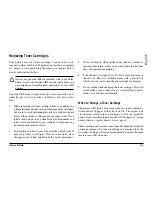
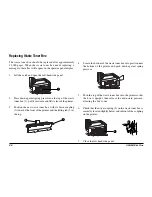
Press the OPEN button and raise the top cover to its fully
upright position.

When accessing the central area take care not to touch
the hot surfaces around the fuser. These are clearly
marked with yellow warning labels, and are very hot.

2.

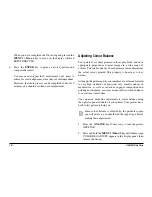
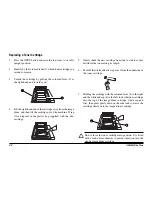
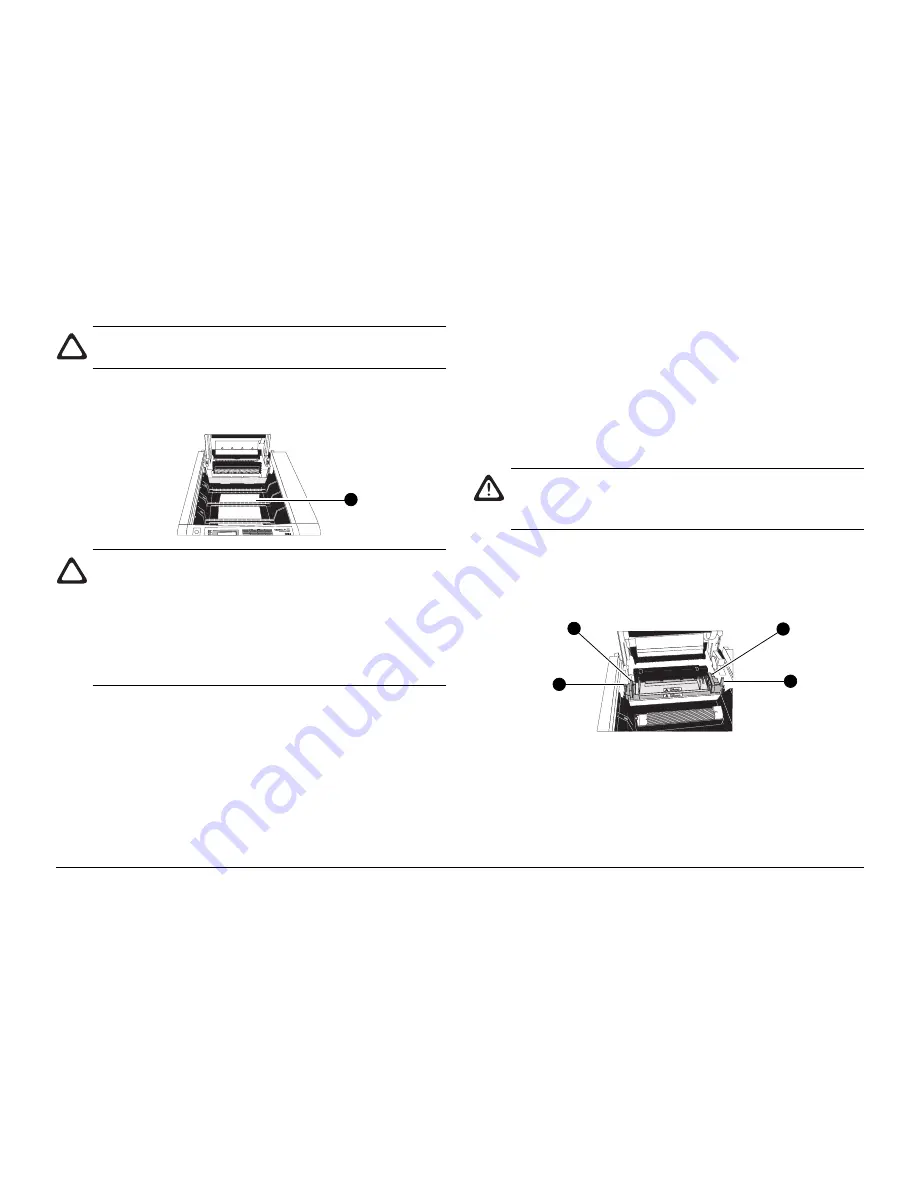
Push the two coloured fuser latch levers (1) away from you
(towards the rear of the printer).

3.

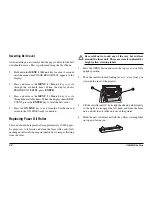
Lift the fuser by its two handles (2) straight up and out of
the printer.

2

1

2

2

1

Summary of Contents for OKIPAGE 8c Plus

Page 1: ...User s Guide...

Page 2: ...9 by Oki All rights reserved Written and produced by the Oki Documentation Dept Oki is a registered trademark of Oki Electric Industry Company Ltd Energy Star is a trademark of the United States Envir...

Page 3: ...Access to the Paper Path 27 Front Feeder and Rear Exit Paper Path 27 Clearing a Paper Input Jam 28 Clearing a Paper Feed Jam 28 Clearing a Paper Exit Jam 29 Replacing Toner Cartridges 31 When to Chang...

Page 4: ...trays Do not use your printer near water or spill liquid of any kind into it Be certain that your power source matches the rating listed on the back of the printer If you are not sure check with your...

Page 5: ...dropped or the cabinet is damaged The printer does not function normally when you are following the operating instructions This product complies with the requirements of the Council Directives 89 336...

Page 6: ...the optional Tray 2 is fitted to the printer Viewing and Using Menu 1 Menu 2 To display a menu press the ON LINE key to take the printer OFF LINE To enter Menu 1 press and release the MENU 1 Menu 2 ke...

Page 7: ...f it is a good idea to wait for at least ten seconds before switching it on again to ensure that memory contents are properly cleared and internal power supplies are allowed to settle Hold down the ME...

Page 8: ...uto is standard PCL5e or Adobe PostScript can be selected manually Selects the standard tray to feed paper from May be overridden by software application NOTE Tray 2 only appears in Menu 1 if the opti...

Page 9: ...er normal paper cardstock etc Selects the appropriate print media type e g lightweight paper normal paper cardstock etc NOTE Tray 2 only appears in Menu 1 if the optional Tray 2 is fitted to the print...

Page 10: ...are available from this menu item A full list appears later under Symbol Sets and Fonts Determines the number of characters printed on a line before the printer will force a line break Selects whethe...

Page 11: ...ON setting results in matt black This setting affects picture images only not plain text Selects which way round the page prints Portrait is tall landscape is wide Selects the standard number of line...

Page 12: ...ustable settings for possible manual correction This procedure is documented separately Adjusts the print density of CMYK to achieve optimum colour balance for the paper in use this feature is documen...

Page 13: ...ing applies to PostScript operation only when installed It determines how long the printer will wait for a sheet to be inserted in the manual paper feeder When this function is active power to the fus...

Page 14: ...high speed If you experience data corruption on printed pages reduce the setting to MEDIUM The printer can send status information back to the computer You will need a printer data cable compliant wi...

Page 15: ...exceeds one page that page will print and eject automatically When data is less than one page take the printer OFF LINE and press the Form Feed key to print and eject the page To exit this mode the p...

Page 16: ...at described above you can easily correct colour registration using the operator panel controls on your printer These adjustments align the three colour cartridges precisely to the black cartridge You...

Page 17: ...s the least colour That number is the setting which should be entered on the printer menu Use the or keys to increment or decrement the setting if a number other than 0 is required When the display sh...

Page 18: ...ines the actual colour printed This property is known as colour balance Although the printer and its consumables are all manufactured to very high standards of precision very small variances in manufa...

Page 19: ...1 By Reduce yellow setting by 1 If yellow is already set to 2 then increase cyan and magenta settings by 1 Br Increase cyan setting by 1 If cyan is already set to 2 then reduce magenta and yellow set...

Page 20: ...e on the display will read PRINT EXECUTE 8 Press the ENTER key to print a new test pattern and compare the results You may need to repeat these adjustments 2 or 3 times to achieve optimum colour balan...

Page 21: ...lable Fonts These are stored as outline curves represented by mathematical formulae and may be scaled larger without loss of print resolution When scalable fonts are used in a document a temporary bit...

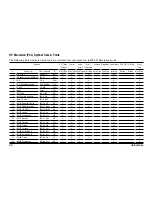
Page 22: ...21 German ISO 25 French ISO 57 Chinese ISO 60 Norwegian v1 ISO 61 Norwegian v2 ISO 69 French ISO 84 Portuguese Roman 8 ISO L1 PC 8 PC 8 Dan Nor PC 850 Legal ISO 2 IRV ISO 4 UK ISO 6 ASC ISO 10 S F IS...

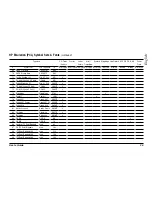
Page 23: ...Spanish ISO Dutch Roman Extension ISO Swedish1 ISO Swedish2 ISO Swedish3 IBM Code Page 437 IBM Code Page 850 IBM Code Page 860 IBM Code Page 863 IBM Code Page 865 PC Set1 PC Extension US PC Extension...

Page 24: ...dows 3 1 Latin 1 ANSI MC Text PC 852 East Euro CP 852 Windows 3 1 Latin 5 Windows 3 1 Latin 2 E Euro CWI Hungarian PC 857 Turkish CP 857 ISO8859 2 Latin 2 ECMA 94 ISO8859 9 Latin 5 ECMA 128 Turkish PC...

Page 25: ...Cyrillic Windows 3 1 PC 866 Cyrillic 2 CP 866 Greek Windows 3 1 PC 869 Greek CP 869 PC 855 Cyrillic CP 855 Wingdings Symbol Greek 437 Greek 437 Cyprus Greek 928 Serbo Croatic II Ukrainian Bulgarian OC...

Page 26: ...n no account use transparencies intended only for marking directly with marker pens These will melt and cause extensive internal damage to your printer Dealing With Paper Jams Your printer should give...

Page 27: ...by a mixture of heat and physical pressure On leaving the fuser the paper passes via two pairs of exit pinch rollers 6 and on to the paper stacker on top of the printer or the rear stacker if it is o...

Page 28: ...mage the printer if slammed shut Clearing a Paper Feed Jam If paper jams between the first image drum and the fuser it will be necessary to open the top cover There is no electrical shock hazard since...

Page 29: ...being careful to match the coloured label on each cartridge with its corresponding coloured label in the printer 5 Close the top cover and press down firmly at both sides to ensure that it is locked...

Page 30: ...exit stacker unless you intend to use it for the remainder of the print job 9 Check for and clear any paper feed jams or paper input jams as described in the preceding sections 10 Close the top cover...

Page 31: ...your skin or clothes brush it off If necessary rinse in cold water Do not use hot water since the application of heat might make the marks permanent 3 Do not attempt to clean spilled toner with any s...

Page 32: ...pplied with the new cartridge 5 Gently shake the new cartridge from side to side to evenly distribute the toner along its length 6 Peel off the white adhesive tape seal from the underside of the toner...

Page 33: ...OKI printers The green surfaces of the drums are light sensitive and should not be exposed to strong ambient light and especially not direct sunlight The green drum surfaces are easily scratched and...

Page 34: ...drum cartridge to produce about 12 000 pages Also when installing a new image drum a new toner cartridge should also be installed with it This toner cartridge will run out more quickly than normal be...

Page 35: ...er installing a new image drum the page counter for that drum should be reset This is performed using the User Menu 1 Hold down the MENU 1 Menu 2 key for about 2 seconds until the menu item COLOR REG...

Page 36: ...pring pressure 2 Press down against spring pressure on the top of the waste toner box 1 pull it outwards and lift it clear of the printer 3 Position the new waste toner box with its drive coupling 2 t...

Page 37: ...the belt 3 Remove the waste toner box 1 as described in the preceding section 4 Lift the coloured handle 2 on the belt assembly and withdraw the unit from the printer 5 Locate the new belt unit into i...

Page 38: ...r belt the page counter for the belt unit should be reset This is performed using the User Menu 1 Hold down the MENU 1 Menu 2 key for about 2 seconds until the menu item COLOR REG ADJUST appears in th...

Page 39: ...e above the other 8 Close the top cover and press down firmly at both sides to ensure that it locks down Resetting Fuser Oil Roller Count After installing a new fuser oil roller the page counter for t...

Page 40: ...he printer to release the fuser unit 3 Hold the fuser by its two handles 2 and lift the unit straight up and out of the printer 4 Fit a new fuser oil roller to the top of the new fuser following the i...

Page 41: ...ny dialogue restores all settings to their default values These will be the most appropriate for general use Resetting Fuser Count After installing a new fuser the page counter for the fuser unit shou...

Page 42: ...lights will also indicate which colour s The fuser has reached its end of life and requires changing The transfer belt unit has reached its end of life and requires changing The printer is requesting...

Page 43: ...ed between the paper tray and the first image drum Follow the instructions in this manual to clear it A paper jam has occured between the first image drum and the fuser Follow the instructions in this...

Page 44: ...idth Resident Option Program Voltage Frequency Power save mode Idle Typical operation Peak SPECIFICATION 478mm 622mm 397mm Less than 52kg 8PPM normal paper 5PPM transparencies label ultra heavy card s...

Page 45: ...32 C Full colour 17 27 C 0 43 C 10 43 C for less than 1year 29 50 C less than 1 month 20 80 at 25 C 50 70 for full colour 10 90 at 26 8 C 10 90 at 35 C 10 90 at 40 C Maximum 1 degree 2500m above sea...

Page 46: ...open Fuser temperature Paper size SPECIFICATION 54dBA 45dBA 43dBA Legal Univ cassette 500 sheets up to 50mm 100 sheets or 40 transparencies Automatic for 1st and 2nd trays 250 sheets face down top 10...

Page 47: ...set Interface Paper Cassette Grey Scale Colour SPECIFICATION IBM Centro CEN36 IEEE1284Nibble Ethernet 100Base TX 10Base T Auto PCL5c PostScript 3 Auto PCL PS Windows 3 1x 95 NT4 Yes Windows 4 Line Pr...

Page 48: ...ms care of 33 drum count 35 life of 34 replacing 33 34 L LED Arrays cleaning 33 M Menus Menu 1 8 Menu 2 12 operator panel 6 use maintenance 15 user maintenance 7 using 6 P Paper exit jam 29 feed jam 2...

Reviews: