- 45 -
•
Connecting with WPS
If the wireless LAN access point supports WPS, you can easily connect to the wireless LAN
using the push button for easy setup (WPS button).
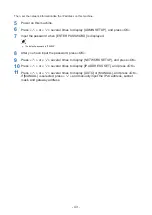
Follow the procedure below to connect.
1
Check the position of the push button for easy setup (WPS button) and the
time for which the button is pressed in the User's Manual enclosed with the
wireless LAN access point.
2
Check that the wireless LAN access point is activated and operating
properly.
3
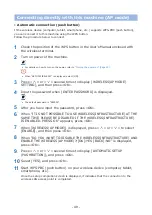
Power on this machine. When "SETUP WIRELESS?" is displayed, press
«OK».
Go to Step 6
4
Press «
∧
» or «
∨
» several times to display [WIRELESS SETTING], and
press «OK».
5
Input the password when [ENTER PASSWORD] is displayed.
•
The default password is "999999".
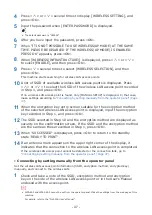
6
After you have input the password, press «OK».
7
When "IT IS NOT POSSIBLE TO USE WIRELESS(AP MODE) AT THE SAME
TIME. PLEASE BE DISABLED IF THE WIRELESS(AP MODE) IS ENABLED.
PRESS OK" appears, press «OK».
8
When [WIRELESS(INFRASTRUCTURE)] is displayed, press «
∧
» or «
∨
»
to select [ENABLE], and then press «OK».
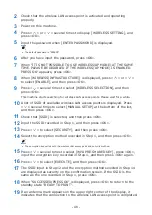
9
Press «
∧
» or «
∨
» several times to display [WPS SETUP], and press
«OK».
10
Select [WPS-PBC], and press «OK».
11
Select [YES], and press «OK».
12
When "WIRELESS STARTED" appears, the machine starts searching for
wireless LAN access points. Within 2 minutes, press and hold the easy
setup button of the wireless LAN access point for the period of time
confirmed in Step 1 or for a few seconds.
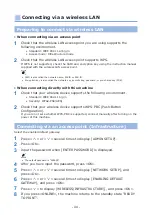
When "WPS SUCCESSED" appears, press «OK». The connection to the wireless LAN
access point is completed.
•
If "NOT CONNECTED TO WIRELESS ACCESS POINT" or "CONNECT FAILED/TIMEOUT" is displayed, press
«OK». Then try the operation as described in
"Connecting by selecting a wireless LAN access point from the
Summary of Contents for PRO330S
Page 1: ...Pro330S Label Printing Manual ...
Page 19: ... 19 Shaft x1 Ground pin Roll Paper Holder Setup Guide ...
Page 90: ... 90 7 Install the image drum back to the machine 8 Close the top cover ...
Page 94: ... 94 10 Install the image drum back to the machine 11 Close the top cover ...
Page 110: ...7 Cleaning 111 Cleaning the roll paper holder 112 Cleaning the main unit 115 Maintenance ...
Page 122: ... 122 20 Close the top cover ...
Page 140: ...EE8001 5120Z002 Rev3 ...


