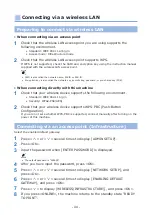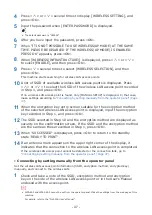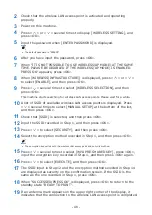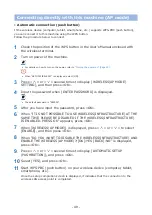
- 58 -
•
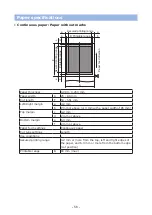
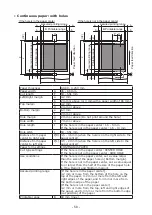
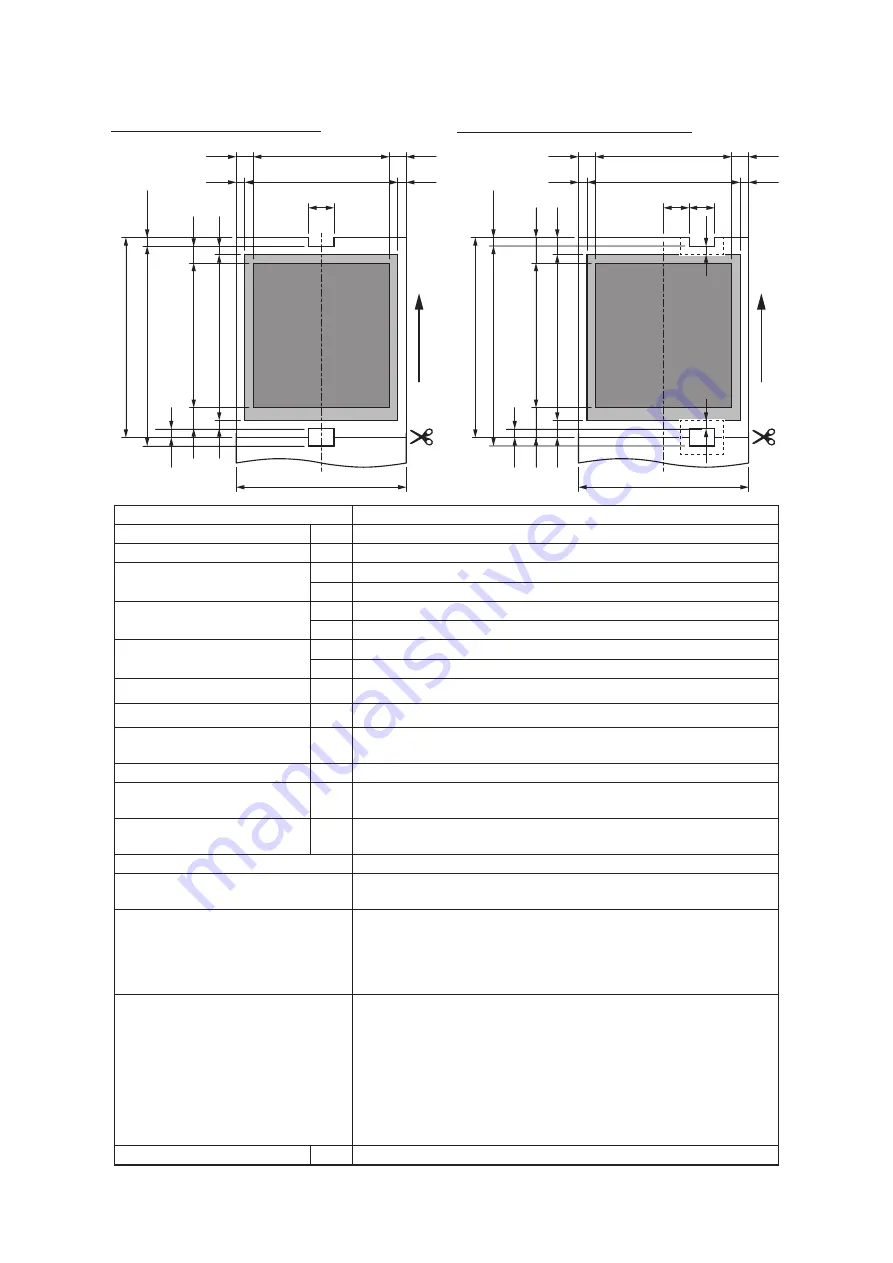
Continuous paper: with holes
A
a
a
b
b
e
J
(I/2)
d
f
I
c
A
a
a
b
H
P
H
b
e
J
(I/2)
d
f
g
g
I
c
F
F
If the hole is in the paper center
If the hole is not in the paper center
Assured printing range
B Printable range
B Printable range
Assured printing range
Paper feed direction
Paper feed direction
Assured printing range
Assured printing range
Printable range
Printable range
Paper thickness
0.080 - 0.250 mm
Paper width
A
36 - 86 mm
Cut length
F
53 - 551 mm
Left/Right margin
a
4.2 mm
b
2 mm or above (or 3 mm with a paper width of 86 mm)
Top margin
c
4.2 mm
d
2 mm or above
Bottom margin
e
6.3 mm
f
2 mm or above
Hole margin
g
2 mm or above (Do not print around the hole.)
Hole width
H
7 mm or above
Hole length
I
If the hole is in the paper center: 1.6 - 5 mm
If the hole is not in the paper center: 1.6 - 13 mm
Hole pitch
J
53 - 551 mm
Distance from paper
center to right side
P(R) 3.5 - 36 mm (when the hole is on the right side to the
paper center)
Distance from paper
center to left side
P(L) 3.5 - 29 mm (when the hole is on the left side to the
paper center)
Paper form settings
CONTINUOUS PAPER
Cut type settings
If the hole is in the paper center: CENTER HOLE
If the hole is not in the paper center: SIDE HOLE
Use conditions
If the hole is in the paper center, set a value larger
than the size of the paper hole in [Bottom margin].
If the hole is not in the paper center, set a value equal
to or larger than the half of the size of the paper hole
in [Top Margin] and [Bottom margin].
Assured printing range
[If the hole is in the paper center]
4.2 mm or more from the bottom of the hole on the
top of the paper, 4.2 mm or more from the left and
right edges of the paper, and 6.3 mm or more from
the bottom edge of the paper
[If the hole is not in the paper center]
4.2 mm or more from the top, left and right edges of
the paper, and 6.3 mm or more from the bottom edge
(cut position) of the paper
Printable range
B
80 mm (max)
Summary of Contents for PRO330S
Page 1: ...Pro330S Label Printing Manual ...
Page 19: ... 19 Shaft x1 Ground pin Roll Paper Holder Setup Guide ...
Page 90: ... 90 7 Install the image drum back to the machine 8 Close the top cover ...
Page 94: ... 94 10 Install the image drum back to the machine 11 Close the top cover ...
Page 110: ...7 Cleaning 111 Cleaning the roll paper holder 112 Cleaning the main unit 115 Maintenance ...
Page 122: ... 122 20 Close the top cover ...
Page 140: ...EE8001 5120Z002 Rev3 ...

