Lock Washer
and
¼" x 3"
Connector Bolt
Lock Washer
and
¼" x 3"
Connector Bolt
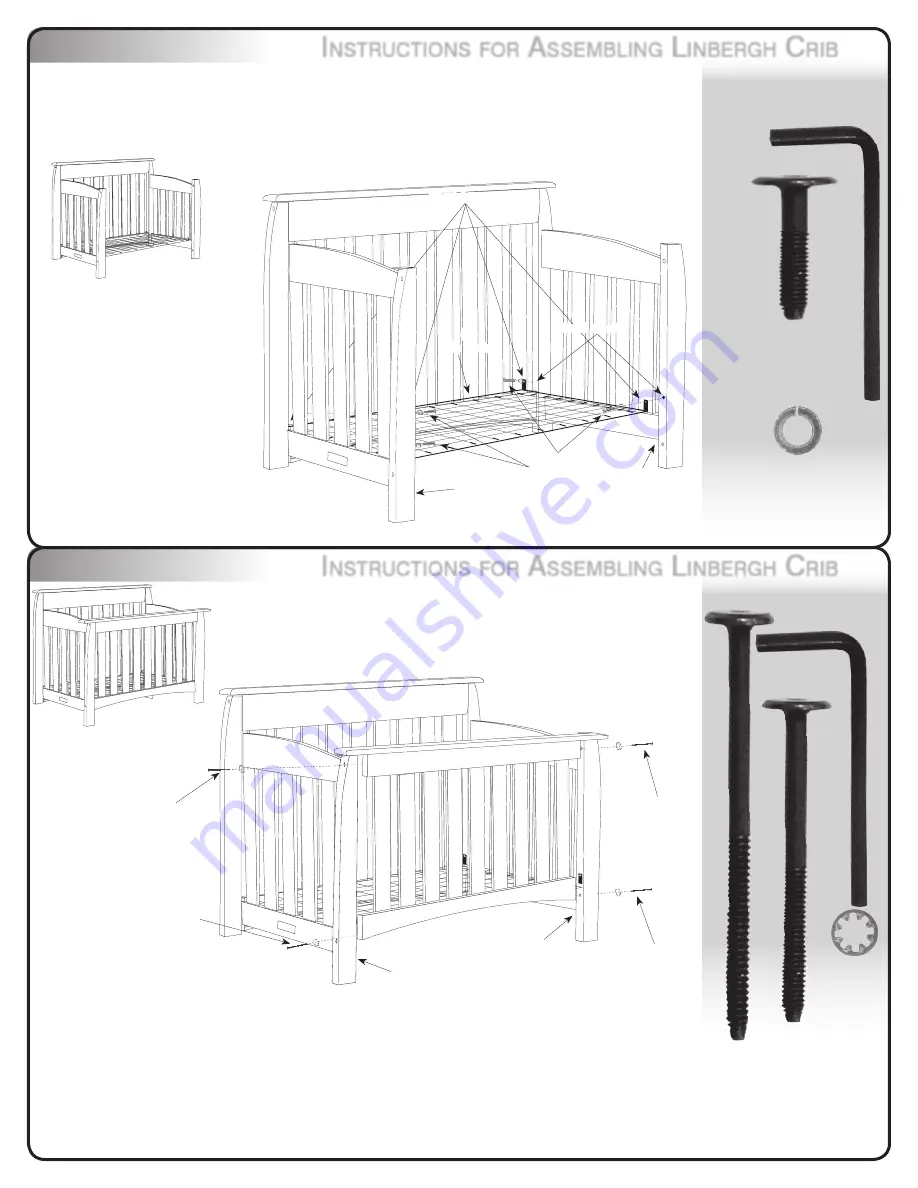
Step 3
Step 4
Tools Needed:
Tools Needed:
Attach crib spring (H) to metal insert with four ¼" x 1" connector head bolts and lock washers using
allen wrench provided. Small springs should be at top to support crib mattress. See figure 4. There
are three metal inserts for height adjustment of crib spring.
Note:
Crib spring should be lowered as
child grows to discourage child from trying to climb out.
DO NOT fasten the bolts all the way until
you have completed step 4
Attach short posts (D) to ends of front panel (C) with two ¼" x 3"
connector bolts and lock washers at the top, and two ¼" x 4¾"
connector bolts and lock washers at the bottom. Turn connector bolts
snug. The word "inside," located on bottom rails, should be on the
inside of the crib.
Now tighten crib spring bolt.
(2) ¼" x 3" Connector Bolt
Allen W
rench
(C)
Front Panel
Short Post (D)
Short Post (G)
I
nstructIons
for
A
ssemblIng
l
Inbergh
c
rIb
I
nstructIons
for
A
ssemblIng
l
Inbergh
c
rIb
(G)
Short Post
(D)
Short Post
Pivot Arms
¼" x 1"
Connector Bolt
(H)
Crib Spring
Metal Inserts
(4) Lock
W
asher
CAUTION:
ANY MATTRESS USED IN THIS
CRIB MUST BE AT LEAST 27¼" BY 51
/ " WITH
A THICKNESS NOT EXCEEDING 6 INCHES.
5
8
Your crib is now ready for bedding.
(2) ¼" x 4 ¾" Connector Bolt
Lock Washer
and
¼" x 4¾"
Connector Bolt
Lock Washer
and
¼" x 4¾"
Connector Bolt
(4)
¼
" x 1"
Connector Bolt
(4) Split
Lock
Washer
Allen Wrench