9-14
94MS20 Rev. B4
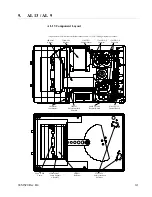
motor assembly from underneath the component chassis, swing the timing
cam out of the way.
•
Remove the four Phillips screws holding the motor to the chassis and
pull the motor out.
•
Remove the orange and brown wires from the motor (orange from terminal
#1 and brown from terminal #2).
•
Remove the cam mount from the motor using the 5/32 Allen wrench.
•
Install in reverse order.
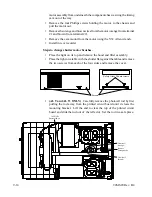
Steps to change shutter motor brushes.
•
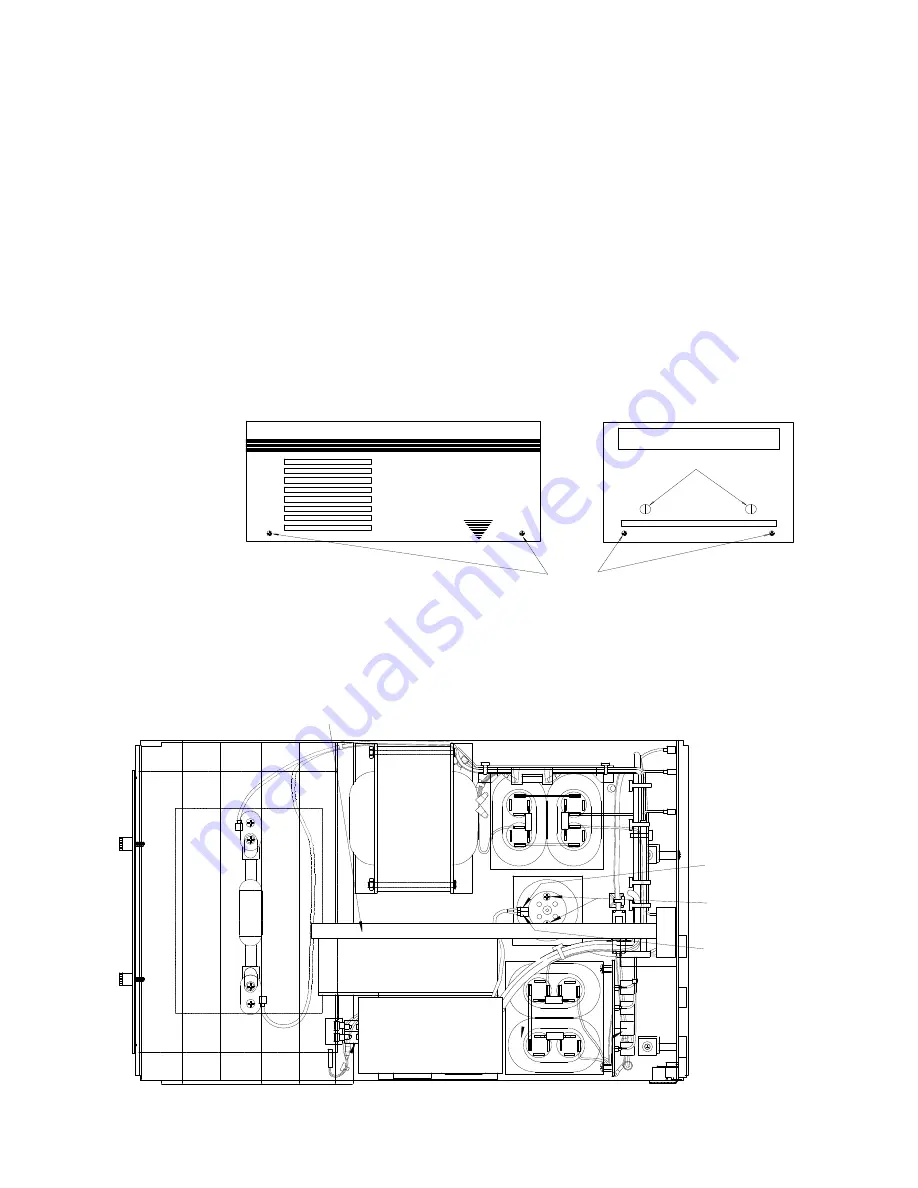
Place the light on its top and remove the hood and filter assembly.
•
Place the light on a table with the shutter flat against the table and remove
the two screws from each of the four sides and remove the cover.
Screws
OLITE
AL13
Safety Glass Thumbscrews
•
(AL 9 and AL 9+ ONLY)
Carefully remove the photocell rod by first
pulling the rod away from the printed circuit board until it clears the
mounting bracket. Lift the end to clear the top of the printed circuit
board and slide the rod out of the reflector. Set the rod in a safe place.
Photocell Rod
18D718-W
Terminal 2
(Brown)
Remove
Throughbolts
Terminal 1
(Orange)
Summary of Contents for OLITE
Page 1: ...94MS20 Rev B4 OLITE OLITE 60Hz Printing Light Service Manual O...
Page 8: ...1 2 94MS20 Rev B4...
Page 20: ...3 10 94MS20 Rev B4...
Page 56: ...5 30 94MS20 Rev B4...
Page 86: ...7 22 94MS20 Rev B5...
Page 108: ...9 20 94MS20 Rev B4...


