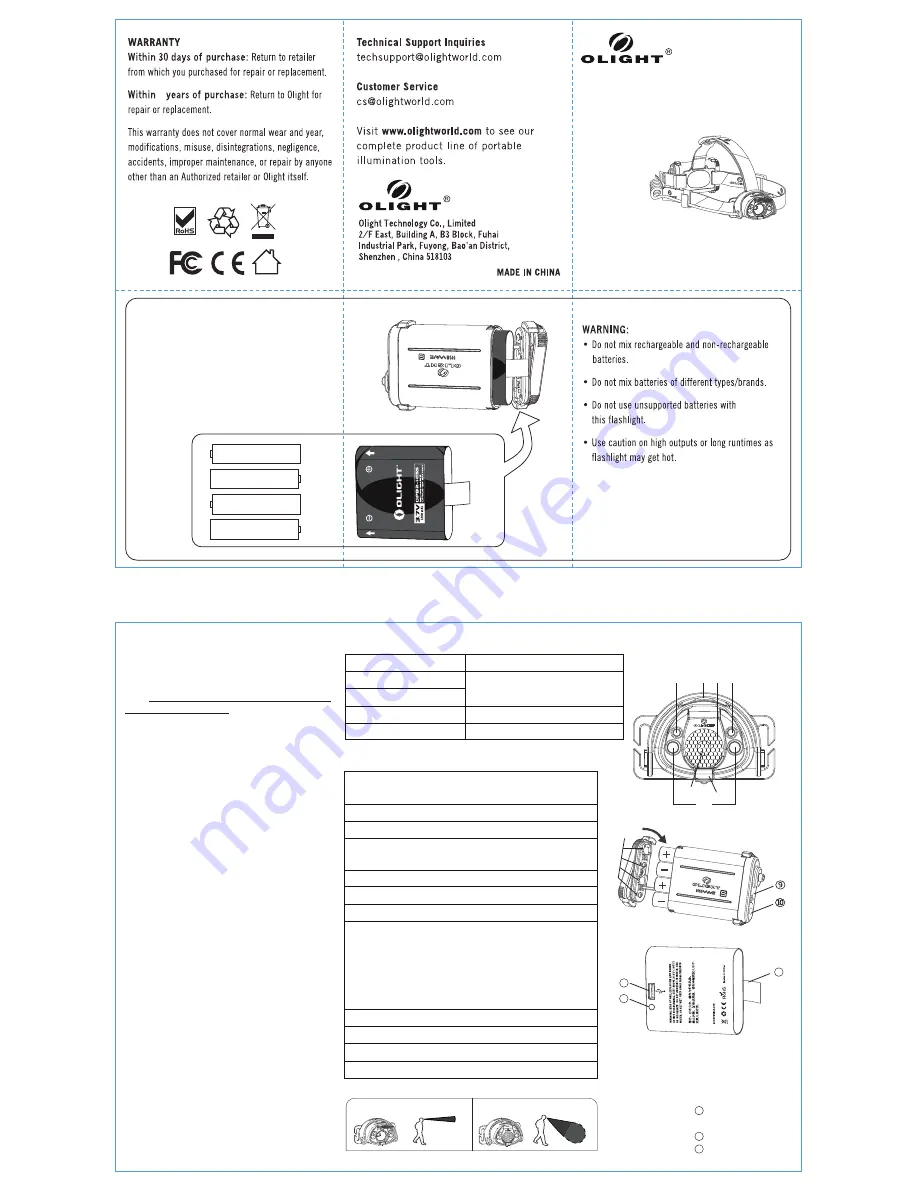
①
②
③
④
⑤
⑥
⑦
⑧
⑨
IR transmitter
Switch
Diffuser
IR receiver
Light source
Diffuser lock
⑩
Battery polarity mark
①
② ③ ④
⑤
⑥
⑦
+
+
-
-
⑧
Figure 2
Open
Specifications
:(
Headlamp
)
Headlamp: 70 x 53.5 x 22 mm
Battery box: 55 x 42 x 27 mm
Dimension
98g( exclude battery)
Weight
1 x CREE XM-L2 LED
Light source
Orange peel reflector
Reflector
PVC Flip up/down
Diffuser
Battery
1 x Battery (1200mAh 3.7V Li-ion INCLUDED)
4 x AAA Alkaline cell/Secondary NiMH batteries
lens
Ultra-clear tempering glass with anti-reflective coating
Light Output and
Runtime
250 lumens / 3 hours (high)
200 lumens / 3 hours (high with diffuser)
100 lumens / 5.6 hours (medium)
85 lumens / 5.6 hours (medium with diffuser)
15 lumens / 36 hours (low)
12 lumens / 36 hours (low with diffuser)
Candella
1,805 cd
Beam Distance
85 m
Water resistant
IPX 6
Impact resistance 1 m
Specifications
:(
Battery
)
Capacity
1200mAh
Voltage
Charge
current
Charge time
Fully charged voltage
Charging
Charge Indicator
Discharge cut-off voltage
Working temperature
3.7V
Micro USB CC
.
CV
0.35A
4.5H
4.2V
-
20
℃
~60
℃
3
.
0V
Charging:light on
Fully charged:light off
11
IR indicator
Micro USB
charging spot
Charging indicator
Battery pull tab
12
13
Battery indicator
Power button
H15S WAVE
VARIABLE-OUTPUT RECHARGEABLE LED HEADLAMP
USER MANUAL
Thank you for purchasing
the Olight H15S Wave LED
headlamp! Please
read this manual
carefully before
using this
product.
Inside the Box
H15S Wave, rechargeable lithium battery, Micro-USB
cable, head band, user manual
2
V1. JULY 10, 2014
How to Operate
1.
Install the rechargeable battery as seen in the diagram
(see Figure 4). Please insure that the included
rechargeable lithium battery is fully charged before
using. Note: The H15S can also utilize 4 x AAA batteries,
see installation instructions.
2.Power Switch and Battery Indicator:
Before use, please press the power button in battery box
to turn the power on, you can see the blue indicators near
the power button lit up right now, these indicators display
proximate balance power of battery, you need charge
your battery when all the blue lamps turns off. Press the
power button again will disable the power supply.
3. To turn on:
Press the red switch on the top of the
headlamp once, you have now activated the maximum
output beam. To access the medium setting, press and
release the switch again. Repeat this step to access the
low setting.
4. To turn off:
Cycle through the light levels by
pressing and releasing the switch until off, the number of
time will depend on the mode you are in.
5.Changing output levels:
Single press the blue
power switch, the brightness will changed from high to
middle or middle to low.
6.Wave Operation:
You must first note that the IR
LED's are slightly glowing red. Next, wave or swipe your
hand 2-6 inches in front of the headlamp from one side to
the other once. If the light is on, this will turn it off. If the
light is off, this will turn it on.
7.To disable the Wave Operation:
With the light
already on, press and hold the red switch until the light
blinks. The Wave Operation is now disabled. Once the
light is turned off and back on again the Wave Operation
will be re-activated.
8.Light Diffuser:
To release the Light Diffuser, press
the release latch on the bottom of the headlamp. To close
the Light Diffuser, press the diffuser down until it clicks
into place.
BATTERY INSTALLATION
Install the batteries as seen in the diagram.
SUPPORTED BATTERIES
•
1 x Battery (1200mAh 3.7V Li-ion included)
4 x AAA Alkaline cell/Secondary NiMH
•
batteries
Product parts
Figure 1
OR
+
-
+
-
+
-
+
-
A A A
A A A
A A A
A A A
Figure 3
11
12
13
Focused beam
Flood beam
3.0702.6010.5991 H15S
升级版说明书
for Norway
H15S
升级版说明书,书写纸,单色印刷
Figure 4


