OLIMEX© 2012
OLinuXino User's Manual
2.6 Using BitBurner
IMPORTANT! MODIFYING THE FUSES IS IRREVERSIBLE PROCESS! BURNING THE
WRONG FUSES MIGHT DAMAGE OLINUXINO IRREVERSIBLY! BURNING WRONG
FUSES MIGHT CAUSE BOOT PROBLEMS!
BURN FUSES AT OWN RISK!
The bit burning is done via the USB of the computer connected to the OLINUXINO board and the
BitBurner software. To be able to burn the fuses you will need to make a custom cable that connects
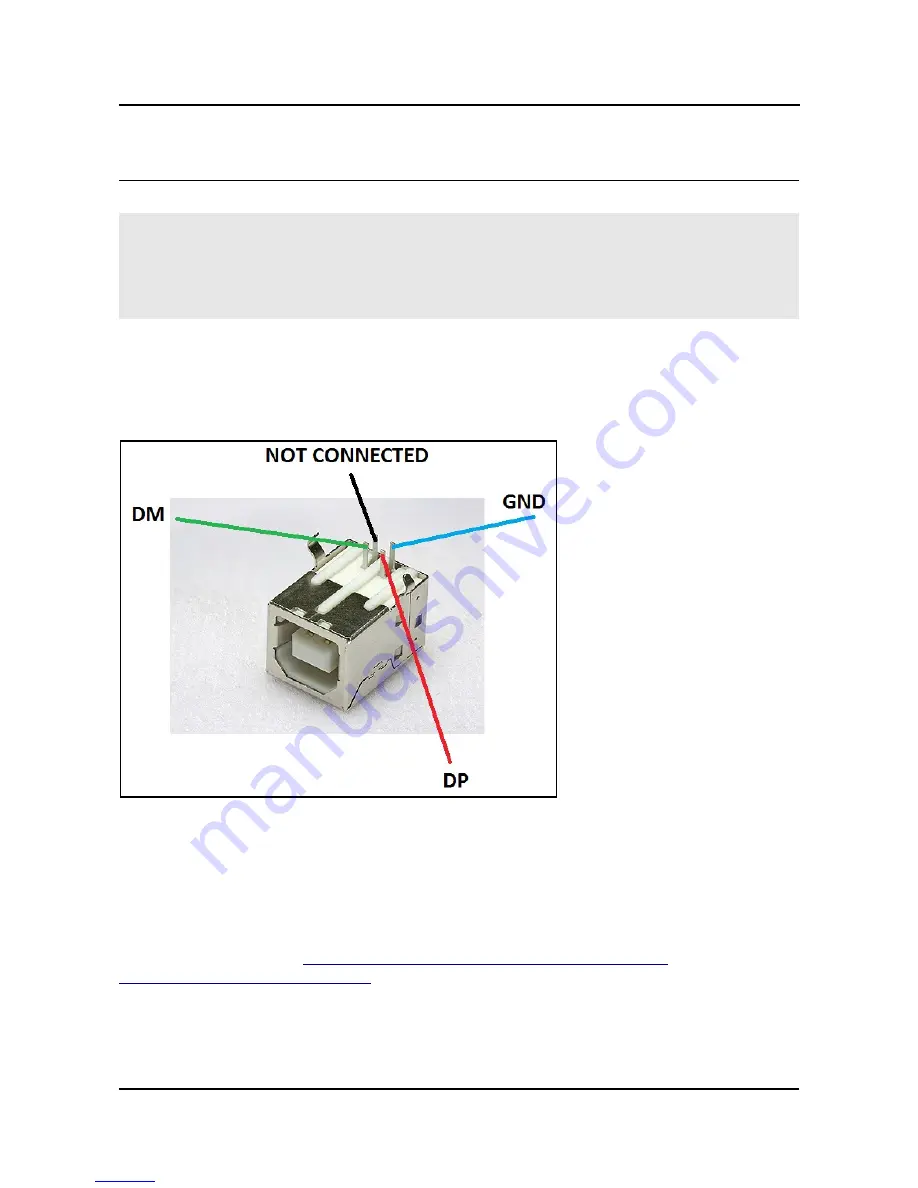
a USB with the 3 pin holes found at the bottom of the board named “GND”, “DP”, “DM” (check
the picture below for a better view how the three wires must be connected.
After soldering the three wires you can place a marker on each of them or use colored wires to be
able to distinguish them. You can also use some gel to keep them tight on the USB connector. On
the opposite side of the cables you might place 50mil (1.27mm) male connector following the order
of the signals. Please also restrain from using wires longer than 20 cm since that might make the
connection unreliable.
Download BitBurner from
https://www.olimex.com/dev/OLINUXINO/iMX233-
OLINUXINO/BitBurner.v1.0.4.6.zip
. Extract it and start the .exe. If you connect everything you
should see and choose HID-compilant device from the “Select device” drop-down menu. If you
check the fuses we have already burned the application should show an image as the one on the next
page.
Page 10 of 48
electronic components distributor


