background image

Summary of Contents for AQUARIA SLIM 14 P

Page 1: ...AINTENANCE INSTRUCTIONS POUR L INSTALLATION L EMPLOI ET L ENTRETIEN HANDBUCH F R INSTALLATION GEBRAUCH UND WARTUNG INSTRUCCIONES PARA LA INSTALACI N USO Y MANTENIMIENTO Attenzione rischio di incendio...

Page 2: ......

Page 3: ...e sull apparecchio 7 Per il corretto funzionamento dell apparecchio rispettare le distanze minime e le indicazioni riportate nel presente manuale vedere figura 1 8 Per il corretto collegamento elettri...

Page 4: ...ement correct de l appareil respectez les distances minimales et les indications de ce manuel voir figure 1 8 Pour raccorder correctement l appareil suivez les instructions du paragraphe 2 3 FR WARNHI...

Page 5: ...se por el usuario no deben efectuarse por ni os sin supervisi n aplicable para los pa ses de la Uni n Europea 4 El aparato puede utilizarse por personas incluso ni os con reducidas capacidades f sicas...

Page 6: ...min 30cm min 20cm min 20cm min 70cm 1 5 3 2 4 min 2m min 2m 6 11...

Page 7: ...9 10 7 7 7 7b 8 7 14 14 5 10 13 11 10 10...

Page 8: ...PAGINA INTENZIONALMENTE BIANCA P GINA INTENCIONADAMENTE BLANCA DIESE SEITE WURDE ABSICHTLICH WEISS GELASSEN PAGE INTENTIONNELLEMENT BLANCHE PAGE INTENTIONALLY LEFT BLANK...

Page 9: ...arecchio 21 4 2 PULIZIA DEL FILTRO ARIA 21 4 3 PULIZIA DEL SERBATOIO 22 5 CONSERVAZIONE DELL APPARECCHIO 22 6 DATI TECNICI 22 7 INCONVENIENTI E RIMEDI 23 SMALTIMENTO Il simbolo su il prodotto o sulla...

Page 10: ...I Indice I paragrafi preceduti da questo simbolo contengono informazioni e prescrizioni molto importanti particolarmente per quanto riguarda la sicurezza Il mancato rispetto pu comportare pericolo per...

Page 11: ...a il rischio di subire bruciature per contatto con componenti con elevata temperatura NON COPRIRE Segnala al personale interessato che vietato coprire l apparecchio per evitarne il surriscaldamento AT...

Page 12: ...asciati alla portata dei bambini in quanto potenziali fonti di pericolo 5 LA DITTA COSTRUTTRICE NON SI ASSUME RESPONSABILIT PER DANNI A PERSONE O COSE DERIVANTI DALLA MANCATA OSSERVANZA DELLE NORME CO...

Page 13: ...te Perl eventualeriparazionerivolgersiesclusivamenteaicentridiassistenzatecnica autorizzati dal costruttore e richiedere l utilizzo di ricambi originali Il mancato rispetto di quanto sopra pu comprome...

Page 14: ...el sole o vicino vicino a fonti di calore come stufa calorifero o radiatore Fig 3 30 Non utilizzare l apparecchio vicino ad apparecchi a gas Fig 3 31 Non azionare l apparecchio in prossimit di tende i...

Page 15: ...computer lettore dvd ecc onde evitare interferenze Fig 6 46 Non utilizzare l apparecchio se nel locale stato da poco spruzzato insetticida a gas o in presenza di incensi accesi vapori chimici o resid...

Page 16: ...Un uso improprio dell apparecchio con eventuali danni causati a persone cose o animali esulano OLIMPIA SPLENDID da ogni responsabilit 0 5 USO NON PREVISTO E POTENZIALMENTE PERICOLOSO I deumidificatori...

Page 17: ...STA SULL APPARECCHIO 5 L APPARECCHIO DEVE ESSERE IMMAGAZZINATO IN UN LOCALE SEN ZA LA PRESENZA DI FONTI DI ACCENSIONE A FUNZIONAMENTO CON TINUO PER ESEMPIO FIAMME LIBERE APPARECCHI FUNZIONANTI A GAS O...

Page 18: ...CHIATURA DISPOSITIVI Lo stoccaggio dell apparecchiatura deve essere conforme alle istruzioni del co struttore 21 STOCCAGGIO DI APPARECCHIATURA IMBALLATA INVENDUTA L imballo deve essere costruito in mo...

Page 19: ...aminata per assicurarsi che non esistano elementi infiammabili o rischi di ignizione Utilizzare segnaletica antifumo g Area ventilata Assicurarsi che l area di installazione sia all aperto o adeguatam...

Page 20: ...ezzaturadurantelariparazione un dispositivo di rilevamento perdite permanentemente funzionante deve essere posizionato nel punto pi critico per avvisare l operatore di una situazione potenzialmente pe...

Page 21: ...il refrigerante e corrodere le tubazioni in rame Se si sospetta una perdita tutte le fiamme libere devono essere rimosse spente Se viene rilevata una perdita di refrigerante la quale necessita di sal...

Page 22: ...i E considerata buona prassi recuperare tutti i refrigeranti in maniera sicura Prima di eseguire questa operazione prendere un campione di olio e di refrigerante nel caso sia necessaria un analisi pri...

Page 23: ...ative valvole d intercettazione perfettamente funzionanti I cilindri di recupero vuoti devono essere messi sotto vuoto e se possibile raffreddati prima del recupero L attrezzatura di recupero deve ess...

Page 24: ...ICHE L apparecchio confezionato singolarmente in imballo di cartone Stoccare l imballo in posizione verticale Il deumidificatore rimuove energicamente l umidit dall aria abbassa la umidit della stanza...

Page 25: ...tte un beep e il display visualizza la percentuale di umidit presente nel locale 1 4 PANNELLO COMANDI 21 Tasto STAND BY ON OFF Premere il tasto per avviare spegnerel ap parecchio 22 Tasto DOWN Premere...

Page 26: ...io ne verticale In caso di trasporto in posizione orizzontale attendere almeno un ora prima di riavviarlo Prima di spostare o trasportare l apparecchio scaricare completamente l acqua di condensa oper...

Page 27: ...apparecchio aprire dolcemente lo sbocco di uscita aria NON inserire niente dita mano oggetti ecc nello sbocco di uscita aria onde evitare di danneggiare l apparecchio Pericolo di tagli o ferite a Acc...

Page 28: ...serbatoio Quando si accende il led 28 l apparecchio si ferma il cicalino suona ed necessario svuotare il serbatoio 7 Operando con entrambe le mani rimuovere il serbatoio 7 dal corpo apparecchio figur...

Page 29: ...chio Non utilizzare benzina solvente pasta per lucidare o solventi similari Questi pro dotti potrebbero provocare la rottura o la deformazione della superficie in plastica Non usare oli sostanze chimi...

Page 30: ...ti possono graffiare e danneg giare il serbatoio e causare perdite di acqua 5 CONSERVAZIONE DELL APPARECCHIO Se non si intende utilizzare l apparecchio per un periodo di tempo particolarmente lungo o...

Page 31: ...pressore attiva l unit non pu lavorare La funzione di deumidificazione non funziona o l unit si accende spegne frequentemente Filtro aria ostruito Pulire il filtro aria Porta o finestra aperta Chiuder...

Page 32: ...E AND CLEANING 21 4 1 CLEANING 21 4 1 a Cleaning the appliance 21 4 2 AIR FILTER CLEANING 21 4 3 TANK CLEANING 22 5 PRESERVATION OF THE APPLIANCE 22 6 TECHNICAL DATA 22 7 TROUBLE SHOOTING 23 DISPOSAL...

Page 33: ...aphs marked with this symbol contain very important information and recommendations particularly as regards safety Failure to comply with them may result in danger of injury to the operators loss of t...

Page 34: ...esents the risk of burns due to contact with components at very high temperatures DO NOT COVER Indicates to the personnel concerned that it is prohibited to cover the appliance to prevent over heating...

Page 35: ...materials must not be left within reach of children as they can be dangerous 5 THEMANUFACTURERISNOTRESPONSIBLEFORDAMAGESTOPERSONS OR PROPERTY CAUSED BY FAILURE TO FOLLOW THE INSTRUCTIONS IN THIS MANUA...

Page 36: ...e power socket For repair work contact solely the technical service centres authorised by the manufacturer and ask for original spare parts to be used Failure to do this can affect the safety of the a...

Page 37: ...product under direct sunlight or near a heat source such as a stove heater or radiator Fig 3 30 Do not use the appliance near gas equipment Fig 3 31 Do not activate the appliance near curtains since...

Page 38: ...ances Fig 6 46 Do not use the appliance if insecticide gas has just been sprayed in the room or in the presence of burning incenses chemical vapours or oily residues 47 Do not use the appliance if the...

Page 39: ...A SPLENDID from any responsibility 0 5 UNINTENDED AND POTENTIALLY DANGEROUS USE The dehumidifiers must not be installed in environments with the presence of inflammable gases explosive gases in very h...

Page 40: ...ONTINUOUSLY OPERATING IGNITION SOURCES FOR EXAMPLE OPEN FLAMES AN OPERATING GAS APPLIANCE OR AN OPERATING ELECTRIC HEATER 6 Do not pierce or burn 7 Be aware that the refrigerants may not contain an od...

Page 41: ...ment should be in accordance with the manufacturer s instructions 21 STORAGE OF PACKED UNSOLD EQUIPMENT Storage package protection should be constructed such that mechanical damage to the equipment in...

Page 42: ...be displayed g Ventilated area Ensure that the area is in the open or that it is adequately ventilated before breaking into the system or conducting any hot work A degree of ventilation shall continu...

Page 43: ...cal components the casing is not altered in such a way that the level of protection is affected This shall include damage to cables excessive number of connections terminals not made to original speci...

Page 44: ...ed from the system or isolated by means of shut off valves in a part of the system remote from the leak Oxygen free nitrogen OFN shall then be purged through the system both before and during the braz...

Page 45: ...d prior to re use of reclaimed refrigerant It is essential that electrical power is available before the task is commenced a Become familiar with the equipment and its operation b Isolate system elect...

Page 46: ...er with a set of instructions concerning the equipment that is at hand and shall be suitable for the recovery of flammable refrigerants In addition a set of calibrated weighing scales shall be availab...

Page 47: ...OF THE APPLIANCE 1 1 FEATURES The appliance is packaged singularly in a cardboard packaging Store the packaging in vertical position The dehumidifier powerfully removes moisture from the air to decre...

Page 48: ...wer socket the appliance emits a beep and the display shows the percentage of hu midity in the room 1 4 CONTROL PANEL 21 STAND BY key ON OFF Press this key to start switch off the appli ance 22 DOWN k...

Page 49: ...cal position If it is transported in a horizontal position wait at least one hour before starting it Beforemovingortransportingtheappliance completelydraincondensation by working as described in parag...

Page 50: ...nce kindly open the air outlet DO NOT insert anything fingers hands objects etc in the air outlet in order to avoid damaging the appliance Cuts or wounds hazard a Appliance start switch off Press this...

Page 51: ...ps the buzzer rings and it is necessary to empty the tank 7 Remove the tank 7 from the appliance body working with both hands Fig 7 Empty the tank 7 Fig 8 Do not remove the float 7b from the water tan...

Page 52: ...chemically treated or antistatic cloth to clean the appliance Do not use petrol solvents polishing pastes or similar These products could break or deform the plastic surface Do not use oils chemical...

Page 53: ...asoline ben zene thinner or other solvents as these can scratch and damage the tank and cause water leakage 5 PRESERVATION OF THE APPLIANCE If you do not intend to use the appliance for a particularly...

Page 54: ...ssor protection is active the unit cannot work The dehumidifying function doesn t work or the unit turn on off frequently Air filter is clogged Clean the air filter Door or window open Close the door...

Page 55: ...YAGE 21 4 1 NETTOYAGE 21 4 1 a Nettoyage de l appareil 21 4 2 NETTOYAGE DU FILTRE DE L AIR 21 4 3 NETTOYAGE DU R SERVOIR 22 5 CONSERVATION DE L APPAREIL 22 6 DONN ES TECHNIQUES 22 7 PROBL MES ET SOLUT...

Page 56: ...ine dans des conditions de s curit 0 2 1 Pictogrammes r dactionnels Service Indique des situations o il faut informer le SERVICE interne de la soci t SERVICE APRES VENTE CLIENTS Index Les paragraphes...

Page 57: ...it le risque de subir des br lures par contact avec des composants haute temp rature NE PAS COUVRIR Il indique au personnel concern qu il est interdit de couvrir l appareil afin d en viter la surchauf...

Page 58: ...parfait tat Les l ments de l emballage ne doivent pas tre laiss s port e des enfants pour qui ils repr sentent des sources potentielles de danger 5 LEFABRICANTDECLINETOUTERESPONSABILITEENCASDEDOMMAGE...

Page 59: ...nt l alimentation lectrique Pour toute r paration s adresser exclusivement aux services apr s vente agr s par le constructeur et exiger l utilisation de pi ces de rechange originales Le non respect de...

Page 60: ...l appareil lui m me pour d brancher la fiche de la prise de courant 29 Ne pas utiliser ce produit la lumi re directe du soleil ou proximit de sources de chaleur telles que po les ou radiateurs Fig 3 3...

Page 61: ...appareils lectroniques t l viseur radio ordinateur lecteur DVD etc pour viter les interf rences Fig 6 46 Ne pas utiliser l appareil aussit t apr s la pulv risation de l insecticide gaz ou en pr sence...

Page 62: ...le Un usage impropre de l appareil avec d ventuels dommages caus s aux personnes biens ou animaux d chargent OLIMPIA SPLENDID de toute responsabilit 0 5 USAGE NON PR VU ET POTENTIELLEMENT DANGEREUX N...

Page 63: ...APPAREIL 5 IL EST INDISPENSABLE DE RANGER L APPAREIL DANS UNE PI CE SANS LA PR SENCE DE SOURCES D INFLAMMATION EN FONCTIONNEMENT CONTINU PAR EXEMPLE FLAMMES NUES APPAREILS GAZ OU APPAREILS DE CHAUFFAG...

Page 64: ...x 20 STOCKAGE DE L APPAREIL DISPOSITIFS Le stockage de l appareil doit tre conforme aux instructions du fabricant 21 STOCKAGE DE L APPAREIL INVENDU L emballage doit tre construit de mani re ce que tou...

Page 65: ...ou risque d inflammation Utilisez des panneaux anti fum e g Zone ventil e Assurez vous que la zone d installation est l ext rieur ou correctement ventil e avant de mettre le syst me en marche ou d ef...

Page 66: ...ue pour avertir l op rateur d une situation potentiellement dangereuse b Faites notamment attention aux points suivants pour vous assurer que le capot n est pas modifi de mani re affecter le niveau de...

Page 67: ...r agir avec le r frig rant et corroder la tuyauterie en cuivre Si une fuite est suspect e toutes les flammes nues doivent tre supprim es teintes Si une fuite de r frig rant n cessitant une soudure est...

Page 68: ...cup rer tous les r frig rants en toute s curit Avant de proc der cette op ration pr levez un chantillon d huile et de liquide de refroidissement au cas o une analyse serait n cessaire avant de r utili...

Page 69: ...des vannes d arr t correspondantes enti rement fonctionnelles Les cylindres de r cup ration vides sont plac s sous vide et si possible refroidis avant la r cup ration L quipement de r cup ration doit...

Page 70: ...appareil est emball unitairement dans un emballage en carton Conserver l emballage en position verticale Le d shumidificateur enl ve nergiquement l humidit de l air baisse l humidit de la pi ce et ma...

Page 71: ...l cran affiche le pourcentage d humidit du local 1 4 PANNEAU DE COMMANDES 21 Touche STAND BY ON OFF Appuyer sur cette touche pour allumer teindre l appareil 22 Touche DOWN Appuyer sur cette touche pou...

Page 72: ...cas de transport en position horizontale attendre au moins une heure avant de le mettre en marche Avant de d placer ou de transporter l appareil vacuez compl tement l eau de condensat en proc dant com...

Page 73: ...NE rien ins rer doigts main objets etc dans la bouche de sortie d air afin d viter d endommager l appareil Risque de coupures ou de blessures a Allumage extinction de l appareil Appuyer une fois sur...

Page 74: ...yant 28 de l appareil s allume le vibreur sonne indiquant la n cessit de vider le r servoir 7 En utilisant les deux mains enlever le r servoir 7 du corps de l appareil Fig 7 Vider le r servoir 7 Fig 8...

Page 75: ...antistatique pour nettoyer l appareil N utilisez pas d essence de solvant de p te polir ou de solvants similaires Ces produits peuvent entra ner la rupture ou la d formation de la surface en plastique...

Page 76: ...uant ou d autres solvants car ceux ci peuvent rayer et endommager le r servoir et provoquer des pertes d eau 5 CONSERVATION DE L APPAREIL Si l appareil ne doit pas tre utilis pendant une p riode parti...

Page 77: ...La protection du compresseur est active l unit ne peut pas fonctionner La fonction de d shumidi fication ne fonctionne pas ou l unit s allume s teint fr quemment Filtre air obstru Nettoyer le filtre...

Page 78: ...reinigen 21 4 2 REINIGUNG DES LUFTFILTERS 21 4 3 REINIGUNG DES TANKS 22 5 AUFBEWAHRUNG DES GER TS 22 6 TECHNISCHE DATEN 22 7 ST RUNGEN UND ABHILFEN 23 ALLGEMEINES INHALTSVERZEICHNIS ENTSORGUNG Dieses...

Page 79: ...0 2 1 Bildsymbole Kundendienst Kennzeichnet Situationen in denen der interne KUNDENDIENST der Firma zu benachrichtigen ist KUNDENDIENST Inhaltsverzeichnis DieParagrafen denendiesesSymbolvorausgeht ent...

Page 80: ...en an hei en Komponenten birgt wenn er entgegen der Sicherheitsvorschriften ausgef hrt wird NICHT BEDECKEN Weist das betroffene Personal darauf hin dass es verboten ist das Ger t wegen berhitzungsgefa...

Page 81: ...ie in Reichweite von Kindern lassen da sie f r diese eine Gefahrenquelle darstellen 5 DIE HERSTELLERFIRMA BERNIMMT KEINERLEI VERANTWORTUNG F R SCH DEN AN PERSONEN ODER SACHEN DIE DURCH NICHTBEACHTUNG...

Page 82: ...etrennt werden EtwaigeReparaturend rfenausschlie lichvondenVertrags Servicezentren und unter Verwendung von Originalersatzteilen aus gef hrt werden Bei Zuwiderhandeln ist die Betriebssicherheit des Ge...

Page 83: ...s Produkt nicht unter direktem Sonnenlicht oder in der N he von W rmequellen wie einem Ofen Heizk rper oder Abb 3 30 Das Ger t nicht in der N he von Gasger ten benutzen Abb 3 31 Das Ger t nicht in der...

Page 84: ...r ten TV Radio Computer DVD Player usw entfernt aufstellen um St rungen zu vermeiden Abb 6 46 Das Ger t nicht benutzen wenn im Raum vor kurzem ein Insektizid gespr ht wurde oder R ucherst bchen angez...

Page 85: ...en an Personen Gegenst nden und Tieren 0 5 NICHT VORGESEHENER UND POTENZIELL GEF HRLICHER GEBRAUCH DieEntfeuchterd rfennichtinR umenmitbrennbaren explosionsgef hrdeten Gaseninstalliertwerden insehrfeu...

Page 86: ...EN IN DEM KEINE Z NDQUELLEN MIT KONTINUIERLICHEM BETRIEB VORHANDEN SIND ZUM BEISPIEL OFFENE FLAMMEN GASBETRIEBENE GER TE ODER ELEKTROHEIZER 6 Nicht durchstechen oder verbrennen 7 Bitte beachten Sie da...

Page 87: ...DES GER TS DER VORRICHTUNG Die Lagerung des Ger ts muss mit den Anleitungen des Herstellers konform sein 21 LAGERUNG DES VERPACKTEN GER TS NICHT VERKAUFT Die Verpackung ist so vorzusehen dass eine me...

Page 88: ...anden sind Hinweisschilder f r Rauchverbot verwenden g Bel fteter Bereich Sicherstellen dass der Installationsbereich im Freien liegt oder entsprechend bel ftet ist bevor das System gestartet oder War...

Page 89: ...Leckagenmessger t fortlaufend funktionieren und am kritischen Punkt positioniert sein um den Bediener auf eine potentiell gef hrliche Situation hinzuweisen b Auf folgende Hinweise besonders achten um...

Page 90: ...nn m ssen alle offene Flammen entfernt ausgemacht werden Falls eine Leckage erkannt wird die verschwei t werden muss das gesamte K hlmittel des Systems in einem Bereich der von der Leckage entfernt is...

Page 91: ...hlmittel wieder sicher aufzufangen Vor diesem Vorgang eine l und eine K hlmittelprobe entnehmen falls das aufgefangene K hlmittel vor einer weiteren Verwendung analysiert werden soll Es ist wichtig da...

Page 92: ...attet sein und die Sperrventile m ssen einwandfrei funktionieren In den Zylindern zur R ckgewinnung ist ein Vakuum zu erzeugen und diese sollten falls m glich vor der R ckgewinnung gek hlt werden Die...

Page 93: ...1 1 MERKMALE Das Ger t ist einzeln in einem Karton verpackt Die Verpackung in vertikaler Position aufstellen Der Entfeuchter sorgt f r eine starke Entfeuchtung der Luft senkt die Feuchtigkeit im Raum...

Page 94: ...splay wird der Feuchtigkeits grad der Raumluft angezeigt 1 4 BEDIENFELD 21 TasteSTANDBY ON OFF DieTastedr cken um das Ger t zu starten bzw abzustellen 22 Taste DOWN Die Taste dr cken um den einstellba...

Page 95: ...Position bewegt und gehandhabt werden Wird sie in liegender Stellung transportiert mu vor dem ersten Einschal ten mindestens eine Stunde abgewartet werden Bevor das Ger t bewegt oder transportiert wir...

Page 96: ...halten des Ger ts behutsam ffnen NICHTS Finger Hand Gegenst nde in den Luftauslass einf hren um eine Besch digung des Ger ts zu vermeiden Schnitt oder Verletzungsgefahr a Ein bzw Ausschalten des Ger t...

Page 97: ...ank leeren Wenn die LED 28 aufleuchtet stoppt das Ger t es ert nt der Summer und der Tank 7 muss geleert werden Mit beiden H nden den Tank 7 aus dem Ger t nehmen Abb 7 Den Tank 7 leeren Abb 8 Den Schw...

Page 98: ...antistatischen Lappen verwenden Weder Benzin L sungsmittel Poliermittel L sungsmittel oder hnliches verwen den Diese Produkte k nnen Br che oder Verformungen der Kunststoffoberfl che verursachen Zur...

Page 99: ...enzin Benzol Verd nner oder sonstige L sungsmittel die den Beh lter verkratzen und besch digen sowie Wasserleckagen verursachen k nnen 5 AUFBEWAHRUNG DES GER TS Falls beabsichtigt wird das Ger t f r e...

Page 100: ...Ger t ist nicht betriebsbereit Die Funktion Enfeuchten funktioniert nicht oder die Einheit schaltet fters ein und aus Luftfilter verstopft Luftfilter reinigen T r oder Fenster offen T r und oder Fenst...

Page 101: ...EZA 21 4 1 LIMPIEZA 21 4 1 a Limpieza del aparato y del control remoto 21 4 2 LIMPIEZA DEL FILTRO DEL AIRE 21 4 3 LIMPIEZA DEL TANQUE 22 5 PRESERVACI N DEL APARATO 22 6 DATOS T CNICOS 22 7 INCONVENIEN...

Page 102: ...togramas informativos Servicio Indica situaciones en las cuales se debe informar al SERVICE empresarial interno SERVICIO ASISTENCIA T CNICA A CLIENTES ndice los p rrafos precedidos por este s mbolo co...

Page 103: ...de seguridad existe el riesgo de sufrir quemaduras a causa del contacto con componentes a temperatura elevada NO CUBRIR Se ala al personal implicado que est prohibido cubrir el aparato para evitar que...

Page 104: ...al alcance de los ni os ya que son potenciales fuentes de peligro 5 LA EMPRESA CONSTRUCTORA NO ASUME NINGUNA RESPONSABILIDAD POR DA OS EN PERSONAS O COSAS QUE DERIVEN DE LA FALTA DE OBSERVACI N DE LA...

Page 105: ...l aparato y desconecte el enchufe de la toma de corriente Para eventuales reparaciones dir janse solamente a un centro de asistencia t cnica autorizado por el fabricante y soliciten el empleo de pieza...

Page 106: ...clavija de la toma de corriente 29 No utilice este aparato bajo la luz directa del sol o cerca de fuentes de calor estufa calefactor o radiador Fig 3 30 No utilice el aparato cerca de aparatos de gas...

Page 107: ...ar condensaci n en el propio aparato 45 Instalar el aparato al menos a 2 metros de los otros aparatos electr nicos televisi n radio computadora reproductor de dvd etc para evitar interferencias Fig 4...

Page 108: ...tes atmosf ricos lluvia sol etc 56 No utilice el aparato en las proximidades de la ba era de la ducha o de una piscina Tipo y caracter sticas de los fusibles AT 5A 0 4 USO PREVISTO El aparato debe ser...

Page 109: ...DE FUENTES DE IGNICI N DE FUNCIONAMIENTO CONTINUO POR EJEMPLO LLAMAS ABIERTAS APARATOS DE GAS O CALENTADORES EL CTRICOS 6 No perfore o queme 7 Tenga en cuenta que los refrigerantes podr an ser inodoro...

Page 110: ...ructor 21 ALMACENAMIENTO DE APARATOS EMPAQUETADOS TODAV A NO VENDI DOS El embalaje se debe construir de manera que un da o mec nico de los aparatos dentro de los mismos no cause una perdida de refrige...

Page 111: ...ficada para asegurarse de que no existen elementos inflamables o riesgos de ignici n Utilice se ales de no fumar g rea ventilada Aseg rese de que el rea de instalaci n sea al aire libre o adecuadament...

Page 112: ...tos durante la reparaci n un dispositivo de detecci n de escapes permanentemente operativo debe posicionarse en el punto m s cr tico para informar el operador de una situaci n potencialmente peligrosa...

Page 113: ...que el cloro podr a reaccionar con el refrigerante y corroer las tuber as de cobre Si sospecha un escape todas las llamas vivas deben removerse apagarse Si se detecta un escape de refrigerante que nec...

Page 114: ...aparatos y con todos sus componentes Se considera buena praxis recuperar todos los refrigerantes de manera segura Antes de ejecutar esta operaci n tome una muestra de aceite y de refrigerante en el ca...

Page 115: ...una v lvula de drenaje de la presi n y con las relativas v lvulas de interceptaci n perfectamente operativas Los cilindros de recuperaci n vac os deben sellarse al vac o y si posible enfriarse antes...

Page 116: ...se embala singularmente en embalajes de cart n Almacene el embalaje en posici n vertical El deshumidificador elimina en rgicamente la humedad del aire baja la humedad de la habitaci n y mantiene el a...

Page 117: ...y la pantalla visualiza el porcentaje de humedad en la habitaci n 1 4 PANEL DE MANDOS 21 TeclaSTANDBY ON OFF Presione esta tecla para iniciar apagar el aparato 22 Tecla DOWN Presione esta tecla para...

Page 118: ...osici n verti cal En caso de transporte en posici n horizontal esperar al menos una hora antes de ponerlo en marcha Antes de mover o transportar el aparato descargue completamente el agua de condensac...

Page 119: ...a de aire NO inserta nada dedos manos objetos etc en la salida de aire para evitar da ar el aparato Peligro de cortes o heridas a Arranque apagamiento del aparato Presione esta tecla una vez o m s par...

Page 120: ...miento del tanque Cuando se enciende la led 28 el aparato se para el zumbador suena y es necesario vaciar el tanque 7 Obrando con ambas manos quite el tanque 7 del cuerpo del aparato Fig 7 Vac e el ta...

Page 121: ...mente tratado o antiest tico para limpiar el aparato No utilice gasolina disolventes pasta de pulido o similares Estos productos podr an causar la rotura o la deformaci n de la superficie de pl s tico...

Page 122: ...no o disolventes dado que stos pueden rayar y da ar el dep si to y generar p rdidas de agua 5 PRESERVACI N DEL APARATO En el caso de que no se desee utilizar el aparato por un periodo de tiempo prolon...

Page 123: ...o puede funcionar La funci n de deshumidi ficaci n no funciona o la unidad se enciende apa ga frecuentemente Filtro del aire obstruido Limpie el filtro del aire Puerta o ventana abierta Cierre la puer...

Page 124: ...2 0 2 1 2 0 3 4 0 4 X 8 0 5 8 0 6 R290 9 1 16 1 1 16 1 2 16 1 3 17 1 4 17 2 18 2 1 18 2 2 18 2 3 19 3 19 3 1 BLACKOUT 20 3 2 20 3 2 a 20 3 2 b 20 4 21 4 1 21 4 1 a 21 4 2 21 4 3 22 5 22 6 22 7 23 A T...

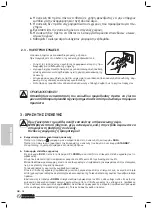
Page 125: ...AQUARIA SLIM GR 2 0 0 1 0 2 0 2 1 Service SERVICE GR 1...

Page 126: ...GR 3...

Page 127: ...AQUARIA SLIM GR 4 0 3 1 OL PIA SPLENDID 2 3 4 5 6 7 8 9...

Page 128: ...GR 5 10 11 OLIMPIA SPLENDID 12 13 14 15 16 17 18 19 20 2 20 21 22...

Page 129: ...AQUARIA SLIM GR 6 A 23 24 25 26 27 28 29 3 30 3 31 5 32 33 20 30 1 34 4 35 36 37 38 39...

Page 130: ...GR 7 40 41 41a 42 43 44 45 2 dvd player 6 46 47 48 49 50 51 52 5 C 35 C 53...

Page 131: ...AQUARIA SLIM GR 8 54 55 56 AT 5A 0 4 X OLIMPIA SPLENDID 0 5...

Page 132: ...GR 9 0 6 R290 1 R290 A3 2 3 R290 Kg m2 0 045 4 0 050 4 0 055 4 0 060 4 0 065 5 0 070 5 0 075 5 0 080 5 0 085 6 4 R290 5 6 7 8 R290 9 10 11...

Page 133: ...AQUARIA SLIM GR 10 12 13 14 15 16 17 18 19 20 21 22 a b c...

Page 134: ...GR 11 d e CO2 f g h...

Page 135: ...AQUARIA SLIM GR 12 I 23 a b 24...

Page 136: ...GR 13 25 26 27 25 OFN 28 OFN OFN OFN OFN...

Page 137: ...AQUARIA SLIM GR 14 29 OFN 30 a b c d e f g h 80 i...

Page 138: ...GR 15 j k 31 32...

Page 139: ...NSTALLATION L EMPLOI ET L ENTRETIEN HANDBUCH F R INSTALLATION GEBRAUCH UND WARTUNG INSTRUCCIONES PARA LA INSTALACI N USO Y MANTENIMIENTO Attenzione rischio di incendio Caution Attention risque d incen...

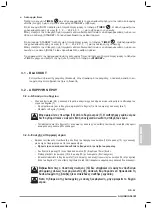
Page 140: ...GR 17 1 3 5 20 30 1 7 9 7 1 4 21 STAND BY ON OFF 22 DOWN 23 UP 24 TIMER 25 Led led timer 26 Led led 27 Led led 28 Led led 21 28 22 27 29 23 26 24 25...

Page 141: ...AQUARIA SLIM GR 18 29 UP DOWN 5 Timer 35 LO 95 2 2 1 3 2 a SS 2 2 a b c 5 d 20 30 cm 1...

Page 142: ...GR 19 e f g h i 2 3 SS Olimpia Splendid 3 a RUN STANDBY b RUN UP DOWN 30 90 5 T led led DOWN 30 Co RUN led...

Page 143: ...TIMER RUN STANDBY RUN TIMER 0 1 2 23 24 0 1 STANDBY led STANDBY TIMER 0 1 2 23 24 0 1 RUN led Timer TIMER 0 STANDBY 3 1 BLACKOUT blackout 3 2 3 2 a led 28 7 7 7 7 8 7b 7 7 led 28 3 2 b 14 13 13 14 10m...

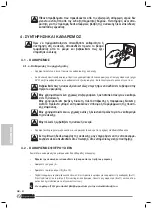
Page 144: ...GR 21 4 4 1 4 1 a 50 C 4 2 5 10 10 11 10 11 10...

Page 145: ...AQUARIA SLIM GR 22 10 10 5 10 5 10 4 3 7 3 2a 5 6 2...

Page 146: ...GR 23 7 led 1 led 26...

Page 147: ......

Page 148: ...279969D...

Reviews: