background image

17

16

GB

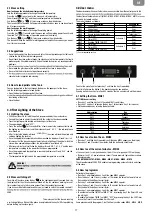
4.0 User menu

The board comes with a user/technician menu, accessible from the control panel. In this

the functions of automatic on / off (MN05 - MN06 - MN07 - MN08 - MN09 - MN10) are avai-
lable only by remote control.
The menu is divided as follows:

Menu

Description

Available for

MN01

Current day 

User

MN02

Current hour

User

MN03

Current minutes

User

MN04

Access technical parameters 

Technician (*)

MN05

Timer ON 1 

Schedule 1

User

MN06

Timer OFF 1 

User

MN07

Enabling TIMER1 ON/OFF 

User

MN08

Timer ON 2 

Schedule 2

User

MN09

Timer OFF 2 

User

MN10

Enabling TIMER2 ON/OFF

(*) See corresponding section

To enter the menu You must press key 1 and then the key 3 repeatedly.
Each time You press the button 3, the board changes by one position. 
If you do not touch any key for at least 60 seconds, there is an automatic exit from menu.

4.1 Setting the time - MN01

SETTING the current day

Press key 1 and then key 3 until the code MN01 is on display. 

Press key 1 and key 2 to change the day (key 1 for decrease, key 2 for increase).

Set the desired days by referring the below table:

Abbreviation

Day

DAY1

Monday

DAY2

Tuesday

DAY3

Wednesday

DAY4

Thursday

DAY5

Friday

DAY6

Saturday

DAY7

Sunday

OFF

4.2 How to set current hour - MN02 

Press key 1 and then key 3 repeatedly until the code MN03 appears on the display.

Press keys 1 and 2 to select the minutes. Hold the buttons to scroll faster.

4.3 How to set the current minutes - MN03 

Premere i tasti 1 e 2 per selezionare i minuti. Tenere premuto i pulsanti per scorrere
più velocemente.

CHRONOTHERMOSTAT –MN05 - MN06 - MN07 - MN08 - MN09 - MN10

The chronothermostat FUNCTION enables to programming automatic starts and stops
of the stove.

4.4 How to programm 

Referring to the program 1

Press key 1 and repeatedly key 3 until the code MN05 appears. 

Press the keys 1 and 2 to vary in steps of 10 minutes the time of automatic turn on.
Press and hold the buttons to scroll faster.

Press key 1 and repeatedly key 3 until the code MN06 appears.

Press the keys 1 and 2 to vary in steps of 10 minutes the time of automatic turn off.
Press and hold the buttons to scroll faster.

Press key 1 and repeatedly key 3 until the code MN07 appears.

To enable the function TIMER1 set MN07 "ON" by pressing key 2 the Timer LED and
this will light.

To enable the function TIMER1 set MN07 "OFF" by pressing the key 2 the LED Timer,
in case the Timer 2 is not enabled, it will turn off.

Same procedure with the program 2, but You’ll only use the codes MN08 - MN09 - MN10.

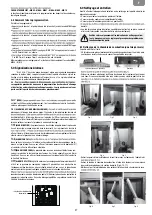
2

3

1

2.1 Stove setting

How to change the wished room temperature

Join the following procedure to change the wished temperature:
Press the key       (1) once to enter the menu and set temperature. 
You will read the word “Set” and the wished temperature on the display. 
Use the keys        (2) e           (3) to increase or reduce the wished value.
The stove will leave the menu Set temperature automatically as soon as you do not work
on it for some seconds.

How to change the working power

Join the following procedure to change the working power:
Press the key            (1) once to enter the menu and set the working power. You will read
the word “Pot” and the range of 5 possible powers on the display. 
Use the keys         (2) and        (3) to increase or reduce the wished value. 
The stove will leave the menu Set working power automatically as soon as you do not
use it for some seconds.

2.2 Suggestions

 Do not continuously turn the stove on and off as this could provoke sparks that could

shorten the life of the electrical components.

 Do not touch the stove with wet hands: the stove has electrical components that could

produce sparks if handled incorrectly. Only authorized technicians can resolve possible
problems.

• Never open the glass door of the pellet stove while the stove is in oper

ation.

• Be sure th

at the brazier basket is positioned correctly.

some holes for inspection and cleaning.

2.3 How to load pellets in the tank

You can load pellets in the tank through the door on the upper part of the stove.
Join the following procedure to load pellets:

• Open the door on the upper part of the stove;

functioning of the stove);

• Close the doo

r.

3.0 First Lighting of the Stove

3.1 Lighting the stove

• 

F

ill the container 3/4 full with the pellets recommended by the manufacturer;

• Connect the stove to an electrical outlet with the cable th

a

t has been supplied;

• Press the lighting 

switch loca

ted on the back part of the stove;

 The upper display will read 

“OFF”;

 Press the  button        for 2 seconds. After a few moments the smoke extractor and

the lighting resistor will start and the display will read “

”;

 the led resistence

is switched on.

 After 1 minute the display will read 

”, the stove will load the pellets and

continue lighting the resistor;

 Once the appropriate temperature has been reached the display will read “

”:

this means that the stove has begun the last phase in lighting, at the end of which the
stove will be completely opera

tional; the led resistence is 

switched off.

 After several minutes of ventilation the display will read “ON  1-2-3-4-5” and the room

temperature, according to the power tha

t has been programmed;

 Once the programmed temperature is reached the display will read “ECO” and the

room tempera

ture;

 The temperature led lights when the programmed tempera

ture is reached;

3.2 Stove switching off

To switch off the stove, press the key          on the control board until you read 

 on

the display. After the stove has been switched off, the fan continues working for a set
time in order to grant a fast smokes exhaust from the combustion chamber. 
If you have a model with remote control, you just need to switch the remote control off

SEND.

 This warns you that the stove is running

a switching off phase. Wait until the phase is completed and the key On/Off stops blinking
before starting up the stove again.

WARNING!

chamber.

Men manuale Extrastove 3 tasti_Layout 1  17/10/12  09.30  Pagina 16

FIRE STAB.

LOAD PELL.

ACC.

"COOL"

-

+

AL

1

2

3

Summary of Contents for MIA 9

Page 1: ...3 I 936 5 991 54 1012 54 24 72 450 499 5 186 59 325 06 113 53 178 78 R40 50 Dimensioni stufa modello 1 MIA 9 11 ...

Page 2: ...ssario installare un condotto di adduzione d aria dall esterno di diametro minimo consigliato di 50 mm La presa d aria esterna deve comunicare con la stufa e va posizionata in modo da evitare che possa essere ostruita Deve essere protetta con una griglia permanente non richiudibile o idonea protezione purchè non venga ridotta la sezione minima L afflusso d aria può essere ottenuto anche da un loca...

Page 3: ...essere uniforme preferibilmente circolare le sezioni quadra te o rettangolari devono avere spigoli arrotondati con raggio non inferiore a 20mm rapporto massimo tra i lati di 1 a 5 pareti il più possibili lisce e senza restringimenti le curve regolari e senza discontinuità deviazioni dall asse non superiori a 45 Ogni apparecchio deve avere una propria canna fumaria di sezione uguale o superio re al...

Page 4: ...che possa compromettere il corretto funzionamento Si raccomanda inoltre di mantenere al di fuori della zona di irraggiamento del focolare e comunque alla distanza di almeno 1 m dal blocco riscaldante tutti gli elementi di materiale combustibile o infiammabile quali travature arredi in legno tendaggi liquidi infiammabili Fig 5 In caso di collegamento con parete in legno o altro materiale infiammabi...

Page 5: ...12 54 24 72 450 499 5 186 59 325 06 113 53 178 78 R40 50 Dimensioni stufa modello 5 3 I 7 Dimensioni stufa modello ES 9 10 Dimensioni stufa modello ES 12 Dimensioni stufa modello WO 95 105 Dimensioni stufa modello WO 125 ...

Page 6: ... materiali facilmente infiammabili a meno di 80 cm Se la stufa è installata su un pavimento infiammabile deve essere interposta una lastra di materiale isolante al calore che sporga almeno 20 cm sui lati e 40 cm sul fronte Sulla stufa ed a distanze inferiori a quelle di sicurezza non possono essere posizionati oggetti in materiale infiammabile o materiale che possa compromettere il corretto funzio...

Page 7: ...lamente in ambiente abitativi Questa stufa essendo comandata da una scheda elettronica permette una combustione completamente au tomatica e controllata la centralina regola infatti la fase d accensione 5 livelli di po tenza e la fase di spegnimento garantendo un funzionamento sicuro della stufa Mai coprire in alcun modo il corpo della stufa o occludere le feritoie poste sul lato superiore quando l...

Page 8: ...i almeno 1 m dal blocco riscaldante tutti gli elementi di materiale combustibile o infiammabile quali travature arredi in legno tendaggi liquidi infiammabili Fig 5 In caso di collegamento con parete in legno o altro materiale infiammabile è neces Fig 2 caratteristiche del comignolo NO SI Fig 3 installazione canna fumaria interna da realizzare a norma Fig 4 installazione canna fumaria esterna min 1...

Page 9: ... Centro di Assistenza Autorizzato FuMI ALARM SOND FUMI Si presenta in caso di guasto o scollegamento della sonda per il rilevamento della temperatura dei fumi Sul display compare la scritta ALARM SOND FUMI In tal caso resettare l allarme premendo il tasto ON OFF e contattare il Centro di Assistenza Autorizzato DEP ALARM DEP SIC FAIL Questo allarme è accompagnato dal lampeggio dei LED ALF e ALC sul...

Page 10: ...io La stufa deve essere installata nel rispetto delle seguenti condizioni di sicurezza Distanza minima su lati e sul retro di 40 cm dai materiali mediamente infiammabili Davanti alla stufa non possono essere collocati materiali facilmente infiammabili a meno di 80 cm Se la stufa è installata su un pavimento infiammabile deve essere interposta una lastra di materiale isolante al calore che sporga a...

Page 11: ...9 Temperatura fumi a potenza nominale 177 8 C Temperatura fumi a potenza ridotta 71 3 C Tiraggio minimo massimo 10 12 Pa Tensione 230 V Frequenza 50 Hz Potenza assorbita in accensione 280 W Potenza assorbita a regime 100 W Peso Modello MIA 9 Potenza in ingresso min max 3 25 kW 8 37 kW Potenza termica nominale 7 5 kW Potenza termica ridotta 3 1 kW Emissioni di CO al 13 di Ossigeno a potenza nominal...

Page 12: ...of non original replacement parts Exceptional events Use of unsuitable pellets Installation Flue of an air cavity or opportune insulation The internal section must be uniform preferably circular the square or rectangular sections must have rounded corners with a radius of no less than 20 mm a maximum relationship between the sides of 1 5 the walls as smooth as possible with no narro wed sections r...

Page 13: ...r an activity that has a fire hazard According to the norm UNI 10683 98 the stove must not be in the same environment where extractors type B gas devices or in any case devices that create lower atmospheric pressure in the locale are found External air intake The stove must be furnished with the air necessary to guarantee the regular functioning of the combustion and an environmental well being Be...

Page 14: ...14 13 GB 7 Stove size model ES 9 10 Stove size model ES 12 Stove size model WO 95 105 Stove size model WO 125 ...

Page 15: ...ual smoke Operations to be performed every season before the lighting by A general cleaning inside and outside A careful cleaning of the exchange tubes A careful cleaning and disincrustation of the crucible and the relative cavity Clean the motors checking the play and fastenings of the mechanisms Clean the smoke channel substitute the tube gaskets and smoke extractor fan ca vity Clean pressure sw...

Page 16: ...rtment Nevertheless check the basket daily given that not all pellets have high quality standards use only quality pellets re commended by the manufacturer Never cover the body of the stove in any way or obstruct the ope nings placed on the upper side when the device is operating All our stoves are trial lighted on the construction line The stove must only be fed with quality 6mm diameter pellets ...

Page 17: ...ove will leave the menu Set temperature automatically as soon as you do not work on it for some seconds How to change the working power Join the following procedure to change the working power Press the key 1 once to enter the menu and set the working power You will read the word Pot and the range of 5 possible powers on the display Use the keys 2 and 3 to increase or reduce the wished value The s...

Page 18: ...m and contact the technical assistance DEP ALARM DEP SIC FAIL This alarm is signalised by the Leds ALF and ALC blinking on the control board It indicates two different possibilities an obstruction in the flue or a possible overheating of the stove In both cases the motor reducer to load the endless screw stops working and the stove switches off Press the key On Off to reset the alarm Check the pos...

Page 19: ...rming this operation always check that the grey seal around the glass is in of the stove Poor quality pellets can in any case cause the glass to become dirty 6 8 Cleaning the clearing system Until a reasonable experience is acquired regarding the operating conditions it is advi sable to perform this maintenance on at least a monthly basis Remove the electrical feed cable Remove the cap from the T ...

Page 20: ...ature at reduced heat output 71 3 C Draught min max 10 12 Pa Voltage 230 V Frequency 50 Hz Electrical comsumption ignition 280 W Electrical comsumption working 100 W Weight Model MIA 9 Heating input min max 3 25 kW 8 37 kW Nominal heat output 7 5 kW Reduced heat output 3 1 kW CO emissions at 13 O2 nominal heat 0 03 CO emissions at 13 O2 reduced heat 0 04 90 0 94 49 Flue gas temperature at nominal ...

Page 21: ... Normes et déclaration de conformité Législation CE Directive Européenne 89 336 CEE et 2004 108 CE directive EMC et amendements successifs 2006 95 CE directive basse tension et amendements successifs 2006 42 CE directive appareils 2011 65 EU successives et pour l installation hydrothermosanitaire se faire remettre par celui qui a effectué l installation la déclaration de conformité L 37 2008 Toute...

Page 22: ... quali travature arredi in legno tendaggi liquidi infiammabili Fig 5 In caso di collegamento con parete in legno o altro materiale infiammabile è neces Fig 2 caratteristiche del comignolo NO SI Fig 3 installazione canna fumaria interna da realizzare a norma Fig 4 installazione canna fumaria esterna min 1 5 m Tappo raccolta condensa Presa d aria Tappo raccolta condensa Presa d aria Tubatura coinben...

Page 23: ... 450 499 5 186 59 325 06 113 53 178 78 R40 50 Dimensioni stufa modello 23 23 F 7 Dimensions poêle à pellet mod ES 9 10 Dimensions poêle à pellet mod ES 12 Dimensions poêle à pellet mod WO 95 105 Dimensions poêle à pellet mod WO 125 ...

Page 24: ...ati e 40 cm sul fronte Sulla stufa ed a distanze inferiori a quelle di sicurezza non possono essere posizionati oggetti in materiale infiammabile o materiale che possa compromettere il corretto funzionamento Si raccomanda inoltre di mantenere al di fuori della zona di irraggiamento del focolare e comunque alla distanza di almeno 1 m dal blocco riscaldante tutti gli elementi di materiale combustibi...

Page 25: ...et la centrale règle la phase d allumage les 5 niveaux de puissance et la phase d extinction garantissant ainsi un fonctionne Ne jamais couvrir en aucune manière le corps du poêle ou fermer les ouvertures postées sur le côté supérieur lorsque l appareil fon ctionne L allumage de tous nos poêles est essayé dans la ligne de production Le poêle doit être alimenté exclusivement avec du pellet de quali...

Page 26: ... corretto funzionamento Si raccomanda inoltre di mantenere al di fuori della zona di irraggiamento del focolare e comunque alla distanza di almeno 1 m dal blocco riscaldante tutti gli elementi di materiale combustibile o infiammabile quali travature arredi in legno tendaggi liquidi infiammabili Fig 5 In caso di collegamento con parete in legno o altro materiale infiammabile è neces Fig 2 caratteri...

Page 27: ...n est pas relevée Dans ce cas effacer l alarme en poussant sur le bouton On Off et contacter le Centre d Assistance autorisée FuMI ALARM SOND FUMI Se présente dans le cas où la sonde est défectueuse con cernant le relevé de la température des fumées Sur l écran apparaît les mots Alarm Sond Fumi Dans ce cas effacer l alarme en poussant sur le bouton On Off et contacter le Centre d Assistance DEP AL...

Page 28: ...llocati materiali facilmente infiammabili a meno di 80 cm Se la stufa è installata su un pavimento infiammabile deve essere interposta una lastra di materiale isolante al calore che sporga almeno 20 cm sui lati e 40 cm sul fronte Sulla stufa ed a distanze inferiori a quelle di sicurezza non possono essere posizionati oggetti in materiale infiammabile o materiale che possa compromettere il corretto...

Page 29: ...tion 100 W Poids Mod ES 9 WO 95 Puissance thermique globale min max Puissance thermique nominale 6 0 kW Reduit Puissance thermique 3 1 kW CO à 13 O2 puissance nominale 0 04 CO à 13 O2 Reduit Puissance thermique 0 04 Rendement puissance nominale 91 75 Rendement Reduit Puissance thermique 94 49 Température gaz de fume puissance nominale 125 9 C Température gaz de fume Reduit Puissance thermique 71 3...

Page 30: ...lt Installation die die nationalen Vorschriften nicht erfu llt Vom Hersteller nicht berechtigte Änderungen und Reparaturen Verwendung von nicht originalen Ersatzteilen Außenordentliche Vorfälle Verwendung ungeeigneter Pellets Installation Schornstein Der Schornstein muss folgende Erfordernisse beachten Er muss keine Verbindung mit anderen Kaminen Öfen Kesseln oder Abzugshauben haben Bild 1 Er muss...

Page 31: ...81 Fachpersonal durchgeführt werden 31 32 D Der Schornstein sollte eine Wanne fu r Feststoffe und mögliches Kondensatwasser auf der unteren Seite haben um einfach aufklappbar und testbar aus einem Zugluft Schieber zu sein Wenn Sie einen Schornstein mit parallelem Austritt verwenden ist es besser die Wanne in den Wind von einem Stu ck zu erhöhen Die Röhre des Schornsteins muss keine Brennoberfläche...

Page 32: ...sachen ation könnte beschädigt wechsels verursachen Nachdem der Ofen fu r uf dem unteren Display ssistenzzentrum fu r die Ofen fu r eine lange Zeit u ft d eine Kamine oder einen da der Heizzug der einen ngen können nicht zuge raums installiert werden hornstein zu machen die ein zu installieren teins 33 D 7 Abmessungen ES 9 10 Abmessungen ES 12 Abmessungen WO 95 105 Abmessungen WO 125 ...

Page 33: ...kurz ist benutzen Sie ein Erdverlängerungskabel Sicherheitsabstände als Brandvorbeugung DerOfenmuss folgende Sicherheitsbedingungen beachten 20 cm Mindestabstand der Ru ckseite und der Seiten des Ofens von nicht entzu ndbaren Materialien 40cm Mindestabstand der Ru ckseite und der Seiten des Ofens von durchschnittlich entzu ndlichen Gegenständen Stellen Sie keinen einfach entzu ndlichen Gegenstand ...

Page 34: ... lokale nationalen und Europäischen Vorschriften EN 60335 1 EN 50165 EN 50366 EN 55014 1 EN 61000 3 2 EN 61000 3 3 EN 14785 1 1 Sicherheitshinweise Lesen Sie bitte das vorliegende Gebrauchs und Wartungshandbuch aufmerksam durch bevor den Ofen aufzustellen und in Betrieb zu nehmen Der Pelletofen muss nur in Häusern betrieben werden Der Ofen wird durch eine elek tronische Karte gesteuert was eine vö...

Page 35: ...zer MN02 Laufende Uhrzeit Benutzer MN03 Laufenden Minuten Benutzer MN04 Aktivierung technischen Parameter Techniker MN05 Timer angeschaltet ON 1 Programm 1 Benutzer MN06 Timer ausgeschaltet OFF 1 Benutzer MN07 Freigabe TIMER1 ON OFF Benutzer MN08 Timer angeschaltet ON 2 Programm 2 Benutzer MN09 Timer OFF 2 Benutzer MN10 Freigabe TIMER2 ON OFF Benutzer Sieh entsprechende Abschnitt Die Taste 1 und d...

Page 36: ...tigt FuMI ALARM SOND FUMI Wenn der Rauchgassensor defekt oder nicht verbunden ist Am Display erscheint Alarm Son fumi On Off am Display drücken um den Alarm zurück zu setzen Ein Service durch Kundendienst ist benötigt DEP ALARM DEP SIC FAIL Led ALF und ALC am Display blinken Mögliche Ursachen dieses Alarms Verstopfung in Abgaszug oder mögliche Ofen Überhitzung In beiden Fäl len funktioniert der An...

Page 37: ... der Anlage in solchen Situationen kann Brände oder Blitzschläge verursachen Bild 1 installationsmöglichkeiten des Schornsteins NEIN NEIN JA 300300 Verwendung ungeeigneter Pellets EN 60335 2 102 EN 62233 EN 14785 EN 50581 Fachpersonal durchgeführt werden 37 38 D Nun über Vakuum reinigen Sie die Innenseite der Kammer durch die Asche Abb 12 6 3 Reinigung der Metallbauteile Benutzen Sie einen weichen...

Page 38: ...ad Nennheizleistung 90 0 Wirkungsgrad reduzierte Leistung 94 49 Abgasstutzentemperatur mit Nennleistung 153 7 C Abgasstutzentemperatur mit reduzierte Leistung 71 3 C Schornsteinzug min max 10 12 Pa Spannung 230 V Frequenz 50 Hz Stromverbrauch bei Anzuenden 280 W Stromverbrauch bei Betrieb 100 W Gewicht Mod ES 9 WO 95 Globalheizleistung min max Nennheizleistung 6 0 kW Reduzierte Leistung 3 1 kW CO ...

Page 39: ...EN 50581 Fachpersonal durchgeführt werden 39 41 E AVISO Durante la operación de instalación de la estufa mantenga a los niños alejados de la zona de trabajo para evitar accidentes imprevistos No bloquee ni tape de ninguna manera el cuerpo de la estufa ni obstruya las ranuras situadas en la parte superior La obstrucción de dichas ranuras podría ocasionar incendios No utilice la estufa en zonas que ...

Page 40: ...de longitud Es posible tener hasta tres curvas de 90º Si el tubo de descarga no se inserta en la salida de humos es ne cesaria una sección vertical oportunamente acoplada de un mínimo de 1 5 m salvo en el caso de contraindicaciones de seguridad evidentes y una terminación a prueba de viento imagen 3 El conducto vertical puede encontrarse en el interior o en el ex terior Si el conducto de humos est...

Page 41: ...rnstein Der Schornstein muss folgende Erfordernisse beachten Er muss keine Verbindung mit anderen Kaminen Öfen Kesseln oder Abzugshauben haben Bild 1 Er muss einen Sicherheitsabstand von Brennmaterialien durch eine passende Lufti solierung halten Der innere Teil muss gleichförmig lieber rund sein die viereckigen und rechteckigen Schnitte brauchen gerundete Kanten mit einem Halbmesser von mindesten...

Page 42: ...de funcionamiento podrían emanar olores desagradables de bido a los humos de la pintura y la grasa que eventualmente haya en la cubierta de la tobera Si durante el funcionamiento normal de la estufa la temperatura del humo llega a 220 guiente forma Motor de engranajes de carga de pellets a la velocidad mínima Ventilador tangencial de intercambio de calor a la velocidad máxima Este procedimiento fu...

Page 43: ...ducto asegurarse siempre de que esté presente el manual dado que la infor mación en él contenida está dirigida al comprador y a todas aquellas personas que por distintos conceptos concurren en su instalación uso y mantenimiento Leer con atención las instrucciones y la información técnica contenidas en este manual antes de proceder a la instalación utilización o cualquier intervención en el product...

Page 44: ...e encendido de la estufa para señalar que la resistencia está calentando el aire necesario para el encendido del pellet 10 Display Led 7 segmentos En el display se visualiza las diferentes modalidades de funcionamiento de la estufa y también la temperatura del ambiente y la potencia de trabajo impuesta por el usuario En el caso de un mal funcionamiento de la estufa en el display se visualizan las ...

Page 45: ...ann gesundheitsschädlich sein Beachten Sie die Räume insbesondere wo Kinder alte oder kranke Leute wohnen Im Fall von Fehlfunktion schalten Sie den Ofen sofort ausund rufen Sie ein Autorisiertes Assistenzzentrum an Die Verwendung der Anlage in solchen Situationen kann Brände oder Blitzschläge verursachen Bild 1 installationsmöglichkeiten des Schornsteins NEIN NEIN JA 300300 Verwendung ungeeigneter...

Page 46: ...io se ensucie depende ade más de la calidad y cantidad de pellet utilizado La limpieza del vidrio debe efectuarse con la estufa fría con los productos aconsejados y testeados por nuestra empresa Cuando se lleva a cabo esta operación observar siempre que la guarnición gris alrededor puede comprometer el funcionamiento de la estufa No obstante pellet de baja calidad puede hacer que se ensucie el vid...

Page 47: ...hält einen Lu fter der sehr schnell läuft und Sie verletzen könnte Beachten Sie die Kinder insbesondere Setzen Sie Sich dem Warmluftstrom fu r eine lange Zeit nicht direkt aus Die direkte und lange Aussetzung der warmen Luft kann gesundheitsschädlich sein Beachten Sie die Räume insbesondere wo Kinder alte oder kranke Leute wohnen Im Fall von Fehlfunktion schalten Sie den Ofen sofort ausund rufen S...

Page 48: ...io installare un condotto di adduzione d aria dall esterno di diametro minimo consigliato di 50 mm La presa d aria esterna deve comunicare con la stufa e va posizionata in modo da evitare che possa essere ostruita Deve essere protetta con una griglia permanente non richiudibile o idonea protezione purchè non venga ridotta la sezione minima L afflusso d aria può essere ottenuto anche da un locale a...

Reviews: