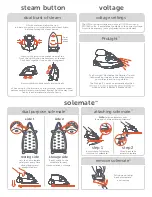


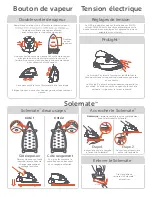


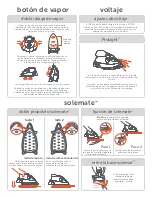


Solemate
™
11
Botones
de vapor
conozca su oliso
®
project iron
®
vista lateral
vista superior
Solemate
™
5
4
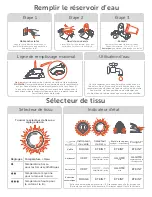
Tapa del depósito
de agua de
llenado superior
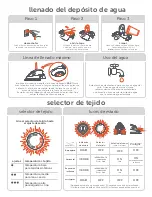
Selector de tejido
+ luz de estado
Luz de estado
de vapor
2
6
Placa
9
Protector
del cable
8
3
7
10
Botón de espera
+ luz de estado
ProLight™
1
Ventana de
nivel de agua
Punta para
detalles
6
7
7
3
5
2
4
1
6
3
5
2
4
1
9
11
10
8
9
3
5
10
8
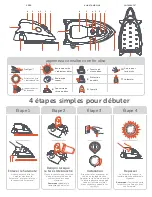
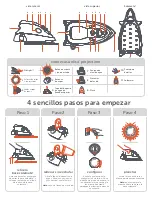
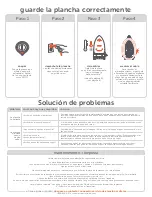
4 sencillos pasos para empezar
Paso 3
Enchufe y seleccione la
con
fi
guración de tejido. Pulse
el botón de modo de espera; la
luz pasará de rojo a verde y la
luz blanca de estado
parpadeará mientras la plancha
se calienta.
Paso 2
rellenar sin enchufar
Abra la tapa del depósito de
agua y llénelo con agua del
grifo hasta el nivel máximo.
Nota:
vaso de llenado no incluido.
Paso 4
planchar
Estará lista cuando la luz
blanca permanezca encendida.
Nota:
apoye siempre la
plancha sobre su base o la
base solemate™.
configurar
Paso 1
retire la
base solemate
™
Antes de enchufar asegúrese
de quitar la base solemate™ y
coloque la plancha en el lado
de reposo de la base
solemate™.
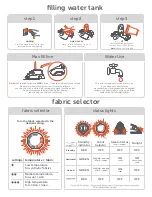
Max
Fill
Max
Fill