PM-311 Quick Setup Guide v1.0
Getting Started
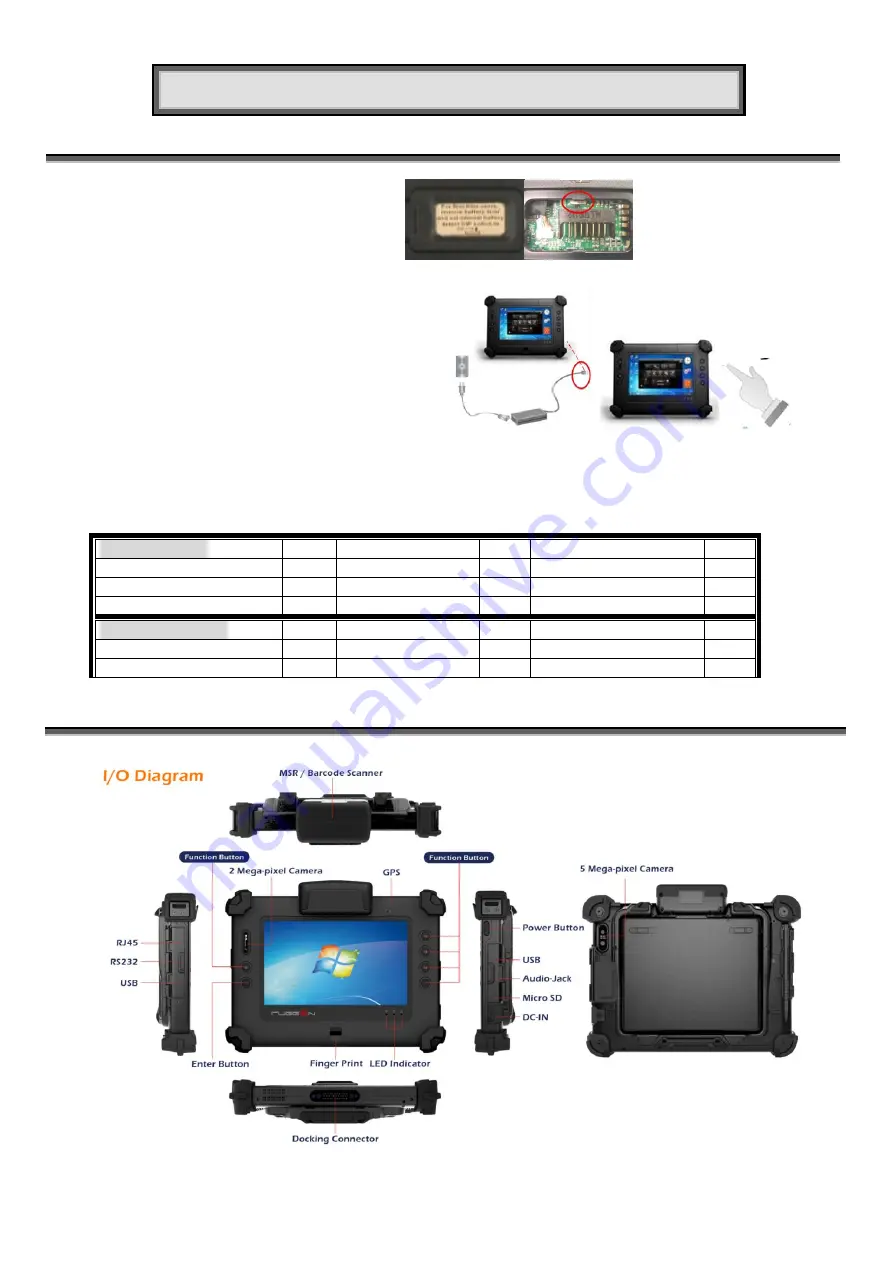
1. Switch ON the main battery
(Figure 1)
a. Main battery switch is located on rear side of
yellow label battery door
b.
Adjust DIP switch to “ON”
c. Place back the battery door
2.
Plugging the Power Cable
(Figure 2)
a.
Plug the AC power cord into the power
socket of the AC power adapter.
b.
Plug the other end of the AC power
cord to a live AC wall outlet.
c.
Plug the connector of the AC adapter
to the DC-IN port found at the right
side of the PM-311.
3.
Turning on the PM-311 System
(Figure 3)
To turn on the PM-311 System, press
the power button. The power LED will
light up to indicate that the PM-311
System is on.
Figure 1
Figure 2 Figure 3
Main Packing List
QTY
QTY
QTY
Main system
1
Stylus
1
Corner Rubber
4
Power Adapter
1
Hand Strap
1
Corner Rubber Screw
4
Handle Secures
1
Shoulder Strap
1
Accessories (Option)
QTY
QTY
QTY
Barcode S MSR
1
Battery Charger
1
DeskTop Dock
1
Vehicle Dock
1
External Battery Pack
1
Vehicle Power Adapter
1
Exploring Your PM-311 System


