background image

17 

Lubrication 

The bearings on the cutterhead


are 

factory  lubricated  and


sealed.  They require 

no lubrication.

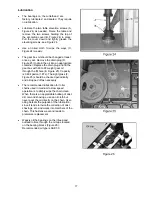
Lubricate the two table elevation screws (A,


Figure 24) as needed.  Raise the table and


remove  the  two  screws  holding  the  top  of


the accordion cover (B, Figure 24) in place.


Pull  the  cover  down  and  lightly  grease  the


elevating screws, see Figure 24.

Use  an  oiled  cloth  to  wipe  the  ways  (C,


Figure 24) weekly.

The gear box oil should be changed at least 

once a year. Remove the drain plug (D, 

Figure 25) to drain the oil into an appropriate 

container. Replace the drain plug and fill the 

gear box with 60 to 90 weight gear oil 

through the fill hole (E, Figure 25). Capacity 

is 0.494 gallon (1.87L). The sight glass (F, 

Figure 25) should be checked periodically 

and oil topped off as necessary.

The recommended lubrication for roller 

chains used in medium to slow speed 

operation is to simply wipe the chain clean. 

When there is an appreciable buildup of dust, 

dirt or wood shavings, use an oil cloth but 

never pour the oil directly on the chain. Over-

oiling defeats the purpose of the lubrication, 

since it tends to invite the collection of dust, 

shavings, etc. and works into members of the 

chain. This hastens wear and leads to 

premature replacement. 

Weekly oil the bearings on the infeed and 

outfeed rollers, through the oil cups located 

on the bearing blocks (Figure 26). 

Recommended oil type is SAE 30. 

Figure 26

Summary of Contents for 4455

Page 1: ...4455 Professional Planer 20 Owner s Manual Oliver Machinery M 4455 12 2017 Seattle WA Copyright 2003 2017 info olivermachinery net www olivermachinery net...

Page 2: ...se negligence accidents unauthorized repairs alterations lack of maintenance acts of nature or items that would normally be consumed or require replacement due to normal wear In no event shall Oliver...

Page 3: ...s above the elbows Remove all loose outer clothing and confine long hair Protective type footwear should be used Where the noise exceeds the level of exposure allowed in Section 1910 95 of the OSHA Re...

Page 4: ...deigned for planing wood products only Do not use to plane any kind of substance other then wood 18 Never start the planer while a workpiece is in contact with the cutterhead or knives 19 Always feed...

Page 5: ...ead 16 V Belt Adjustment 16 Adjusting Table Gibs 16 Adjusting Table Rollers 17 Maintenance 17 Lubrication 18 Troubleshooting 19 Specifications Stock No 7 5HP 1Ph HSS Straight Knife 4455 001 Stock No 7...

Page 6: ...other site Machine Preparation and Setup WARNING The equipment used to lift this machine must have a rated capacity at or above the weight of the planer Failure to comply may cause serious injury The...

Page 7: ...es Make sure the voltage of your power supply matches the specifications on the motor plate of the machine 1 Disconnect machine from power source 2 Remove screws that secure the cover to connection bo...

Page 8: ...ine but the planer still has power To reset rotate switch clockwise until the button pops out G Main Motor Starts rotation of cutterhead Will not work if the Emergency Stop switch is engaged or hood i...

Page 9: ...side that has been run through a jointer 1 With the planer turned OFF cutterhead NOT spinning place your calibrating board jointed surface down on the table and slide it into the machine 2 Use the ha...

Page 10: ...old the SET button until the zero to the right of the decimal point starts to flash 6 Repeat steps 4 and 5 until the last digit in the 0 001 place is entered 7 Press and hold the SET button until the...

Page 11: ...e and clean the clamping block and springs B Figure 9 Also clean cutterhead knife slot before re installing the sharpened or new knife 3 Re install the springs knife and clamping block and just snug t...

Page 12: ...adjustment is necessary follow the below listed sections for setting the in feed roller chipbreaker pressure bar and outfeed roller Make a hardwood block to the specifications in drawing Figure 12 Yo...

Page 13: ...sn t loosen jam nut C Figure 14 and turn the adjusting screw D Figure 14 to raise or lower the in feed roller until it contacts wood gauge Repeat for opposite side of the in feed roller Adjustment of...

Page 14: ...contacts wood gauge Repeat for opposite side of the pressure bar Adjustment of Out feed Roller The out feed roller should be set 0 02 below the lowest point of knife Make sure the knives are set prope...

Page 15: ...es have been rotated You can rotate the knives once before replacing Use the provided tork wrench to rotate or remove knives V Belt Adjustment Two v belts A Figure 20 drive the cutterhead The single v...

Page 16: ...he bed roller until it just contacts the straight edge Maintenance WARNING Disconnect the machine from power source before proceeding with any maintenance lubrication or assembly Failure to comply may...

Page 17: ...60 to 90 weight gear oil through the fill hole E Figure 25 Capacity is 0 494 gallon 1 87L The sight glass F Figure 25 should be checked periodically and oil topped off as necessary The recommended lub...

Page 18: ...ow current 2 Motor not wired for correct voltage 1 Contact local electric company 2 Refer to motor nameplate for correct voltage Workpiece stops when feeding 1 Too much material being removed in one p...

Page 19: ......
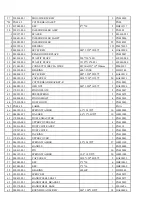
Page 20: ...6 13 1 0t 8 HE011900 58 012003 005 KEY 5 5 16 1 HH010409 173 000006 101 HEX NUT M16 2 0P 100 4 PN010032 174 008011 100 NUT M16 2 0P 24B 13H 4 HC011600 221 041306 002 POLY BAG 190 130 0 15t 1 HR051500...

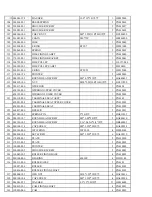
Page 21: ...XING SHAFT 1 PN010076 4 000105 109 CAP SCREW M10 1 5P 75 4 HA020643 5 006001 071 WASHER 10 25 3 0t 32 HE019700 6 280056 901 PRESS SPRING 2 PN010087 7 008006 100 NUT M8 1 25P 13B 6 5H 28 HC010800 8 000...

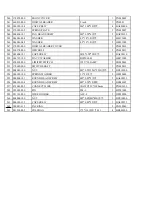
Page 22: ...01 FIXING PLATE 8 PN010097 42 280055 901 PRESS SPRING 2 PN010078 43 360408 902 FIXING SHAFT 4 PN010010 44 170510 000 DUST HOOD 1 PN010089 45 PN02 10 LABEL PN1A 46 006303 100 SPRING WASHER 6 1 12 3 10...

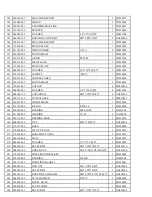
Page 23: ...FIXING SAHFT 3 PN010045 89 000302 103 ROUND HEAD SCREW M4 0 7P 10 4 HA040404 90 006301 100 SPRING WASHER 4 1 7 7 4 HE020600 91 006001 001 WASHER 4 3 10 1 0t 6 HE010600 92 250168 615 SWITCH BOX 2 PJ0B...

Page 24: ...R 1 PN010802 121 920318 000 TERMINALS SEAT ASSY 1 PN0109 490031 008 TERMINALS SEAT UPPER COVER 1 PN010901 490032 000 TERMINALS SEAT 1 PN010902 122 660017 000 BUFFER 2 PN010091 123 011003 105 SPRING PI...

Page 25: ...62 250173 615 DUST SLEEVE 2 PM010037 163 360423 000 WORM SHAFT 1 PN010069 164 010110 000 R RING RTW 68 2 HF024800 165 030203 000 BEARING 6008 2NSE 2 HJ031300 166 031003 000 BEARING 51105 4 HJ130600 16...

Page 26: ...6013 000 CHAIN 40 107P 1 HK247700 212 016003 000 CHAIN 40 80P 1 HK246800 213 PN02 14 Manual PN0N 220 041306 006 Poly Bag 415 255 0 15t 1 HR051400 223 640006 000 Anti Rust Bag 1600 1800 0 1t 1 PN010022...

Page 27: ...006712 100 WAVY WASHER BWW 6001 1 HE071500 251 490018 000 LIMITED SWITCH 125V 20 5AMP 1 PH030062 252 170680 000 SWITCH SHAFT 1 PN020013 253 008001 100 NUT M3 0 5P 5 5B 2 5H 2 HC010100 254 006302 100 S...

Reviews: