d-Color MF350/250/201Plus
4-7
Installation using the Add Printer wizard
4
4.1.3
Network connection (IPP or IPPS)
For IPP printing, specify the port during the printer driver installation process.
Specifying the TCP/IP setting for this machine
Specify the IP address of this machine.
!
Detail
For details on specifying the IP address of this machine, refer to the User manual – Network
Administrator.
Specifying the IPP settings for this machine
Enable IPP printing in "IPP Setting" of this machine.
!
Detail
For details on the IPP settings of this machine, refer to the User manual – Network Administrator.
To use IPPS printing, the certificate must be registered to this machine. For details, refer to the User
manual – Network Administrator.
Printer driver installation using the Add Printer wizard
2
Reminder
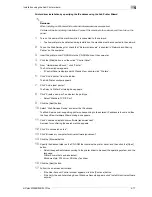
When installing on Windows XP or Server 2003, administrator permissions are required.
1
Insert the printer driver CD-ROM into the CD-ROM drive of the computer.
2
Click the [Start] button, and then click "Printers and Faxes".
–
If "Printers and Faxes" does not appear in the "Start" menu, open the Control Panel from the "Start"
menu, select "Printers and Other Hardware", and then click "Printers and Faxes".
3
For Windows XP, click "Add a printer" on the "Printer Tasks" menu. For Windows Server 2003, double-
click the "Add Printer" icon.
"Add Printer wizard" starts.
4
Click the [Next] button.
5
In the Local or Network Printer dialog box, select "Network printer", and then click the [Next] button.
6
In the Specify a Printer dialog box, select "Connect to a printer on the Internet or on a home or office
network".
7
In the "URL" field, enter the URL for this machine in the following format, and then click the [Next]
button.
–
http:// (IP_address_of_machine) /ipp Example: If the IP address of this machine is 192.168.1.20,
enter http://192.168.1.20/ipp.
–
When setting this machine for IPPS printing, enter "https:// (IP_address_of_machine) /ipp". The
window for confirming the user name and password appears in the course of installation.
8
When the confirmation dialog box appears, click the [OK] button.
9
Click the [Have Disk] button.
10
Click the [Browse] button.
11
Specify the desired folder on the CD-ROM that contains the printer driver, and then click the [Open]
button.
–
Select the specified folder according to the printer driver to be used, the operating system, and the
language. Printer drivers that can be selected: Windows XP/Server 2003: PCL driver, PS driver
Summary of Contents for D-color MF 250 Plus
Page 8: ...Content 8 d Color MF350 250 201Plus...
Page 9: ...1 Introduction...
Page 10: ......
Page 15: ...2 Overview of printer functions...
Page 16: ......
Page 24: ...2 Overview of printer functions 2 10 d Color MF350 250 201Plus...
Page 25: ...3 Precautions for installation...
Page 26: ......
Page 31: ...4 Installation using the Add Printer wizard...
Page 32: ......
Page 58: ...4 Installation using the Add Printer wizard 4 28 d Color MF350 250 201Plus...
Page 59: ...5 Installation on Macintosh computers...
Page 60: ......
Page 72: ...5 Installation on Macintosh computers 5 14 d Color MF350 250 201Plus...
Page 73: ...6 Installation to use NetWare...
Page 74: ......
Page 76: ...6 Installation to use NetWare 6 4 d Color MF350 250 201Plus...
Page 77: ...7 Uninstalling the printer driver...
Page 78: ......
Page 81: ...8 Print functions of the PCL PS drivers for Windows...
Page 82: ......
Page 104: ...8 Print functions of the PCL PS drivers for Windows 8 24 d Color MF350 250 201Plus...
Page 105: ...9 Print function of Mac OS X...
Page 106: ......
Page 128: ...9 Print function of Mac OS X 9 24 d Color MF350 250 201Plus...
Page 129: ...10 Print function of Mac OS 9 2...
Page 130: ......
Page 139: ...11 Function detail description...
Page 140: ......
Page 180: ...11 Function detail description 11 42 d Color MF350 250 201Plus...
Page 181: ...12 Settings on the control panel...
Page 182: ......
Page 224: ...12 Settings on the control panel 12 44 d Color MF350 250 201Plus...
Page 225: ...13 Web Connection...
Page 226: ......
Page 249: ...d Color MF350 250 201Plus 13 25 Web Connection 13 13 4 6 Network...
Page 251: ...14 Troubleshooting...
Page 252: ......
Page 257: ...15 Appendix...
Page 258: ......
Page 261: ...d Color MF350 250 201Plus 15 5 Appendix 15 15 2 Configuration page GENERIC 35C 4...
Page 262: ...15 Appendix 15 6 d Color MF350 250 201Plus 15 3 Font list 15 3 1 PCL Font List GENERIC 35C 4...
Page 263: ...d Color MF350 250 201Plus 15 7 Appendix 15 15 3 2 PS Font List GENERIC 35C 4...
Page 264: ...15 Appendix 15 8 d Color MF350 250 201Plus 15 3 3 Demo page...
Page 271: ...16 Index...
Page 272: ......


