E-11
X. Connecting the power cord
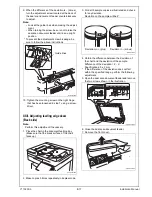
1. Connect the power cord.
2. Fit the supplied cord clamp over the power cord.
(One supplied screw C)
3. Plug the power cord into the power outlet.
XI. Toner supply
Turn ON the Main Power Switch.
Note:
• Toner is automatically supplied in parallel with
warm-up.
• If any one of the toner cartridges is not set,
toner supply does not start.
XII. Adjusting touch panel
1. Press the Menu key.
2. Touch “Accessibility.”
3. Touch “Touch Panel Adjustment.”
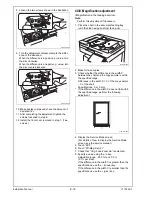
4. Using the stylus pen, lightly touch the center of
the + markers at four places on the touch panel.
(Any specific marker can be the first one.)
Note:
Pressing the touch panel hard may cause dam-
age.
* When all the markers at four places have been
touched, the start key turns blue and lights up
steadily blue.
5. Press the start key.
6. Touch “Close.”
XIII.Date/Time setting (Administrator set-
tings)
1. Select the Date/Time Setting function as follows:
Menu
→
Utility
→
Administrator Settings
→
Enter
the Administrator Password (Default setting:
1234567812345678)
→
System Settings
→
Date/
Time Settings.
2. Select the item you want to set and press the
clear key.
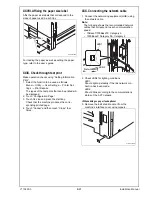
3. Enter the data for the year, month, day, and time-
of-day from the 10-key pad.
Note:
Switch between “Bookmark” and “Display Keypad”
on the left side of the touch panel as necessary.
4. Touch “OK.”
5. Touch “Close” three times.
XIV. Setting gradation adjustment
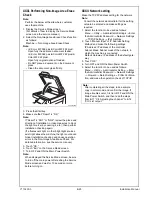
1. Set that A3
or Ledger
paper is loaded in
the tray.
Note:
If the A3
or Ledger
paper is not readily
available, use A4
or Letter
paper.
2. Display the Service Mode screen.
(For details of how to display the Service Mode
screen, see the service manual.)
3. Touch “Imaging Process Adjustment.”
4. Touch “Gradation Adjust.”
5. Check that “Stabilizer” is selected and press the
start key.
* When the start key lights up blue, go to step 6.
Note:
When a maintenance call occurs, see the service
manual.
A161IXE042DA
A161IXE043DB
C4004U139CA
Y115290-3
Installation Manual


