Supporto Tecnico / Technical Support
Bollettino Informazione Tecnica /
Technical Information Bulletin
data /
date
codice
-
progr./
code - number
TIB
27/07/2011 80460708
16
3 / 5
Modulo IO-TIB-A (Liv.03)
INFORMAZIONI RISERVATE, DA DIVULGARE SOLO SU AUTORIZZAZIONE DEL “SUPPPORTO TECNICO”
CONFIDENTIAL INFORMATION ONLY TO BE DISCLOSED WITH PERMISSION FROM “TECHNICAL SUPPORT”
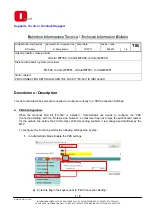
a)
Digit the IP Address or the Host Name on Internet Explorer bar. The “Public Access level” is
automatically opened.
b)
Click on “Address Book” icon
c)
Click on “Address Book”
Î
“Store Address”
Î
“New Registration”
Î
Select “FAX” and
then click on “OK” button
d)
Enter the Name which will showed in the Address Book list. (In this example:
“FAX_PBX_TEST1”)
e)
Specify a Keyword for Address Search
f)
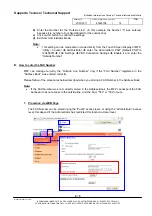
Enter the “Destination FAX Number”. In this case the “Destination Number has to be
entered as in the example showed in the picture above: “
E-0125412238
”
Note:
•
E-
Î
It is the Prefix which inform the MFP that it has to use the “Outside Number”
set in the “PBX Connection Setting” (See Point 1 of this TIB)
•
0125412238
Î
It is the really FAX Number
g)
Confirm the “Destination FAX Number” entering it as explained in the point “
c)
” above: “
E-
0125412238
”
2. Procedure via Touch Screen Display
Perform the following procedure step by step for storing a new FAX Number directly from the Touch
Screen Display.
Note:
•
As for WEB page, FAX Number can be stored using the “User” access level, or using the
“Administrator” access level; this depend if the Administrator has restricted this function at
User level.
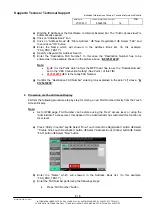
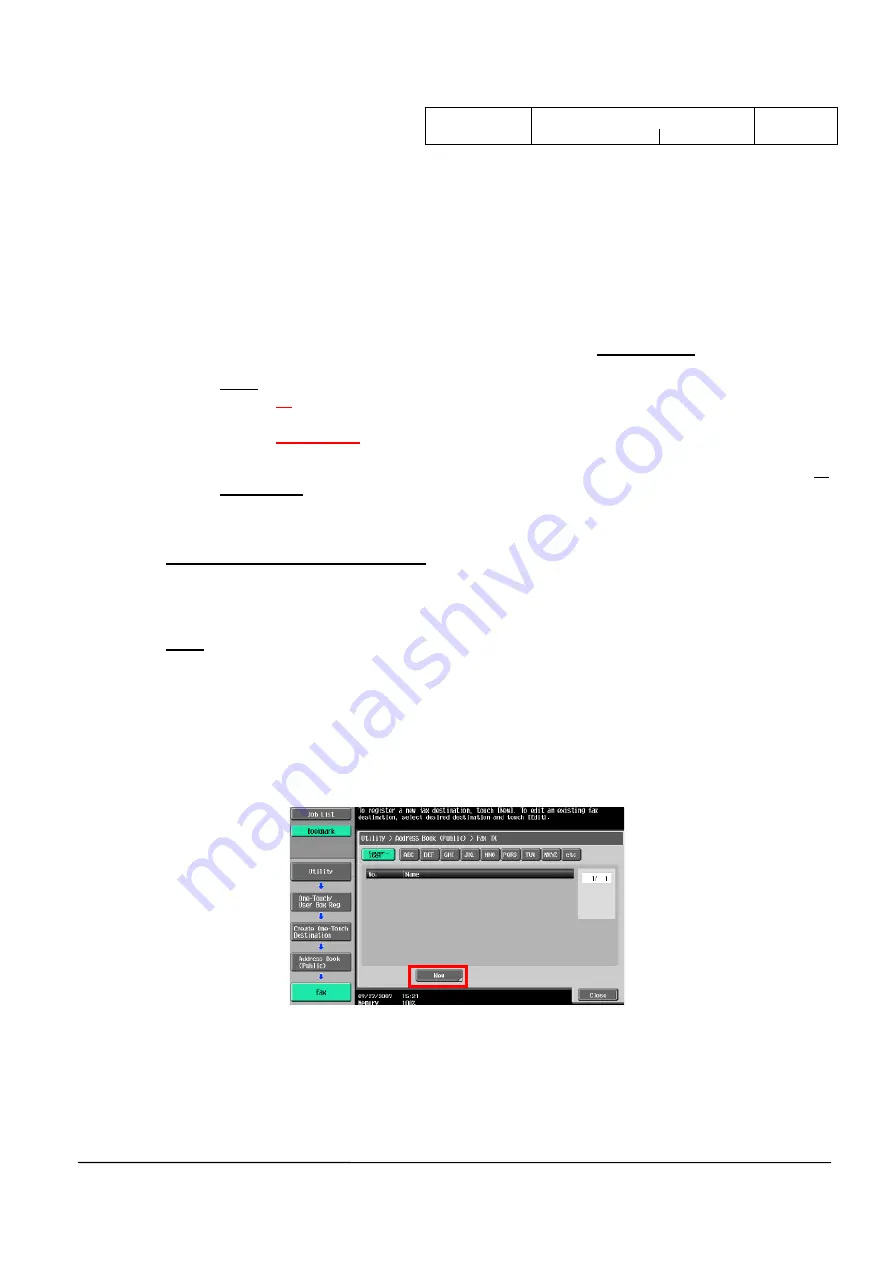
a)
Press “Utility / Counter” key
Î
Select “One-Touch / User Box Registration” button
Î
Select
“”Create One-Touch Destination” button
Î
Select “Address Book (Public) button
Î
Select
“FAX” button
Î
Select “New” button
b)
Enter the “Name” which will showed in the Address Book list. (In this example:
“FAX_PBX_TEST1”)
c)
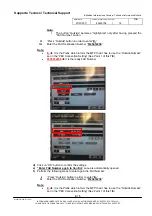
Enter the FAX Number performing the followings steps:
I.
Press “FAX Number” button

