background image

d-Color MF752/652

16-7

16

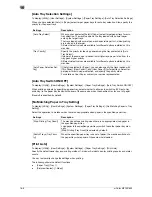
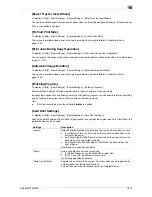
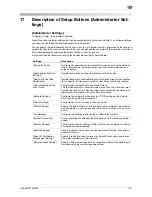
[Post Inserter Settings]

To display: [Utility] - [User Settings] - [System Settings] - [Paper Tray Settings] - [Post Inserter Settings]

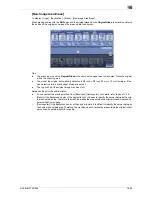
Specify the type and the size of paper to be loaded into the paper tray for using 

Post Inserter

.

Tips

-

This item is available when the optional 

Finisher FS-535

 is equipped with the 

Post Inserter

.

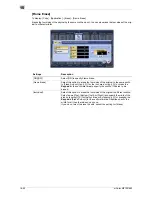
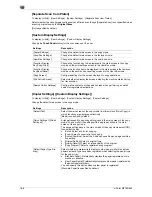
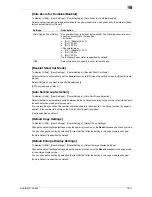
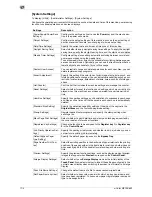
[Auto Color Level Adjust.]

To display: [Utility] - [User Settings] - [System Settings] - [Auto Color Level Adjust.]

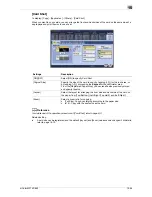
Adjust the criteria to determine whether an original is in color or black and white when scanning originals by 
specifying the color mode to [Auto Color].

Tap [Black] or [Full Color] to adjust to one of the five levels.

[3] is specified by default.

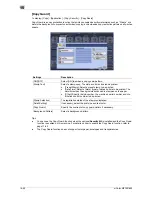
[Auto Paper Select for Small Original]

To display: [Utility] - [User Settings] - [System Settings] - [Auto Paper Select for Small Original]

Specify whether to copy an original when an original that is so small that the machine cannot detect the size 
automatically is placed on the 

Original Glass

. To copy, select a paper size.

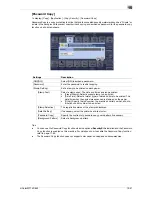
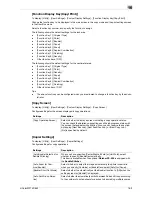
[Blank Sheet Detection Level]

To display: [Utility] - [User Settings] - [System Settings] - [Blank Sheet Detection Level]

Adjust the detection level of blank page when [Blank Page Removal] is specified for [Original Settings].

Tap [Do not detect] or [Detect] to adjust to one of the five levels.

[0] is specified by default.

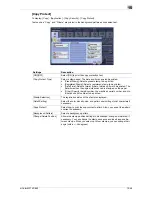
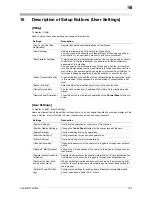
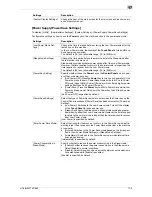
Settings

Description

[Paper Tray]

Select the paper tray for which paper type and size will be changed. You 
can change settings for each tray.

[Paper Type]

[Paper Type]: Select the type of the paper loaded into the selected paper 
tray.
[Plain Paper] is specified by default.

[Paper Size]

Select the size of paper loaded into the paper tray selected for [Paper 
Type].
[Auto Detect] is specified by default.

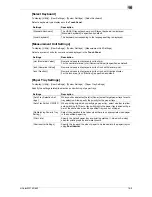
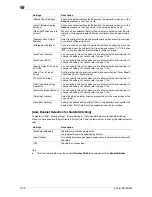
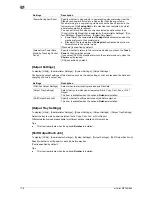
Settings

Description

[Copy on Small Size]

Print on 5-1/2 

e

 8-1/2 (A5) size paper. If 5-1/2 

e

 8-1/2 (A5) size paper has 

not been loaded, load the paper (5-1/2 

e

 8-1/2 (A5)) into the 

Bypass Tray

.

[Copy on Letter]
([Copy on A4])

Print on 8-1/2 

e

 11 size paper.

[Prohibit Copy]

A message is displayed when the machine cannot detect the size of the 
original. Select this option when you do not want to specify the paper size 
but print on arbitrary size of paper.
[Prohibit Copy] is specified by default.

Summary of Contents for d-COLOR MF652

Page 1: ...Code 571607 d COLOR MF652 d COLOR MF752 Operazioni di Copiatura Copy Operations Kopieren Op rations Copie Operaciones de copia...

Page 2: ...which could compromise the conformity attested to above as well as the characteristics of the product incorrect electrical power supply incorrect installation incorrect or improper use or use not in...

Page 3: ...oval 3 4 Enhancing text against the background Text Enhancement 3 4 Making the image glossy Glossy 3 4 Reversing the contrast and color Neg Pos Reverse 3 4 Applying a color to the background Backgroun...

Page 4: ...Copying the original image without margin Image Adjust 9 3 Reversing the left and right of the original image Mirror Image 9 4 Fine tuning the print position Image Shift 9 4 Copying the original in th...

Page 5: ...15 19 Color Adjust 15 20 Brightness 15 21 Contrast 15 22 Saturation 15 23 Red 15 24 Green 15 25 Blue 15 26 Hue 15 27 Copy Density 15 28 Sharpness 15 29 Color Balance 15 30 Booklet 15 31 Page Margin 15...

Page 6: ...e Display Settings 16 11 When AMS Direction is Incorrect 16 12 Separate Scan Output Method 16 12 Enlargement Rotation 16 12 Auto Zoom Platen 16 12 Auto Zoom ADF 16 12 Specify Default Tray when APS Off...

Page 7: ...Separation Adjustment 17 22 Color Registration Adjust 17 23 Gradation Adjustment 17 24 Scanner Area 17 24 ADF Adjustment 17 24 Line Detection 17 25 Trail Edge Adjust 17 25 User Paper Settings 17 26 Er...

Page 8: ...ons 17 49 Authentication Device Settings 17 50 General Settings Authentication Device Settings 17 50 Logoff Settings 17 50 User Account Common Setting 17 51 Logout Confirmation Screen Display Setting...

Page 9: ...assword 17 67 Format HDD 17 68 HDD Encryption Setting 17 68 Function Management Settings 17 68 Stamp Settings 17 68 Apply Stamps 17 69 Delete Registered Stamp 17 69 FIPS Settings 17 69 License Setting...

Page 10: ...Contents 8 d Color MF752 652...

Page 11: ...1 Copy Operations...

Page 12: ......

Page 13: ...at one time originals with pages of different sizes or originals with folds configure the original settings according to the original type For details refer to page 7 3 2 Tap Copy 3 If necessary conf...

Page 14: ...e list If Ready to accept another job appears while printing a job you can scan the next original Related setting You can change the default copy settings to suit your environment For details refer to...

Page 15: ...opy Basic operation flow 1 d Reference To configure various copy settings smoothly you can collectively display the basic copy settings in a single screen and arrange frequently used keys in the main...

Page 16: ...make a copy even if the machine is printing an original you can interrupt the active job and make an intruder copy 1 Press the Interrupt key The indicator on the Interrupt key lights up in green and p...

Page 17: ...1 4 Press the Start key The original is scanned and copy begins 5 After the copy job is completed press the Interrupt key The indicator of the Interrupt key goes off and the interrupting status is can...

Page 18: ...ng Checking the preview image before copying You can check the finishing image of a copy in the Touch Panel before copying By checking whether any incorrect setting is specified with the finishing ima...

Page 19: ...select Original Direction according to the original direction 6 Tap Start The original is scanned and the Preview screen appears 7 Tap The screen used to change the preview display appears To continu...

Page 20: ...to scan originals load the original and tap Start Scan To enlarge the preview image double tap the image If a multi page original has been scanned you can flick the preview image to view the next pag...

Page 21: ...Making a trial printing proof copy Before beginning copying make a sample copy and check it for irregularities When you are printing a large number of copies use the proof copy function to prevent mis...

Page 22: ...g the Register key enables you to display the Keypad on the Touch Panel to enter data To retype the number of copies press C Clear 5 Press Preview 6 Tap Print and select Original Direction according t...

Page 23: ...all original pages have been scanned tap Finish 10 Press the Start key Copying begins for only one copy 11 Check the proof copy If necessary tap Change Setting to change the copy settings 12 When maki...

Page 24: ...m there are programs in which all copy settings are registered and image adjustment pro grams in which only settings related to image quality are registered When you register a copy program you can re...

Page 25: ...r image adjustment program you can register the settings of Original Type Density Bkgd Re moval Text Enhancement Neg Pos Reverse Background Color Color Adjust and Mirror Image 5 Enter the program name...

Page 26: ...Recalling a program for copying 1 1 16 d Color MF752 652 1 4 Recalling a copy program for copying 1 Load the original 2 Tap Copy 3 Tap Program...

Page 27: ...content of program is applied 5 Press the Start key If desired tap Check Setting before starting a copy and check the settings The original is scanned and copy begins If you press the Stop key while...

Page 28: ...Recalling a program for copying 1 1 18 d Color MF752 652 1 4...

Page 29: ...2 Recalling frequently used functions with simple action...

Page 30: ......

Page 31: ...uick Copy For details refer to page 16 8 Arranging frequently used copy settings in the main screen You can arrange a key in which a copy mode setting is registered quick setting key in the main scree...

Page 32: ...ed finishing program in the main screen in the copy mode If you arrange the frequently used combination of finishing settings as a recall key in the main screen it will be useful to specify the settin...

Page 33: ...3 Specifying the Color and Image Quality for Copying...

Page 34: ......

Page 35: ...copy based on the original color Full Color 2 Color Single Color and Black For details refer to page 15 4 Selecting the appropriate image quality for the contents of the original Original Type Select...

Page 36: ...the background Text Enhancement Text is enhanced when it is superimposed over the background figure graph etc You can also enhance the background image For details refer to page 15 18 Making the image...

Page 37: ...round color For details refer to page 15 19 Adjusting the color quality according to the original Color Adjust Adjust the color quality brightness saturation color balance etc of the original for copy...

Page 38: ...3 3 6 d Color MF752 652...

Page 39: ...4 Saving the Number of Print Sheets...

Page 40: ......

Page 41: ...paper consumption You can further reduce the amount of paper used by using the Combine function For details refer to page 15 9 The following describes the operation flow in the case where a 1 sided o...

Page 42: ...iginals select the binding position of Output For 2 sided originals select the binding positions of No of Originals and Output 5 Tap Original Direction and select the original loading direction 6 Tap...

Page 43: ...escribes the operation flow in the case where multiple 1 sided originals are copied two pages are reduced into the same side of one page and printed on both sides of paper 1 Load the original 2 Tap Du...

Page 44: ...r MF752 652 5 Tap 2in1 If you select 4in1 or 8in1 select Direction layout 6 Tap Original Direction and select the original loading direction 7 Tap OK 8 Press the Start key The original is scanned and...

Page 45: ...late for memo and ticket The number of times repeated is determined automatically according to the original and paper sizes or zoom ratio You can also specify an arbitrary number of times For details...

Page 46: ...4 4 8 d Color MF752 652...

Page 47: ...5 Specifying the Size or Type of the Paper to Be Copied...

Page 48: ......

Page 49: ...n the future For details refer to page 15 7 Copying on a wide paper Wide Paper You can specify a paper size that is slightly larger than the size of the original as wide paper If you specify wide pape...

Page 50: ...5 5 4 d Color MF752 652...

Page 51: ...6 Binding Copied Paper...

Page 52: ......

Page 53: ...s refer to page 15 10 Tips The optional Finisher is required to use the Staple function Punching the printed sheets Punch Copied sheets are punched for filing before they are output This function is u...

Page 54: ...the center before they are output For details refer to page 15 10 Half folding Tri Fold Center folding Z Fold Tips The optional Finisher and Saddle Stitcher are required to use the Fold Bind function...

Page 55: ...roup functions are switched automatically according to the number of printed sheets for each set If the number of printed sheets for each set is 1 the Group function is applied If the number is 2 or l...

Page 56: ...ontal or vertical direction and return it to its original position This is useful for adjusting the image position when you file print sheets For details refer to page 15 32 Tips If the positions of t...

Page 57: ...7 Specifying the Original Size and Scan Method...

Page 58: ......

Page 59: ...lly specify the size For details refer to page 15 13 Specifying the binding position of the original Binding Position When scanning a 2 sided original specify the binding position of the original in B...

Page 60: ...eft side of the machine The following chart shows the possible combinations of standard sized paper that can be used for the Mixed Original setting Original Size Maximum Original Width 11 e 17 w A3 w...

Page 61: ...folded original through the ADF use Z Folded Original For details refer to page 15 13 NOTICE Unfold folded originals before loading them into the ADF If a folded original is not unfolded before scann...

Page 62: ...inal NOTICE Do not load more than 150 sheets at a time into the original tray and do not load the sheets up to the point where the top of the stack is higher than the mark Doing so may cause an origin...

Page 63: ...r to page 16 12 Copying multiple originals in different settings collectively Program Jobs Originals are scanned with different settings for each set and copied collectively Use this function when var...

Page 64: ...change the copy settings When the original has been placed on the Original Glass tap Finish 5 Load the next original and tap Change Setting 6 Configure the copy settings then press Start Repeat Steps...

Page 65: ...d Color MF752 652 7 9 7 9 Specify finish settings as required then tap Start Copying begins...

Page 66: ...7 7 10 d Color MF752 652...

Page 67: ...8 Copying Various Types of Originals...

Page 68: ......

Page 69: ...gle page and print the images onto the same side of one sheet This can reduce the number of sheets used 1 Place a card on the Original Glass 2 Tap Paper and specify the paper tray for printing the car...

Page 70: ...ft and right pages of a book and catalog Book Original You can copy two page spreads such as books and catalogs separately into the left and right pages or copy on a single sheet as one page Place a b...

Page 71: ...ion with no need of scanning each page separately Place the two page spread in the ADF For details refer to page 15 15 Copying an index original on index paper Tab Original Copy an index original onto...

Page 72: ...To use Booklet Original the optional Finisher and Saddle Stitcher are required 1 Load the original NOTICE Load a catalog with the staples removed To use the Original Glass position the pages in order...

Page 73: ...or MF752 652 8 7 8 2 Tap Application No of Originals Original Settings and select Booklet Original 3 Press the Start key 4 After all originals are scanned tap Finish and press the Start key Copying be...

Page 74: ...8 8 8 d Color MF752 652...

Page 75: ...9 Adjusting the Layout for Copying...

Page 76: ......

Page 77: ...ratio For details refer to page 15 8 Copying a poster sized image Poster Mode The original image is enlarged divided and printed on multiple sheets When you join the printed sheets you will create a l...

Page 78: ...n on the back side can also be fine tuned Use this function when you want to make a fine adjustment such as changing the print position a little or printing images in different positions between the f...

Page 79: ...10 Inserting a Cover Sheet or Blank Sheet into Copied Documents...

Page 80: ......

Page 81: ...rting paper between transparencies OHP Interleave When copying onto multiple transparencies you can insert the specified paper between the transparencies These sheets of paper prevent the transparenci...

Page 82: ...e 15 39 Tips Use the insert sheets and text papers of the same size and stack them in the same direction Arranging the first page of the chapter on the front side Chapters When an original is copied o...

Page 83: ...using the ADF to which you want to insert an original For details refer to page 15 40 3 Press the Start key An original loaded into the ADF is scanned 4 Place the original to be inserted on the Origin...

Page 84: ...10 10 6 d Color MF752 652...

Page 85: ...11 Adding Text or an Image to the Original...

Page 86: ......

Page 87: ...REPLY and DO NOT COPY are printed on the first page or all pages You can select the text to be printed from the registered fix stamps and arbitrary registered stamps Since text is printed without mod...

Page 88: ...or details refer to page 15 46 Related setting for the administrator For details on how to register the information to be added for header and footer refer to page 17 29 Composing an overlay image Ove...

Page 89: ...Overlay Register original images to the hard disk of this machine as overlay image You can call a registered overlay image and compose it on an original scanned later This is useful for regis tering f...

Page 90: ...11 11 6 d Color MF752 652...

Page 91: ...12 Erasing an Unnecessary Portion for Copying...

Page 92: ......

Page 93: ...When making copies with the ADF open and the original placed on the Original Glass the machine detects the outline of the original and erases shadows outside the original You can copy receipts and th...

Page 94: ...12 12 4 d Color MF752 652...

Page 95: ...13 Deterring Unauthorized Copying...

Page 96: ......

Page 97: ...on software program used to specify the copy protect and stamp in formation to the MFP You can install the program using the accompanying DVD ROM For details refer to the Copy Protection Utility manua...

Page 98: ...r envelopes and transparencies Adding a password Password Copy Password Copy is a copy protection function that prints concealed security watermarks such as Private or a date in the background to prev...

Page 99: ...14 Saving Original Images to a User Box...

Page 100: ......

Page 101: ...etails on the User Box Personal User Box and Group User Box refer to User s Guide Box Op erations For details on the Annotation User Box refer to User s Guide Box Operations 0 To save the original in...

Page 102: ...nd select the destination user box Tap New and enter a new user box number to register the destination user box To save the original in an Annotation User Box tap System and select the destination use...

Page 103: ...15 Description of Setup Buttons...

Page 104: ......

Page 105: ...y level Select this option to scan printed originals such as brochures and catalogs Photo PhotoPaper Press this button to copy an original consisting of only photos at the opti mum image quality level...

Page 106: ...of whether the scanned orig inal is in color or in black and white 2 Color Copy in the specified two colors This will produce a lower cost color copy than one printed in full color In the scanned orig...

Page 107: ...ze of the original when making a copy 1 4 Tap this button to specify paper loaded into any of Tray 1 to Tray 4 and make a copy Tap this button to copy onto the paper loaded into the Bypass Tray L Pres...

Page 108: ...ng a standard size paper into the Bypass Tray select the paper size Settings Description Inches When loading inch size paper into the Bypass Tray select the paper size Metric Sizes When loading metric...

Page 109: ...th Y of the paper For the centimeter area tap or press the Keypad to enter the length X and width Y of the paper After you have entered the size select a key memory1 to memory5 in Registered Paper Siz...

Page 110: ...ric Sizes When loading wide paper in metric sizes into paper tray select the paper size as well Settings Description Auto Press this button to automatically make a copy with the optimal zoom ratio to...

Page 111: ...os individually for the lengthwise and widthwise direc tions for copying Select X or Y and enter a zoom ratio by tapping or pressing the Keypad Zoom Ratio Copy with the registered zoom ratio If you ta...

Page 112: ...binding position of a copy is specified automatically When the long side of the original is 11 11 16 inches 297 mm or less the binding position is set to the long side of paper When the long side of t...

Page 113: ...re it is output 2 Position Each set of printed sheets is stapled at two positions in the top left or right before it is output Position Setting Select the binding position and original loading di rect...

Page 114: ...pies in detail Layout Specify the copy layout such as to copy using a page order such as that used in a booklet and to copy an original image repeatedly Tailoring Add front and rear covers and insert...

Page 115: ...alog Despeckle Scan originals using the ADF while removing dust on the Slit Scan Glass It takes longer to finish scanning compared to the normal operation Blank Page Removal Blank pages contained in t...

Page 116: ...m is set automatically The original image is copied at the center of the page without enlarging it Cancel the setting if necessary Binding Position If Separation Front Cover or Front Back Covers is se...

Page 117: ...nnot be closed properly due to the thickness of the original Specify the width of the area to erase by tapping for the inch area or by tapping or pressing the Keypad for the centimeter area Settings D...

Page 118: ...Trademark Licenses Separate Scan To display Copy Application No of Originals Separate Scan If the number of original sheets is so large that they cannot be loaded into the ADF at the same time you ca...

Page 119: ...text or images on the back would be scanned Settings Description Background Removal Copy 2 sided originals made of thin paper and originals with colored back ground with optimal image quality Bleed Re...

Page 120: ...raph etc Glossy To display Copy Application Quality Density Glossy Images are copied with a glossy finish Settings Description Lighter Text If you want to enhance the background against text adjust to...

Page 121: ...Pos Reverse Copy the original with the density gradations and color of the image inversed The finished image looks like a negative print photo Background Color To display Copy Application Edit Color B...

Page 122: ...een Adjust the intensity of green Blue Adjust the intensity of blue Hue Adjust the hue The hue refers to a color trend relative to discrete colors such as red blue and yellow By adjusting the hue the...

Page 123: ...hter or darker because there is a degree of brightness in colors For example when comparing the yellow of a lemon and the yellow of a grapefruit it is obvious that the yellow of the lemon is brighter...

Page 124: ...an image Lower contrast makes the image softer and smoother while higher contrast makes it sharper Tips Adjusting contrast changes an image as shown in the following Settings Description Sample Copy Y...

Page 125: ...ompare two kinds of yellow between lemon and pear By saying that the lemon is a more vivid yellow and the pear is a duller yellow the difference between the two colors is stated in terms of saturation...

Page 126: ...olor Color Adjust Red Adjust the intensity of red Tips Adjusting red changes an image as shown in the following Settings Description Sample Copy You can check the finishing by printing a sample copy P...

Page 127: ...or Color Adjust Green Adjust the intensity of green Tips Adjusting green changes an image as shown in the following Settings Description Sample Copy You can check the finishing by printing a sample co...

Page 128: ...lor Color Adjust Blue Adjust the intensity of blue Tips Adjusting blue changes an image as shown in the following Settings Description Sample Copy You can check the finishing by printing a sample copy...

Page 129: ...combinations of these elements When imagining that the color of an apple is red a lemon is yellow and the sky is blue you can under stand the concept of the hue of an object Hue is the tint by which...

Page 130: ...r Color Adjust Copy Density Adjust the copy density Tips Adjusting copy density changes an image as shown in the following Settings Description Sample Copy You can check the finishing by printing a sa...

Page 131: ...amount of contours in text and images Smoothen the rough contour or sharpen the blurred image Tips Adjusting sharpness changes an image as shown in the following Settings Description Sample Copy You...

Page 132: ...lor balance changes an image as shown in the following To enhance red increase the density of yellow and magenta or decrease the density of cyan To enhance green increase the density of yellow and cya...

Page 133: ...lect the binding position of the copied sheets Fold Bind Staples copy outputs in the center the paper or fold them in the center be fore discharging Half Fold Feeds out a copied sheet by folding it in...

Page 134: ...m the binding position is set to the short side of paper Left Bind Select this option when setting the binding position to the left of paper Right Bind Select this option when setting the binding posi...

Page 135: ...per by shifting the original image in horizontal or vertical direction Shift Left Shift Right Shifts the image to the left or right Adjust the shift amount by tapping for the inch area or by tapping o...

Page 136: ...epeat An original image is repeatedly copied on the same side of a single sheet Settings Description ON OFF Select ON to specify Mirror Image Original Size If the size of the original is not detected...

Page 137: ...size selecting Auto Detect causes the ma chine to automatically detect the size If the machine cannot detect the size of irregular sized originals or photos manually specify the size Settings Descrip...

Page 138: ...ter of the paper Place the original on the Original Glass Center Zoom Enlarge or reduce the original image according to the lengthwise or widthwise side of the original image and print paper whichever...

Page 139: ...Reference Load transparencies into the Bypass Tray For details on how to load transparencies refer to User s Guide Introduction Trademark Licenses NOTICE Do not use a transparency that has been throug...

Page 140: ...e front sheet Front Blank Inserts a blank front sheet Paper Select the paper used for cover sheet Use the same size cover and body sheets and stack them in the same orientation You can se lect the pap...

Page 141: ...ng the Keypad and press Add to register the insertion page number If you have entered an incorrect page number select this number and tap Delete If page numbers are entered in random sequence they are...

Page 142: ...elect ON to specify Insert Image Insert Page Position Specify a page number you want to insert a sheet into The original is in serted after the page you have specified Enter an insertion page number u...

Page 143: ...ad and tap Add to register the page number If you have entered an incorrect chapter page number select this number then tap Delete If page numbers are entered in random sequence they are rearranged in...

Page 144: ...blank page that is inserted using the Cover Sheet or Insert Sheet function Default Do Not Print For details refer to page 17 29 Settings Description ON OFF Select ON to print the date time Date Format...

Page 145: ...hapter numbers only when you have selected Chapter Page in Page Number Type For example to print chapter numbers from the third chapter enter 1 The first chapter of the original is counted as 1 the se...

Page 146: ...can select whether to print stamps on the blank page that is inserted using the Cover Sheet or In sert Sheet function Default Do Not Print For details refer to page 17 29 Settings Description ON OFF...

Page 147: ...Select a preset stamp to be printed Registered Stamp Select a registered stamp to be printed Date Time Select a format type of date and time to be printed The date time when the original was scanned...

Page 148: ...can select whether to print the header and footer on the blank page that is inserted using the Cover Sheet or Insert Sheet function Default Do Not Print For details refer to page 17 29 Settings Descr...

Page 149: ...n the originals scanned in the subsequent pages Settings Description ON OFF Select ON to print a watermark Watermark Type Select the watermark you want to print Text Color If necessary select the prin...

Page 150: ...or compose a registered over lay image on the original Recall Overlay Image Specify which side of the paper to compose the overlay image and select an overlay image to be composed Check the density c...

Page 151: ...iginal was scanned is stamped on the paper Other Specify the job number the machine s serial number and dis tribution control number to be printed Stamp Selection The registration status of the stamp...

Page 152: ...rd function does not support color paper envelopes and transparencies Settings Description ON OFF Select ON to embed a copy guard pattern Stamp Text Select a stamp used The date and time can also be p...

Page 153: ...paper envelopes and transparencies Settings Description ON OFF Select ON to embed a password Password Enter the password to restrict copying Stamp Setting Set a stamp to be printed on each paper Stam...

Page 154: ...to the same width In Erase Amount tap for the inch area or tap or press the Keypad for the centimeter area to specify the width of the area to be erased Individual Select this option to erase the fou...

Page 155: ...detection fails a blank sheet of paper is output The top or end of the original image may be cut off Related setting for the administrator You can select the erasing method from Bevel and Rectangular...

Page 156: ...function when var ious types of originals are mixed such as 1 sided original to be printed on one side of paper and 2 sided original to be copied by enlarging d Reference For details about the operat...

Page 157: ...nged For details refer to page 16 13 Settings Description ON OFF Select ON to specify Card Shot Original Size Specify the size of the card to copy by tapping for the inch area or by tapping or pressin...

Page 158: ...15 15 56 d Color MF752 652...

Page 159: ...16 Description of Setup Buttons User Settings...

Page 160: ......

Page 161: ...consumables consumption level in this machine When necessary print the status of consumables in list form Banner Printing Select whether to permit banner printing of the print function Device Informa...

Page 162: ...al Specify whether to copy an original when an original that is so small that the machine cannot detect the size automatically is placed on the Original Glass Blank Page Print Settings You can specify...

Page 163: ...is specified as default inch Numerical Value Numeric values are displayed in units of inch with decimal point inch Fraction Numeric values are displayed in units of inch with fraction display For the...

Page 164: ...ex 1 Sided Settings Description Auto Tray Select When you have selected Auto in Paper select target paper trays for auto tray selection The machine selects the tray loaded with optimal paper among the...

Page 165: ...paper size Blank Sheet Detection Level To display Utility User Settings System Settings Blank Sheet Detection Level Adjust the detection level of blank page when Blank Page Removal is specified for O...

Page 166: ...creen Select whether to display the screen indicating the machine status during fax transmission Search Option Settings Configure the contents of the search screen when performing an detail search for...

Page 167: ...Copy Screen Configure settings for the screen displayed in copy operations Copier Settings To display Utility User Settings Copier Settings Configure settings for copy operations Settings Description...

Page 168: ...d by the administrator to change the setting For details refer to page 17 54 Auto Zoom ADF You can specify this option when you are allowed by the administrator to change the setting For details refer...

Page 169: ...t function by set is applied Yes is specified by default Default Copy Settings To display Utility User Settings Copier Settings Default Copy Settings Change the default settings settings when the powe...

Page 170: ...u are allowed by the administrator to change the setting For details refer to page 17 54 Auto Zoom ADF To display Utility User Settings Copier Settings Auto Zoom ADF You can specify this option when y...

Page 171: ...the copy mode By arranging a frequently used finishing setting to the finishing program you can specify the finishing setting only by tapping the program key in the main screen of the copy mode Tips T...

Page 172: ...h and Account Track To display Utility User Settings Synchronize User Auth and Account Track When user authentication and account track are both employed specify whether to synchronize user authen tic...

Page 173: ...eration To display Utility Remote Panel Operation Press this button to start remote operation of the Control Panel of this machine Tips This button is displayed when the operating environments of remo...

Page 174: ...16 16 16 d Color MF752 652...

Page 175: ...17 Description of Setup Buttons Administrator Settings...

Page 176: ......

Page 177: ...created User Authentication Ac count Track Configure user authentication and account track This function allows you to restrict users who can use this machine or man age the use status of this machine...

Page 178: ...chine has not been operated for a certain period of time User Box Settings Specify the user box settings such as deletion of unnecessary user boxes and files and the time until the file saved in each...

Page 179: ...mode which offers a higher power saving effect than Sub Power Off mode Power Save Press the Power key to shift to Power Save mode Low Power or Sleep mode Hold down the Power key to shift to sub power...

Page 180: ...printing mode such as the Scan Fax mode the temperature of the Fusing Unit in this machine is not adjusted by which power consumption is reduced You can set this option when you have selected an optio...

Page 181: ...r local area in multiples of 30 min utes Settings Description Enable Settings Select whether to apply Daylight Saving Time to this machine If you select Yes enter the number of hours to move the clock...

Page 182: ...normal mode No is specified by default Password for Non Busi ness Hours Specify whether to restrict the use of this machine in the Power Save mode by requesting a password To request a password in or...

Page 183: ...address and use the administrator s E mail address Login User Address Prohibit the change of From address and use user s E mail address The administrator s E mail address is used if us er s E mail add...

Page 184: ...tails on displaying this item contact your service representative Erase Adjustment Specify the operation and erase method when erasing the area outside the original by setting Non Image Area Erase PS...

Page 185: ...g Adjust the print start position on the left edge of the paper relative to the paper discharge direction Press Start to print a test pattern Check that the margin between the left edge and the print...

Page 186: ...x 2nd Side Adjust the print start position at the left edge of the paper relative to the paper discharge direction for printing the back side in 2 sided printing Press Start to print a test pattern Ch...

Page 187: ...600 dpi or 1200 dpi res olution Paper Type Select the type of paper that is used to adjust defects Adjust Value Enter an adjustment value between 8 and 7 by tapping and Tap this button if a print ima...

Page 188: ...of the paper For details refer to page 17 18 Vertical Punch Z Fold Position Adjustment If the positions of the punch holes on the paper are displaced vertically use this option to adjust the punch ho...

Page 189: ...f paper contact your service repre sentative for instructions 1st Tri Fold Position Adjustment To display Utility Administrator Settings System Settings Expert Adjustment Finisher Adjustment 1st Tri F...

Page 190: ...her Make adjustment while checking paper folded at a displaced position The value you set by selecting All in Paper Size will be added to the setting for each paper size Tri Fold Output Setting To dis...

Page 191: ...Utility Administrator Settings System Settings Expert Adjustment Finisher Adjustment Punch Horizontal Position Adjustment If the positions of the punch holes on the paper are displaced sideways use t...

Page 192: ...ping and Move the punch position to the left Move the punch position to the right 0 0 mm is specified by default Settings Description Settings Description Finisher Finisher Z Fold Post Inserter Feeder...

Page 193: ...istrator Settings System Settings Expert Adjustment Finisher Adjustment Horizontal Punch Z Fold Position Adjustment If the positions of the punch holes on the paper are displaced sideways use this opt...

Page 194: ...s Expert Adjustment Finisher Adjustment 2nd Z Fold Position Adjustment Use this option to adjust the 2nd Z fold position Copy after configuration then repeat adjustments as required Tips This item is...

Page 195: ...ze Adjustment To display Utility Administrator Settings System Settings Expert Adjustment Finisher Adjustment Post Inserter Tray Size Adjustment If the size of the paper loaded into the post inserter...

Page 196: ...Stabilization Only is specified by default Image Stabilization Set ting Change the timing for executing image stabilization as well as the type of image stabilization as required Make selection accord...

Page 197: ...shows the color registration adjustment for cyan Settings Description X If the print position of the desired color is out of line to the left or right with respect to the printing position of black ta...

Page 198: ...ype for printing a test pattern Bypass Tray cannot be selected 5 Press the Start key A test pattern is printed 6 Place the test pattern on the Original Glass in the orientation indicated on the Touch...

Page 199: ...ert is not displayed TYPE1 is specified by default Detection level Select a contamination detection level Low Make it harder to detect contamination Std Detect contamination at an ordinary level High...

Page 200: ...paper count Settings Description Non Image Area Erase Operation Settings Specify how to erase the area outside the original when making copies with Non Image Area Erase set to ON Erase Operation Selec...

Page 201: ...stem Settings List Counter TX Operation Log Output Prints logs on send operations or save them on a USB memory Specify Output Date Range and select an output method To print tap Print Change print set...

Page 202: ...choose not to reset the settings select OFF The default is 1 min allowable range 1 to 9 min Settings Description When Account is changed Specify whether to initialize all settings except registered s...

Page 203: ...pages inserted with a specified page facing up using Chapters function Settings Description Header Footer Settings You can register header footer programs and change or delete registered programs Fax...

Page 204: ...pe Setting Specify the default paper type used in the Bypass Tray If paper is loaded into the Bypass Tray the default paper type is automatically set Settings Description Fax RX Job Priority Select wh...

Page 205: ...osition For example if you set the page number print position on the lower right page numbers are printed on all pages in the lower right Left Right Bind Sym metrical Top Bottom Bind Symmetrical Speci...

Page 206: ...s Select whether to use Enlarge Display mode as the initial display of the Touch Panel If you select Yes specify whether or not to enable Enlarge Display mode when Reset is pressed in the Normal Displ...

Page 207: ...Description ON OFF Specify whether to assign a shortcut key to main menu keys The following shows the default settings Main Menu Key 1 ON Copy Main Menu Key 2 ON Scan Fax Main Menu Key 3 ON User Box O...

Page 208: ...scription Copy Print Select a display pattern of function keys to be displayed on the print set tings screen in Copy and User Box modes Full Functions Displays all function keys Standard Functions Not...

Page 209: ...the adminis trator of this machine Input Machine Address Register the device name and E mail address of this machine Settings Description Administrator Name Enter the name of the administrator of this...

Page 210: ...nter list is printed External Server Settings When employing external server authentication register the authentication server When registering multiple authentication servers register the one you wan...

Page 211: ...cted function Account Track Specify whether account tracking should be implemented to manage users by account Account Track Input Meth od When you have selected ON for Account Track select the account...

Page 212: ...nal Server Settings Main External Serv er Select this option to enable login using the authentication function of the MFP in case a trouble occurs on the external authentication server Overwrite User...

Page 213: ...have selected ON for Account Track select the account tracking method Synchronize User Authentication Account Track To display Utility Administrator Settings User Authentication Account Track General...

Page 214: ...gure settings for authentication by the LDAP server using the card ID registered on authentication cards in an environment with IC card based user authentication implemented by connecting an optional...

Page 215: ...xpiration Date Confirm whether the certificate is within the validity period Confirm is specified by default Key Usage Confirm whether the certificate is used according to the intended purpose approve...

Page 216: ...user name and the external server name As for the ex ternal server name in authentication information to be saved in this machine you can register the name of external server registered on this machi...

Page 217: ...ity Administrator Settings User Authentication Account Track User Authentication Settings Administrative Settings Default Operation Selection Select the default value for the operation that is perform...

Page 218: ...ion tap Edit to register authentication information To delete authentication information tap Delete Function Permission Restrict functions available to users Specify whether to restrict the following...

Page 219: ...rmission for each account and confirm the use status Synchronize Account Track Specify whether to synchronize user authentication and account track when both user authentication and account track are...

Page 220: ...t is specified by default Function Permission Restrict functions available to users Specify whether to restrict the following functions respectively Copy Full Color Black is specified by default Scan...

Page 221: ...xternal server authentication register the authentication server When registering multiple authentication servers register the one you want to normally use as the default value Select a number for reg...

Page 222: ...d as the authentica tion server Default NDS Tree Name Enter the default NDS tree name using up to 63 characters Default NDS Context Name Enter the default NDS context name us ing up to 191 characters...

Page 223: ...roup To register a group select the registration number and tap Edit To check destinations or users registered in a group tap Details Group Name Enter the name of the group using up to 24 characters A...

Page 224: ...ard type is installed Bio Authentication This item is available when the optional Authentication Unit biometric type is installed Logoff Settings Specify whether to log out automatically when scanning...

Page 225: ...ation Account Track User Account Common Setting Counter Remote Control Specify whether to allow acquisition of counter information managed on this machine when a remote diag nosis system is used Restr...

Page 226: ...by default Register Authentication Server When external server authentication is implemented register the LDAP server to check user names Tap Check Connection to try connecting to the LDAP server usin...

Page 227: ...onfirm is specified by default Expiration Date Confirmation Confirm whether the certificate has ex pired Do Not Confirm is specified by default CN Confirm whether CN Common Name of the certificate mat...

Page 228: ...ngs Specify Default Tray when APS Off Select a paper tray to switch to after releasing the selection of Auto for Paper Settings Description Auto Zoom Platen Specify whether to switch Zoom to Auto when...

Page 229: ...nt or fax job is printed after copy operations are completed Settings Description When Auto Paper Auto Zoom Reduce is set The original image is automatically rotated when Paper is set to Auto and Zoom...

Page 230: ...t a certificate from clients that connect to this ma chine To authenticate clients select Enable Invalid is specified by default Certificate Verifica tion Level Settings To validate the certificate du...

Page 231: ...selecting Job List Comm List A number excluding a prefix and suffix is displayed in Address of Job History Report Type in Comm List defaults to Scan Address Type that appears when you select Comm Lis...

Page 232: ...to authentication operations and data management to enhance security Enhanced Security Mode Select whether to enable the Enhanced Security Mode If you enable the Enhanced Security Mode the various sec...

Page 233: ...text types that are available for passwords is re stricted If necessary change the minimum number of password charac ters Prohibited Functions When Authentication Error Define the severity of penalti...

Page 234: ...ess to the Web page contents being saved on the hard disk of the MFP TX Operation Log Select whether to obtain an operation log on the Control Panel when scanning or sending a fax as a send operation...

Page 235: ...ion entry of password is prohibited for five seconds The number of times authen tication fails is also counted and if the failure count reaches a predeter mined value the authentication operation is p...

Page 236: ...play Settings When you have selected Yes select items you want to hide Mode 1 Destination file name and user box name Mode 2 Destination file name and user box name and user name Public User User Auth...

Page 237: ...py Guard function Copy Guard is a copy protection function that prints concealed security watermarks such as Private or a date in the background to prevent unauthorized copying and embeds a copy restr...

Page 238: ...User Authentication Set to OFF Security Settings Administrator Password Set a password complying with password rules Security Settings HDD Settings HDD En cryption Setting Enable the HDD Encryption In...

Page 239: ...five minutes Security Settings Security Details Confi dential Document Access Method Set to Mode 2 Security Settings Security Details Print Data Capture Set to Restrict Security Settings Security Det...

Page 240: ...tion Check HDD Capacity Enables you to check the used space total space and available space on the hard disk Overwrite HDD Data This machine temporarily stores image data on the hard disk or in the me...

Page 241: ...0x00 Overwrites with 0xff Overwrites with 0xaa Mode 8 Overwrites with 0x00 Overwrites with 0xff Overwrites with 0x00 Overwrites with 0xff Overwrites with 0x00 Overwrites with 0xff Overwrites with 0xa...

Page 242: ...Utility Administrator Settings Security Settings Function Management Settings Specify whether to use network functions for which counter management is difficult Stamp Settings To display Utility Admi...

Page 243: ...security requirements for cryptographic modules These standards are adopted by many organ izations including U S federal government agencies Enabling the FIPS Mode makes the functions of the machine c...

Page 244: ...rvice representative Remote Access Setting To display Utility Administrator Settings Remote Access Setting Specify whether to remotely import or export user data such as address information using the...

Page 245: ...18 Index...

Page 246: ......

Page 247: ...sort 6 5 H Header footer 11 4 I Image adjust 9 3 Image repeat 4 7 Image shift 9 4 Insert image 10 5 Insert sheet 10 4 Interrupt 1 6 M Mirror image 9 4 Mixed original 7 4 N Neg pos reverse 3 4 Non Ima...

Page 248: ...18 4 d Color MF752 652 Index by item 18 18 1 Z Z folded original 7 5 Zoom 9 3...

Page 249: ...ghtness 15 21 C Card Shot 15 55 Card Shot Settings 16 13 Cellular Phone PDA Setting 17 57 Center Staple Position 17 14 Centering 17 11 Centering Duplex 2nd Side 17 12 Change E Mail Address 16 14 Chang...

Page 250: ...firmation Screen Display Setting 17 51 M Main Menu Default Settings 17 33 Main Menu Display Settings 17 33 Management List 17 27 Measurement Unit Settings 16 5 Media Adjustment 17 13 Mirror Image 15 3...

Page 251: ...Specify Default Tray when APS Off 16 12 17 54 Stamp 15 44 Stamp Repeat 15 45 Stamp Settings 17 29 17 68 Standard Size 15 6 Standard Size Setting 17 29 Synchronize User Auth and Account Track 16 14 Syn...

Page 252: ...18 8 d Color MF752 652 Index by button 18 18 2...

Page 253: ...you need and the instructions for handling the waste correctly for example location and times of the waste collection centres etc b When you purchase a new device of ours give a used device similar t...

Reviews: