HIGH
FULL
3
A
LAN
E
E
F
F
C
D
2009.2
安装 USB 接口 IB-110( 选购件 )
USB インタフェース IB-110
(オプション)
の取付
English
Français
日本語
简体中文
Español
Deutsch
Italiano
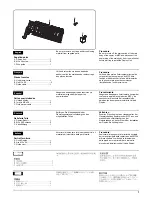
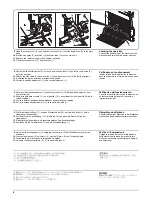
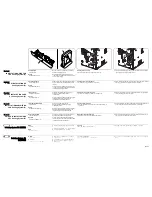
IB-110 を縦置きで使用する場合
1.
IB-110 に付属する縦置きスタンド
(C)を取り
付ける。
2.
プリンタボード(A)
のディップスイッチ (3) を
HIGH から FULL へ切り替える。
注意
IB-110 を使用しない場合は、
必ず HIGH にするこ
と。
纵置使用 IB-110 时
1.
安装附属 IB-110 的纵置台架 (C)。
2.
将打印板(A)上的 DIP 开关(3)从 HIGH 拨至
FULL。
注意
如果不使用 IB-110,务必将 DIP 开关置于 HIGH
位置。
Installing the USB interface IB-110
(optional)
Installing IB-110 vertically:
1.
Attach the vertical stand (C) supplied with IB-
110.
2.
Move the DIP switch (3) on the printer board
(A) from HIGH to FULL.
Note
If the IB-110 will not be used, the DIP switch must
be left at HIGH.
Installation de l’interface USB IB-110
(en option)
Installation verticale de l’IB-110:
1.
Fixer le support vertical (C) fourni avec l’IB-
110.
2.
Amener le commutateur DIP (3) de la carte
d'imprimante (A) de HIGH à FULL.
Remarque
Si le IB-110 n'est pas utilisé, laisser le
commutateur DIP en position HIGH.
Instalación de la interfaz IB-110
(opcional)
Instalación vertical de la IB-110:
1.
Coloque el soporte vertical (C) entregado con
la IB-100.
2.
Mover el interruptor DIP (3), de la tarjeta de
impresora (A), de la posición HIGH a la
posición FULL.
Nota
Si no va a utilizar el IB—110, el interruptor DIP
debe permanecer en la posición HIGH.
Installieren der USB-Schnittstelle IB-110
(optional)
Vertikale Installation von IB-110:
1.
Den mit IB-110 gelieferten Vertikalständer (C)
anbringen.
2.
Schalten Sie den DIP-Schalter (3) auf der
Druckerkarte (A) von HIGH auf FULL um.
Hinweis
Falls das IB-110 nicht verwendet wird, muss der
DIP-Schalter auf HIGH gesetzt bleiben.
Installazione dell’interfaccia USB IB-110
(opzione)
Installazione di IB-110 in posizione verticale:
1.
Fissare il supporto verticale (C) fornito in
dotazione con IB-110.
2.
Spostate il selettore DIP (3) sulla scheda
stampante (A) dalla posizione HIGH a FULL.
Nota
Se l'unità IB-110 non verrà utilizzata, il selettore
DIP deve essere lasciato alla posizione HIGH.
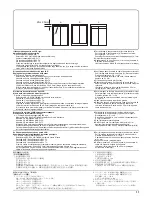
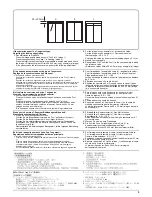
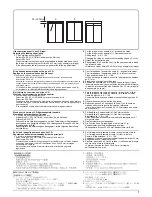
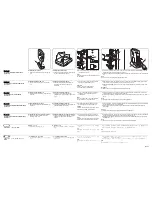
IB-110 を横置きで使用する場合
1.
IB-110 に付属する台ゴム(D)4 個を、図の位置
に貼り付ける。
横置使用 IB-110 时
1.
将 IB-110 上附属的 4 个橡胶台 (D),贴在图示
位置上。
Installing IB-110 horizontally:
1.
Attach the four rubber bases (D) supplied with
IB-110 as indicated in the figure.
Installation horizontale de l’IB-110:
1.
Fixer les quatre bases en caoutchouc (D)
fourni avec l’IB-110 comme indiqué sur
l’illustration.
Instalación horizontal de la IB-110:
1.
Coloque las cuatro bases de goma (D)
entregadas con la IB-110 como se indica en la
figura.
Horizontale Installation von IB-110:
1.
Die mit IB-110 gelieferten vier Gummifüße (D)
gemäß der Abbildung anbringen.
Installazione di IB-110 in posizione orizzontale:
1.
Fissare le quattro basi di gomma (D) fornite in
dotazione con IB-110 come indicato nel
disegno.
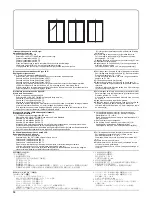
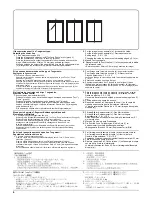
3.
IB-110 に付属する電源ケーブル
(E)のフェライトコアが付いている側のコネクタをプリンタボード
に接続し、もう一方を IB-110 に接続する。
4.
IB-110 に付属する USB ケーブル(F)をプリンタボードに接続し、
もう一方を IB-110 に接続する。
注意
必ず付属の電源ケーブルと USB ケーブルを使用すること。
3.
将 IB-110 上附属的电源线 (E) 连接器 ( 具有磁性的氧化铁 ) 侧连接在打印板上,另一侧连接在 IB-110
上。
4.
将 IB-110 上附属的 USB 线 (F) 连接在打印板上,另一侧连接在 IB-110 上。
注意
务必使用附属的电源线和 USB 线。
3.
Connect the connector, which has a ferrite core, of the power cable (E) supplied with IB-110 to the
printer board, and connect the other side to IB-110.
4.
Connect the USB cable (F) supplied with IB-110 to the printer board, and connect the other side to IB-
110.
Note
Be sure to use the supplied power cable and USB cable.
3.
Brancher le connecteur, qui possède un noyau en ferrite, du cordon d’alimentation (E) fourni avec
l’IB-110 sur la carte d’imprimante, et brancher l’autre côté à l’IB-110.
4.
Brancher le câble USB (F) fourni avec l’IB-110 sur la carte d’imprimante, et brancher l’autre côté à
l’IB-110.
Remarque
Veiller à utiliser le cordon d’alimentation et le câble USB fournis.
3.
Conecte el conector con un núcleo de ferrita, del cable eléctrico (E) entregado con la IB-110 a la
tarjeta de impresora y conecte el otro lado a la IB-110.
4.
Conecte el cable USB (F) entregado con la IB-110 a la tarjeta de impresora y conecte el otro lado a la
IB-110.
Nota
Asegúrese de utilizar el cable eléctrico y el cable USB entregados.
3.
Den mit Ferritkern versehenen Stecker des mit IB-110 gelieferten Netzkabels (E) an die Druckerkarte,
und das andere Ende an IB-110 anschließen.
4.
Das mit IB-110 gelieferte USB-Kabel (F) an die Druckerkarte, und das andere Ende an IB-110
anschließen.
Hinweis
Verwenden Sie unbedingt das mitgelieferte Netzkabel und USB-Kabel.
3.
Collegare il connettore, che ha un nucleo in ferrite, del cavo di alimentazione (E) fornito in dotazione
con IB-110 alla scheda stampante e collegare l’altra estremità a IB-110.
4.
Collegare il cavo USB (F) fornito in dotazione con IB-110 alla scheda stampante e collegare l’altra
estremità a IB-110.
Nota
Assicurarsi di usare il cavo di alimentazione e il cavo USB forniti in dotazione.
Summary of Contents for d-Copia 1800
Page 1: ...d Copia 1800 d Copia 2200 Digital Copier SERVICE MANUAL Code Y110980 1...
Page 4: ...This page is intentionally left blank...
Page 10: ...This page is intentionally left blank...
Page 14: ...2KL 2KK This page is intentionally left blank...
Page 20: ...2KL 2KK 1 1 6 This page is intentionally left blank Service Manual Y110980 1...
Page 38: ...2KL 2KK 1 2 18 This page is intentionally left blank Service Manual Y110980 1...
Page 108: ...2KL 2KK 1 3 70 This page is intentionally left blank Service Manual Y110980 1...
Page 142: ...2KL 2KK 1 4 34 This page is intentionally left blank Service Manual Y110980 1...
Page 198: ...2KL 2KK 1 5 56 This page is intentionally left blank Service Manual Y110980 1...
Page 224: ...2KL 2KK 2 2 6 This page is intentionally left blank Service Manual Y110980 1...
Page 240: ...2KL 2KK 2 3 16 This page is intentionally left blank Service Manual Y110980 1...
Page 271: ...INSTALLATION GUIDE FOR PAPER FEEDER...
Page 285: ...INSTALLATION GUIDE FOR DUPLEX UNIT...
Page 294: ...INSTALLATION GUIDE FOR Printing System Z...
Page 297: ...UPDATING STATUS DATE UPDATED PAGES PAGES CODE 09 2009 1ST EDITION 297 Y110980 1...


