ONLINE indicator
The ONLINE key is pressed and on line and off line are
changed.
Power save indicator
SCAN indicator
*4: Using the SCAN key to begin scanning
Note:
• Scanning is not possible during a copy job.
• If the SCAN (
) key is pressed during a print job, the scan
job will be stored.
• When scanning an original that has been placed in the SPF,
only one original can be placed unless you are using
Desktop Document Manager.
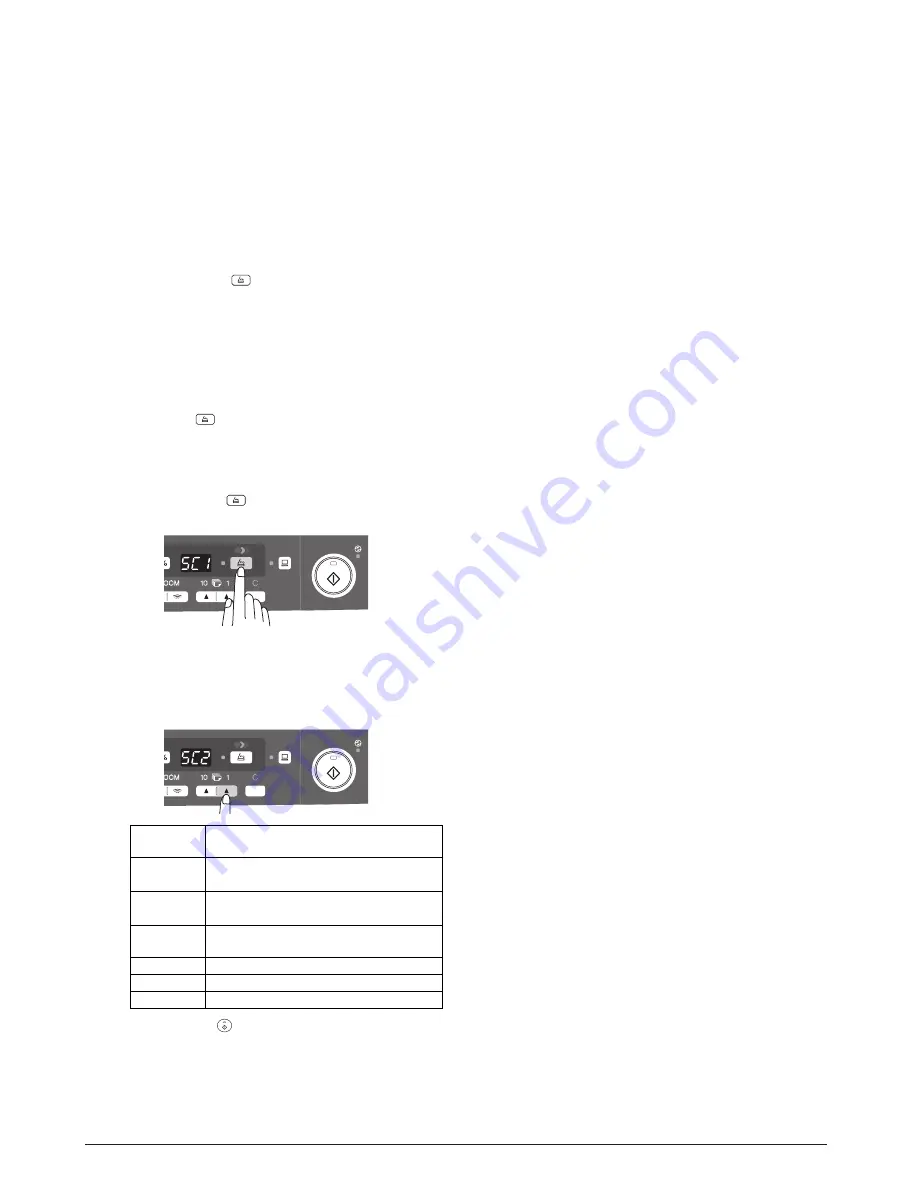
1) Press the SCAN (
) key.
The unit enters scan mode.
2) Place the original you wish to scan on the document glass/
SPF.
3) Press the right copy quantity key to display the number of
the application that you wish to use for scanning.
The application numbers are initially as follows.
On:
Indicates the unit is ready for printing or scanning is
being performed. (On line)
Blinking: Printing or data is being received from a computer.
Off:
Copying is being performed. (Off line)
On:
Indicates the unit is in a power save mode.
Blinking: Indicates that the unit is initializing (when the side
cover is opened and closed or the power turned off
and on).
On:
The SCAN (
) key has been pressed and the unit
is in scanner mode.
Blinking: A scan job is being executed from the computer, or
scan data is stored in the unit’s memory.
Off:
The unit is in the copy mode.
Y109500-5 Service Manual 4-3
Application
number
Application launched
SC1 Desktop Document Manager (Full color)
SC2 Desktop Document Manager
(if installed)
(if installed)
4) Press the start (
) key.
Scanning will start and the scanned data will be transferred
to the application.
SC3
E-mail (your standard e-mail program in
the Windows OS you are using)
SC4
Fax (if a fax program is installed)
SC5
OCR (if an OCR program is installed)
SC6
Microsoft Word (if installed)
(Monochrome)
Summary of Contents for d-Copia 200D
Page 1: ...d Copia 200D d Copia 201D Digital Copier SERVICE MANUAL Code Y109500 5...
Page 6: ...This page is intentionally left blank...
Page 8: ...This page is intentionally left blank 1 2 Service Manual Y109500 5...
Page 12: ...This page is intentionally left blank 2 4 Service Manual Y109500 5...
Page 22: ...This page is intentionally left blank 4 8 Service Manual Y109500 5...
Page 28: ...This page is intentionally left blank 5 6 Service Manual Y109500 5...
Page 86: ...This page is intentionally left blank 10 20 Service Manual Y109500 5...
Page 94: ...This page is intentionally left blank 12 6 Service Manual Y109500 5...
Page 96: ...UPDATING STATUS DATE UPDATED PAGES PAGES CODE 05 2008 1ST EDITION 96 Y109500 5...


