Supporto Tecnico / Technical Support
Bollettino Informazione Tecnica /
Technical Information Bulletin
data /
date
codice
-
progr./
code - number
TIB
22/05/14
808457
02
6 / 6
Modulo IO-TIB-A (Liv.06)
INFORMAZIONI RISERVATE, DA DIVULGARE SOLO SU AUTORIZZAZIONE DEL “SUPPORTO TECNICO”
CONFIDENTIAL INFORMATION ONLY TO BE DISCLOSED WITH PERMISSION FROM “TECHNICAL SUPPORT”
No.
Procedure
Details
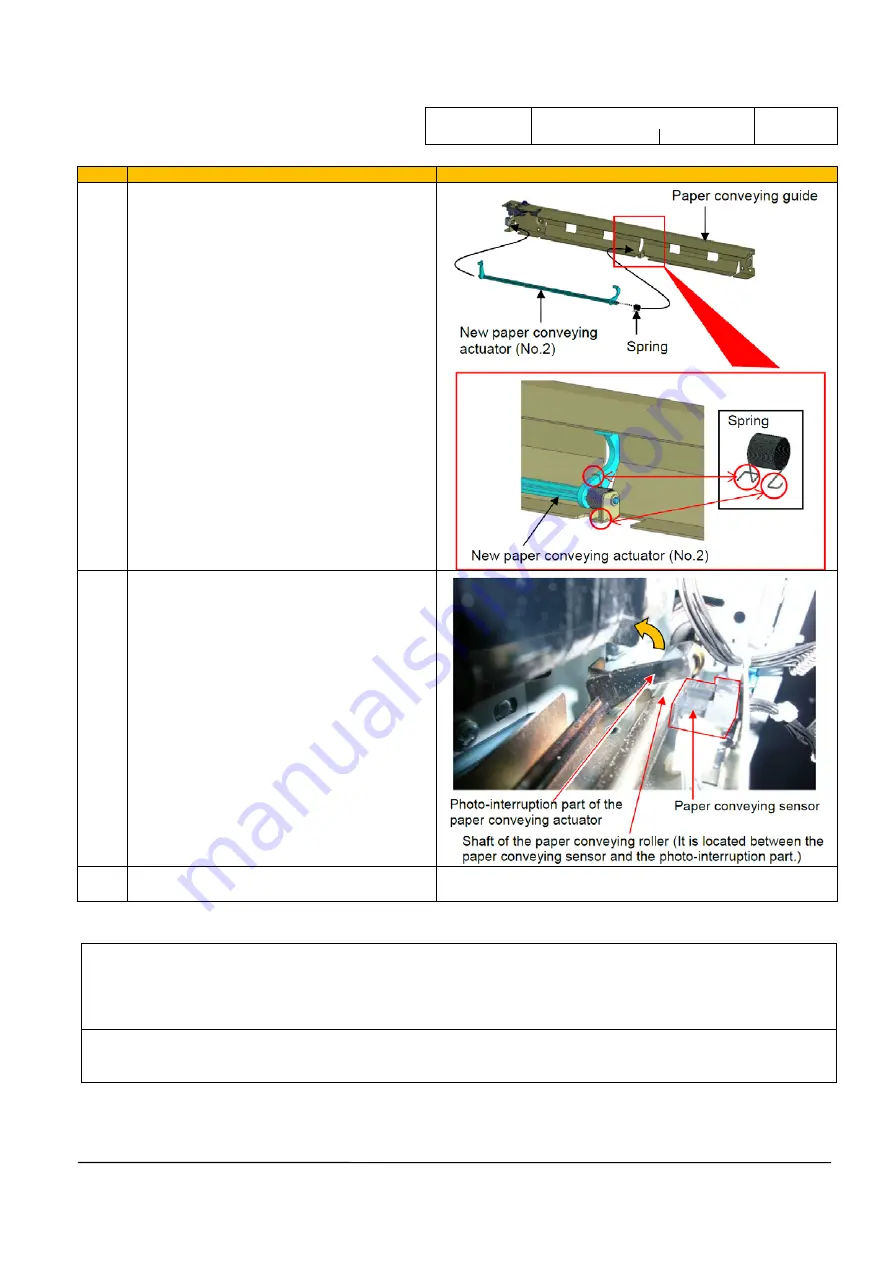
7
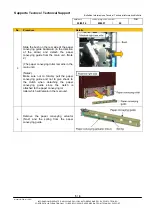
Attach the new paper conveying actuator
(No.2) and the spring removed in the Step 6
to the paper conveying guide.
(Hook the spring hooks to the bottom of the
paper detection part of the new paper
conveying actuator and the bent shape of
the paper conveying guide.)
8
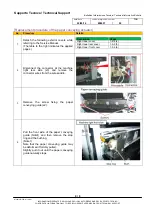
Reattach the paper conveying guide to the
main unit.
At this time, push the paper conveying
actuator in the direction of the arrow (Note
3) and put the paper conveying roller's shaft
remaining in the machine between the
photo-interruption part of the paper
conveying actuator and the paper
conveying sensor. Then, reattach the paper
conveying guide.
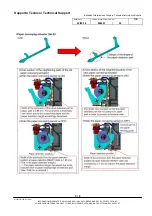
(Note 3)
Unless pushing the paper conveying
actuator, the paper conveying guide cannot
be reattached since the photo-interruption
part contacts the paper conveying roller
shaft in the machine.
9
Reassemble other parts in the reverse
order of disassembly.
CONTROMISURE IN FIELD / FIELD MEASURE:
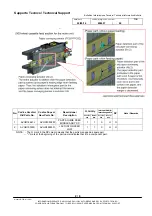
Please replace the paper conveying actuator (No.2) with new one when the phenomenon described
below occurs. (Please refer to the page 4 and after for details on the replacement procedures.)
Numeri di serie delle macchine interessate / Serial nos. of affected machines:
After using up the old stock


