12
ENGLISH
5. Turn the ribbon tension knob on the left-hand side cartridge
clockwise (in the direction of the arrow on the cartridge) to properly
tension the ribbon.
6. Replace the plastic paper guide by following its removal procedure
in reverse order.
7. If the cash register was using dual-ply paper, load the paper tape
back through the print mechanism, and wind the journal back onto
the plastic journal winder spindle. Instructions on how to load dual-
ply paper are provided in the next section.
8. Reposition, close and lock the printer compartment cover.
P
P
P
P
Pa
a
a
a
aper
per
per
per
per TTTTTa
a
a
a
ape
pe
pe
pe
pe
This cash register uses standard 2 1/4" (57 mm) paper. The paper
needs to be changed when a red line appears on the tape. You can use
either single-ply or dual-ply paper. Use dual-ply paper whenever you
want to print customer receipts and journal records, single-ply when
just customer receipts need to be printed.
Loading Single-Ply and Dual-Ply P
Loading Single-Ply and Dual-Ply P
Loading Single-Ply and Dual-Ply P
Loading Single-Ply and Dual-Ply P
Loading Single-Ply and Dual-Ply Pa
a
a
a
aper
per
per
per
per
Proceed as follows to load the cash register with either single-ply or
dual-ply paper.
1. Make sure the cash register is plugged into a grounded power outlet
and that the control key is in either one of the two REG positions.
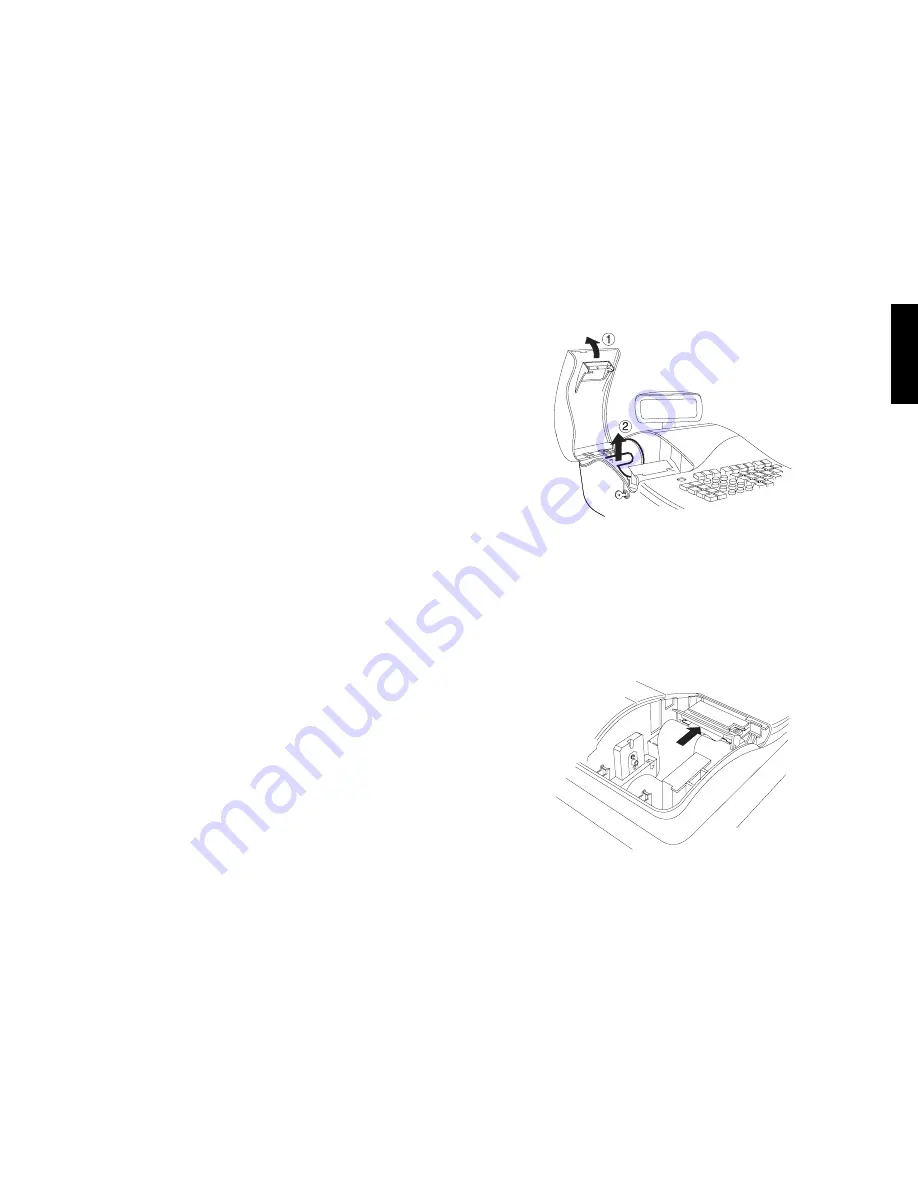
2. Unlock and open the printer compartment, then remove the plastic
journal winder spindle.
3. With a pair of scissors, cut the end of the paper tape to create a
straight, even edge so that the paper can be properly fed through the
print mechanism.
4. Set the paper roll in the bottom of the printer compartment so that
the paper feeds out from the bottom of the roll.
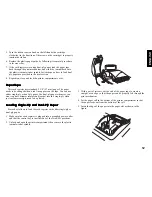
5. Insert the edge of the paper into the paper slot as shown in the
figure.


