13
3.
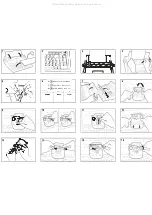
FIG. 8
Lift the ribbon cartridge at the front and remove it.
4.
FIG. 9
Lower the print head.
5.
FIG. 14
Remove the two reels of the correcting tape.
6.
FIG. 15
Place the full reel on the left pin. Pass the tape through the tape guide on
the left and then the one on the right.
7.
FIG. 16
Place the other reel on the right pin and turn it so as to make the tape
taut.
8.
FIG. 11
Return the printing device to its original position.
9.
FIG. 12
Reinsert the ribbon cartridge in its housing and press slightly until it clicks
into place.
10.
Close the printer unit cover and the transparent cover. Press
. The printer unit
moves to the left margin.
IF...
You are using COVER-UP correcting tape
, press
+ E
before making any
corrections. The daisy wheel will erase the character in a single stroke instead of the
normal three. Pressing
+ E
again deactivates the command.
You are using LIFT OFF correcting tape
, you can regulate the correction quality
according to the type of paper and font style used. To do this, press
+ D
.
Pressing
+ D
again, or switching the machine off, deactivates the command
and the machine returns to the previous correction quality.
REPLACING THE BATTERY
The battery that powers the memory is an ordinary non-rechargeable 3V lithium battery
(e.g. Duracell DL2430). It must not be exposed to high temperatures or flames, it must
be kept out of the reach of children and, once used, it must not be disposed of in the
normal way but placed in special rubbish containers. DO NOT try to recharge it! When it
runs low, the machine displays the message
CHECK
BATTERIES
. To replace the
battery, proceed as follows:
1.
Switch off the machine and unplug the power cable from the mains socket.
2.
FIG. 7
Open the transparent cover and then the printer unit cover.
3.
FIG. 5
Uncover the transparent cover around the battery compartment on the
right side of the machine.
4.
Push the rear part of the battery with your thumb so as to slip it away from its
contact flap.
5.
Lift the upper part of the battery with your index finger so as to be able to extract it.
6.
Extract the flat battery and insert the new one taking care not to touch either end.
Make sure that the positive pole (+) is facing upwards.
7.
Replace the transparent cover around the battery compartment.
8.
Close the printer cover unit and the transparent cover.
9.
Plug the power cable back into the mains socket and switch the machine on. The
display will show the
CHECK BATTERIES
message. Press
to eliminate it.
CAUTION
Danger of explosion if battery is incorrectly replaced. Replace only with the same
or equivalent type recommended by the equipment manufacturer. Discard used
batteries according to manufacturer’s instructions.
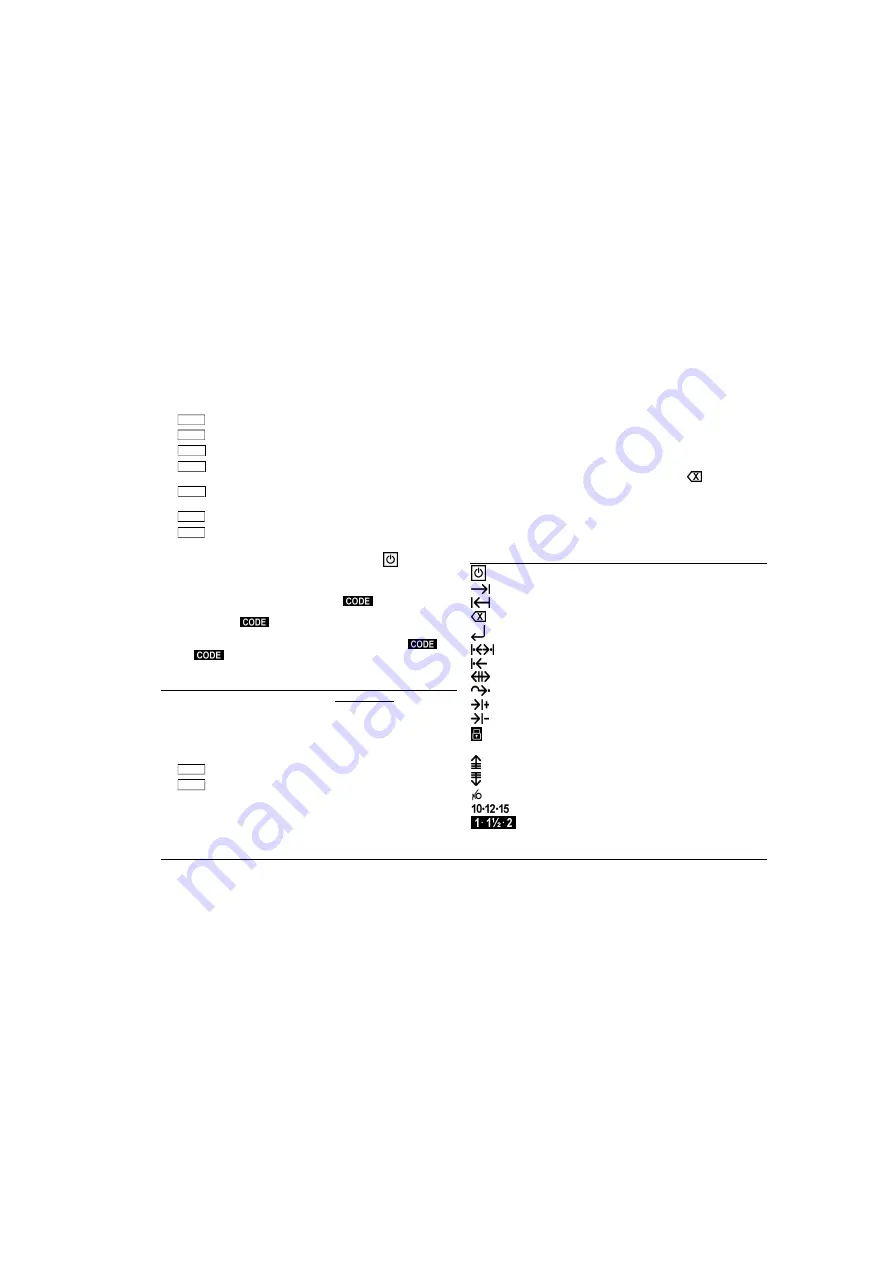
KEYS AND FUNCTIONS
Switches typewriter on/off
Accesses tab stop
Moves back one character
Erase key
Manual carriage return
Sets the line format
Sets the left margin
Overrides the margins
Fast return to initial position
Sets a tab stop
Deletes a tab stop
Caps lock key
Shift key
Used for typing capital letters
Moves paper down
Moves paper up
Fast return to typewriter mode
Selects the print pitch
Selects the line feed
All manuals and user guides at all-guides.com
all-guides.com


