Service Manual
Y100250-4
9-21
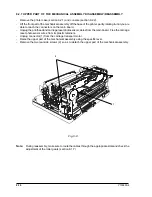
9.2.16 POWER SUPPLY ASSY DISASSEMBLY/REASSEMBLY
Note:
If the fuse inside the power supply has blown, replace the entire power supply assy since some
components on the power supply board may be damaged.
-
Remove the mechanical assy (section 9.2.3)
-
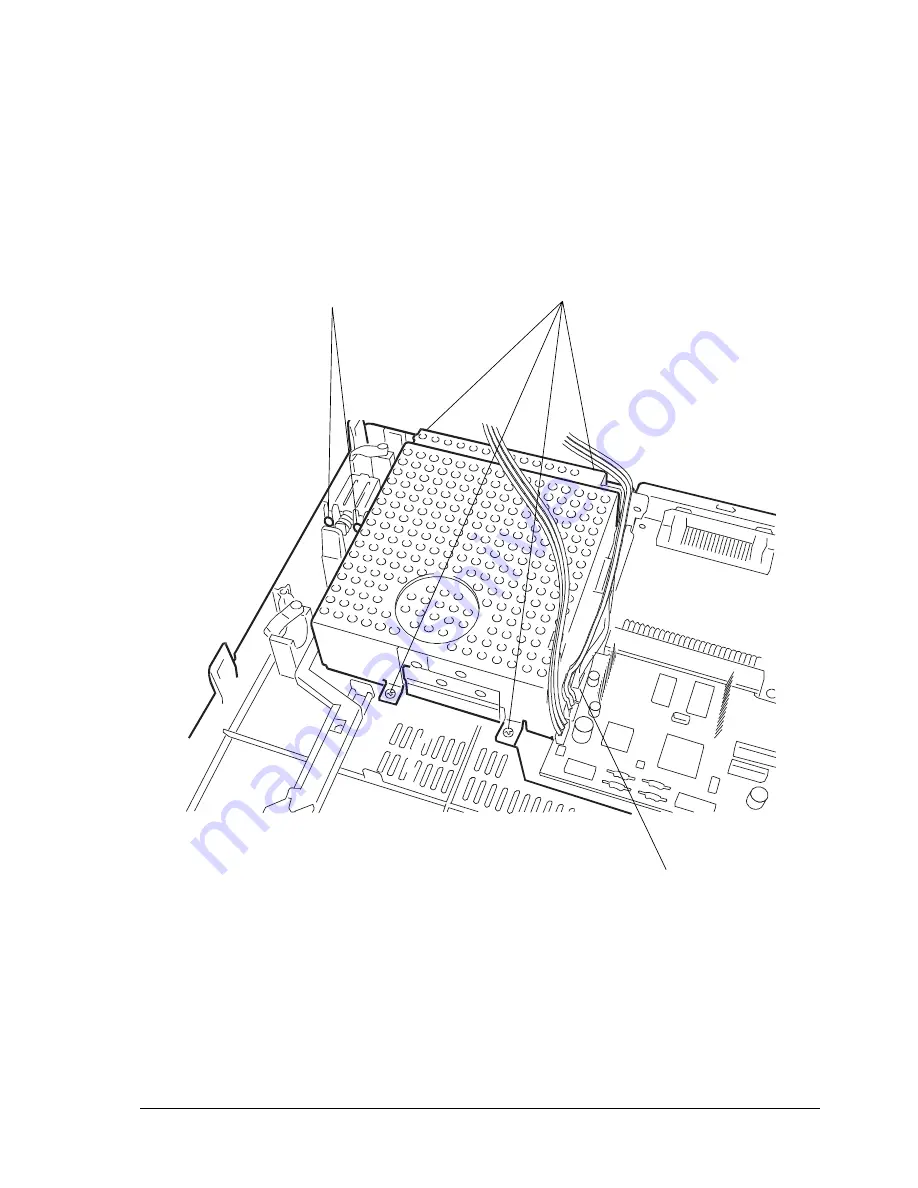
Unplug the power supply cable (1) from the main board.
-
Unscrews the four screws (2) that secure the power supply and also remove the ground wires.
-
Loosen the two screws (3) that secure the switch.
-
Extract the power supply assy.
Note:
During reassembly, make sure that you correctly reposition the ground cables.
If you replace the assembly, make sure that the replacement unit uses the correct voltage.
Fig. 9-22
3
1
2
Summary of Contents for PR2 E
Page 1: ...PR2 E Printer SERVICE MANUAL CodeY100250 4...
Page 4: ...OOOOO...
Page 40: ...Y100250 4 3 6 Fig 3 3 Print Test Example PR2 E Basic Version...
Page 41: ...ServiceManual Y100250 4 3 7 Fig 3 4 Print Test Example PR2 E Horizontal Magnetic Device...
Page 92: ...OOOOO...
Page 98: ...Y100250 4 6 6 Fig 6 3 PR2MAGN Card 6 3 2 VIEW OF THE PR2MAGN CARD...
Page 106: ...OOOOO...
Page 124: ...OOOOO...
Page 149: ...UPDATING STATUS DATE UPDATED PAGES PAGES CODE 04 2001 1ST EDITION 149 Y100250 4...

