Königshütte
Lima 2.0 6 kW
Pellet stove
GB
Installation instructions
for the specialist company
2.7 Installation
Installing the exhaust pipe
●
Fit the pipe lining (on site) into the chimney!
The connection height can be determined individually, but
should not exceed 1.5 m from the connection.
●
Make sure there is a distance of at least 95 mm between the flue
pipe and flammable elements!
●
Plug the exhaust pipe (on site) into the pellet fireplace’s Ø 80 mm
connection!
●
Push the pellet fireplace into the intended place of installation
and adjust the pellet fireplace such that the exhaust pipe fits into
the pipe lining (see also the subsection: “Adjusting the pellet fire-
place with the height-adjustable feet”)!
●
The exhaust pipe connection must be sealed.
●
Elbows with a cleaning opening must be used in order to be able
to clean the connecting line.
●
The exhaust pipe may not protrude into the chimney.
●
Please note that a temperature of 85 °C can be reached at the par-
tition walls in accordance with test specification EN 13240 and
this can result in colour changes in light wallpapers or similar
flammable building materials.
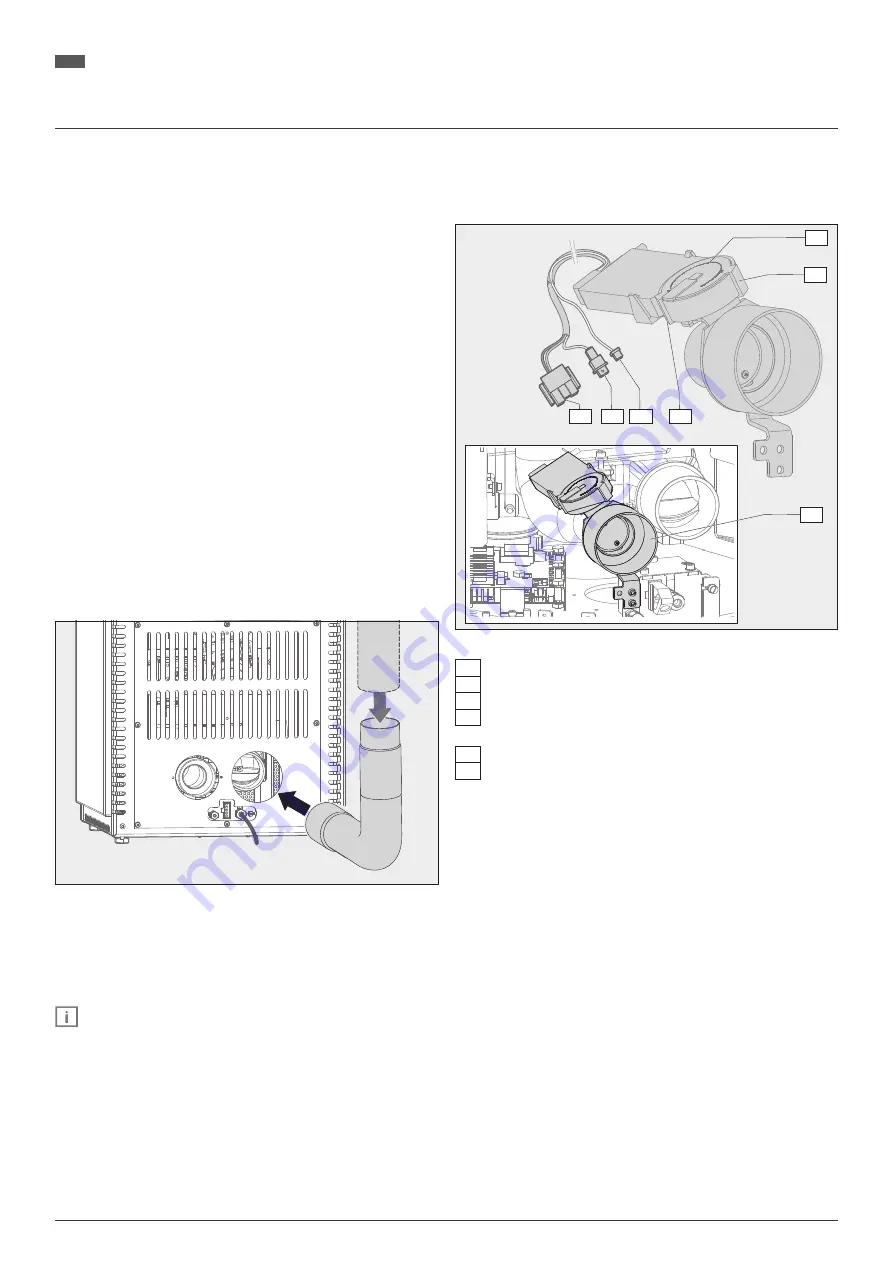
Fig. 2.8
Plug the exhaust pipe (on site) into the connection
Installation of a combustion air damper for automatic opening
and closing of the combustion air line (optional)
A closed combustion air line prevents warm air from escaping from
the installation room unnecessarily with the stove turned off.
Note!
The combustion air damper is closed in the “Off” oper-
ating state. It is open in all other operating states (“Ready”,
“Ignition”, “Start”, etc.).
The actuator takes approx. 2 minutes to reach the “closed” posi-
tion, i.e. the pellet fireplace may be switched off at the master
switch 2 minutes after “Off” appears on the display at the earliest.
The user of the pellet fireplace should also be informed of
this.
1
2
6
5
4
3
2
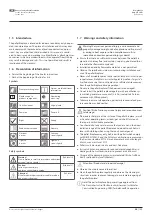
Fig. 2.9
Connection of a motor-driven combustion air damper
1
Motor slewing ring
2
Stops for the combustion air damper (open/closed)
3
“S19” connector
4
“L continuous” connector (must be connected to the
“L continuous” mating connector in the wiring harness)
5
“S5” connector
6
Combustion air damper
Remove the lower back wall and panel!
●
Release the hose clamp on the combustion air line!
●
Remove the combustion air nozzles!
●
Plug the connecting piece for the combustion air damper into the
combustion air line and tighten the hose clamp again!
●
Connect the combustion air damper connector into the wiring
harness and to the main circuit board of the pellet fireplace as fol-
lows before installing the combustion air damper:
a) Plug the “19” connector into position “S19” on the main circuit
board (see connection diagram)!
b) Plug the “S5” connector into position “S5” on the main circuit
board.
c) Plug the “L continuous” connector into the “L continuous” con-
nector in the pellet fireplace wiring harness!
●
Route the cable such that the cables are not touching any hot
stove surfaces!
●
Take care to ensure that no cables are lying next to the motor
slewing ring after installation of the combustion air damper and
no cables can be damaged as a result!
●
Activate the combustion air damper and check it for proper func-
tioning (see next chap. “Activating the combustion air damper”)!
●
Install the panel and lower back wall again.
40
We reserve the right to make technical changes
| 100
Summary of Contents for Lima 2.0
Page 15: ...K nigsh tte Lima 2 0 6 kW Pelletofen DE Technische nderungen und Irrt mer vorbehalten 15 100...
Page 33: ...K nigsh tte Lima 2 0 6 kW Pelletofen DE Technische nderungen und Irrt mer vorbehalten 33 100...
Page 98: ...K nigsh tte Lima 2 0 6 kW Pelletofen Pellet stove Po le pellets...
Page 99: ...K nigsh tte Lima 2 0 6 kW Pelletofen Pellet stove Po le pellets...


